Setup Python integration
Table Of Contents
1.74.x+
This guide was written for JIPipe version 1.74.0 or newer
Quick setup
JIPipe features an (experimental and still under heavy development) integration of the Python script language. This software is not part of ImageJ and its update site ecosystem and thus requires additional installation steps. These steps are generally only necessary if JIPipe notifies you about the missing installation of the third-party software.
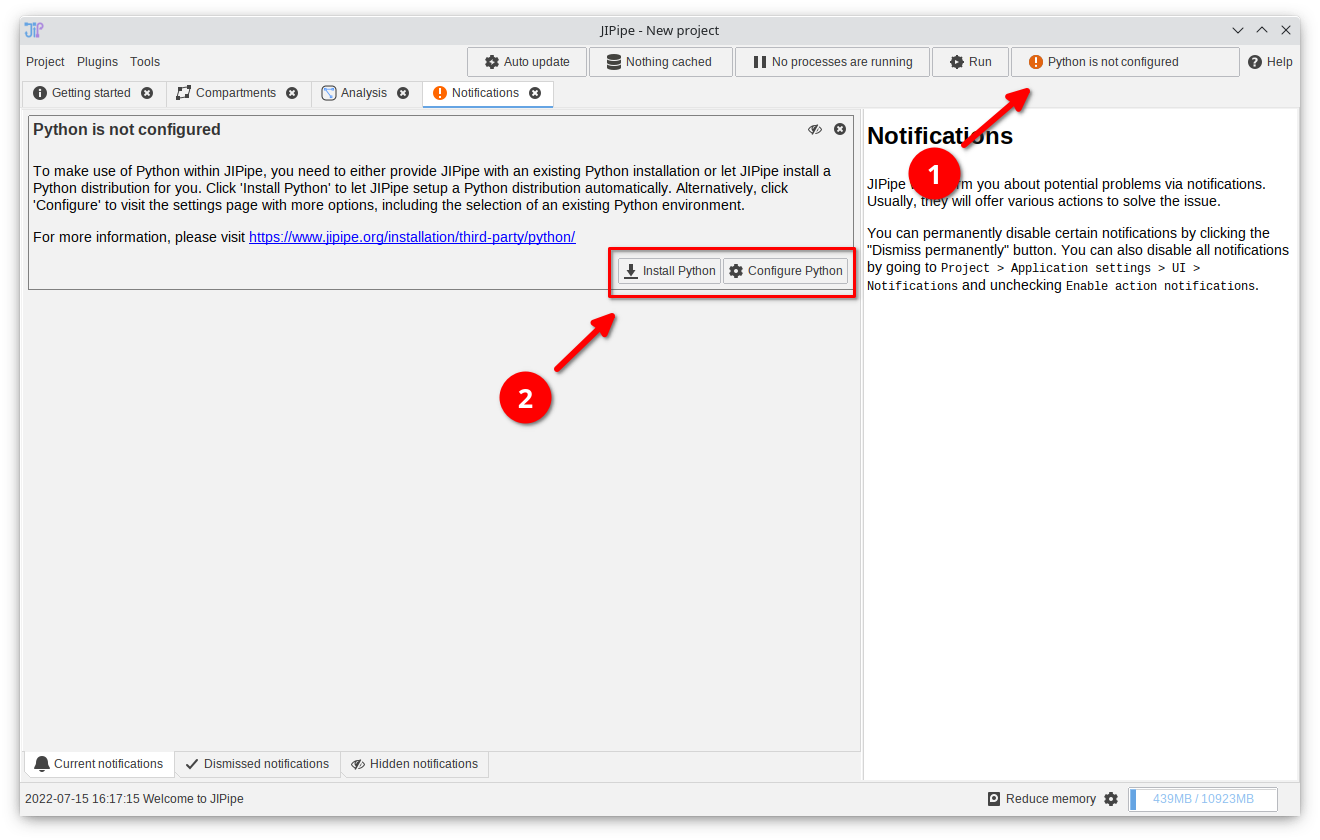
Notification: Python not configured
If JIPipe was not yet configured with a Python environment, you will be notified on opening the application. Click the notifications button and select the "Install Python" option and follow the instructions or choose "Configure Python".
You can always change the Python environment by navigating to
Project > Application settings > Extensions > Python integration if you clicked away the notification or if you want to make further changes.
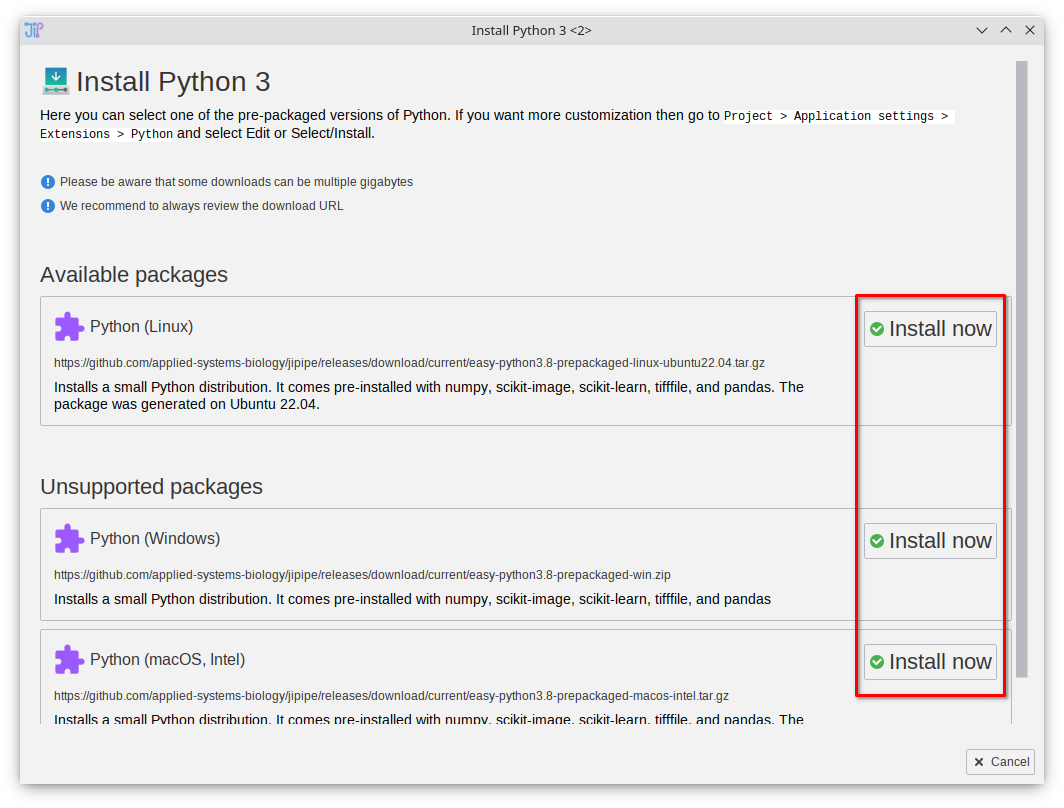
Install Python
On selecting the "Install Python" option, JIPipe will provide you with a pre-made environment that is installed into the ImageJ directory. Choose any of the supported packages. If you already have existing Python environments, please follow the other tutorials on this page.Selecting an existing Conda environment
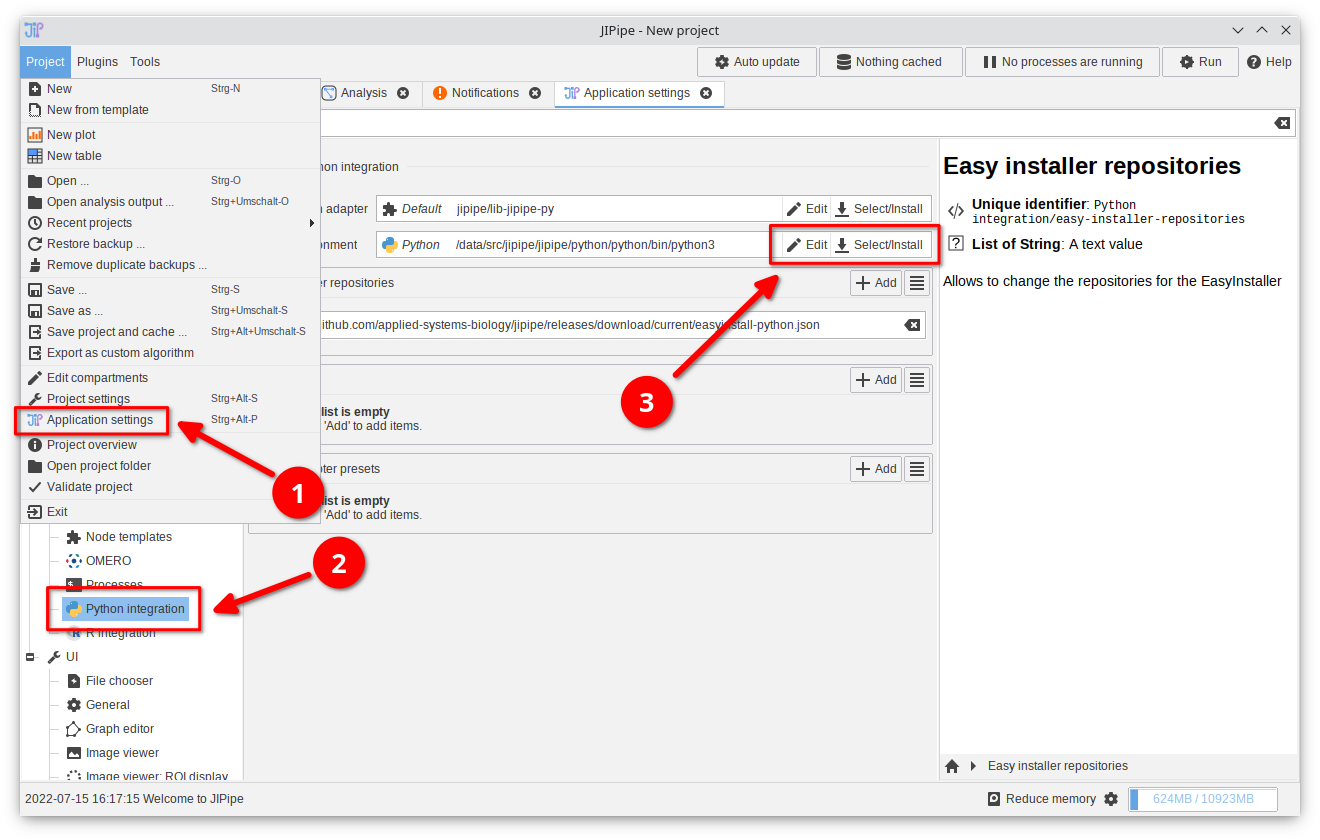
1. Open the Python integration settings
Unless you clicked "Configure Python" in the notification panel, navigate toProject > Application settings > Extensions > Python integration.
Click the "Select/Install" button in the "Python environment" setting and choose "Select existing Conda environment".
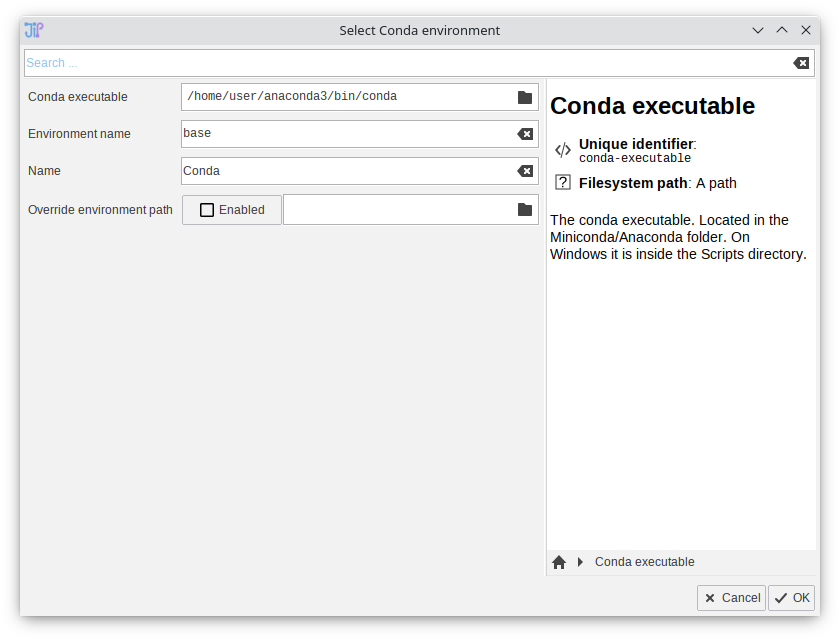
2. Select the Conda executable
Provide the path to the Conda executable and the environment name. Common locations for the executable are:- Windows:
C:/Users/User/anaconda3/Scripts/conda.exe(adapt to your user name) - Linux:
/home/user/anaconda3/bin/conda(adapt to your user name) - MacOS:
/Users/user/opt/anaconda3/bin/conda(adapt to your user name)
Selecting an existing virtual environment (venv)
1. Open the Python integration settings
Unless you clicked "Configure Python" in the notification panel, navigate toProject > Application settings > Extensions > Python integration.
Click the "Select/Install" button in the "Python environment" setting and choose "Select existing Conda environment".
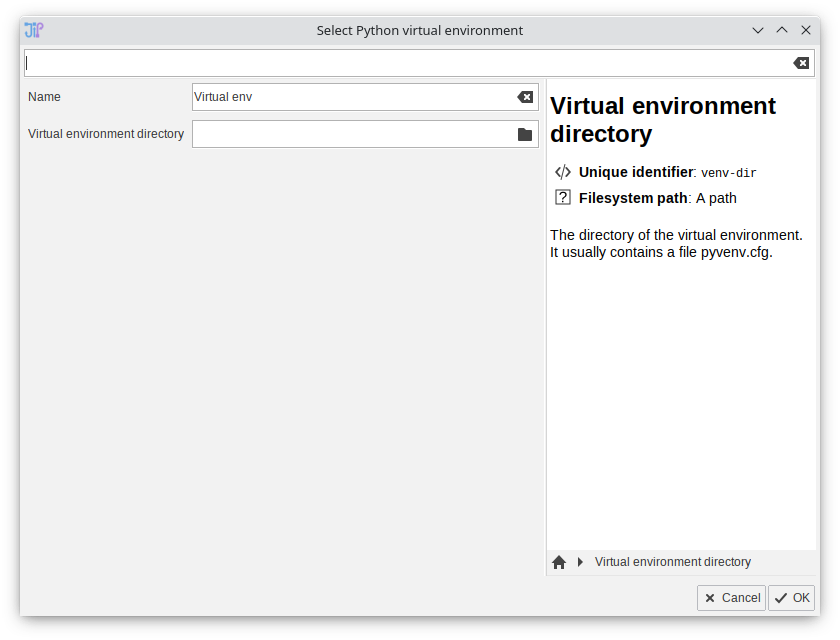
2. Select the virtual environment directory
Provide the path to the virtual environment directory. I contains a filepyvenv.cfg.
Confirm the configuration by clicking "OK".
Selecting an existing Python distribution (general)
1. Open the Python integration settings
Unless you clicked "Configure Python" in the notification panel, navigate toProject > Application settings > Extensions > Python integration.
Click the "Select/Install" button in the "Python environment" setting and choose "Select existing Conda environment".
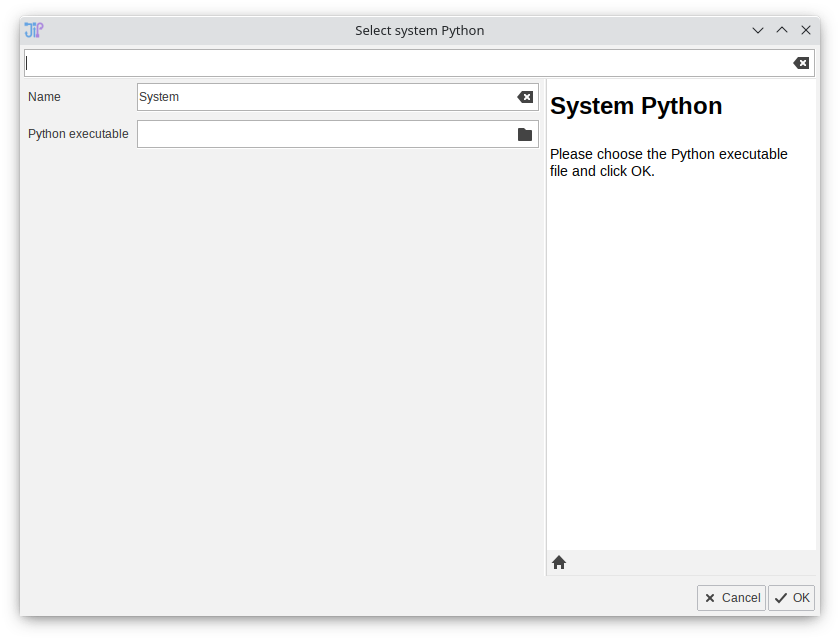
2. Select the Python executable
Provide the path to the Python executable. Common locations for the executable are:- Windows:
%appdata%..\Local\Programs\Python\PythonXX\python.exe(XX being the Python version) - Linux/MacOS:
/usr/local/bin/python
Advanced configuration
1. Open the Python integration settings
Unless you clicked "Configure Python" in the notification panel, navigate toProject > Application settings > Extensions > Python integration.
Click the "Edit" button in the "Python environment" setting.
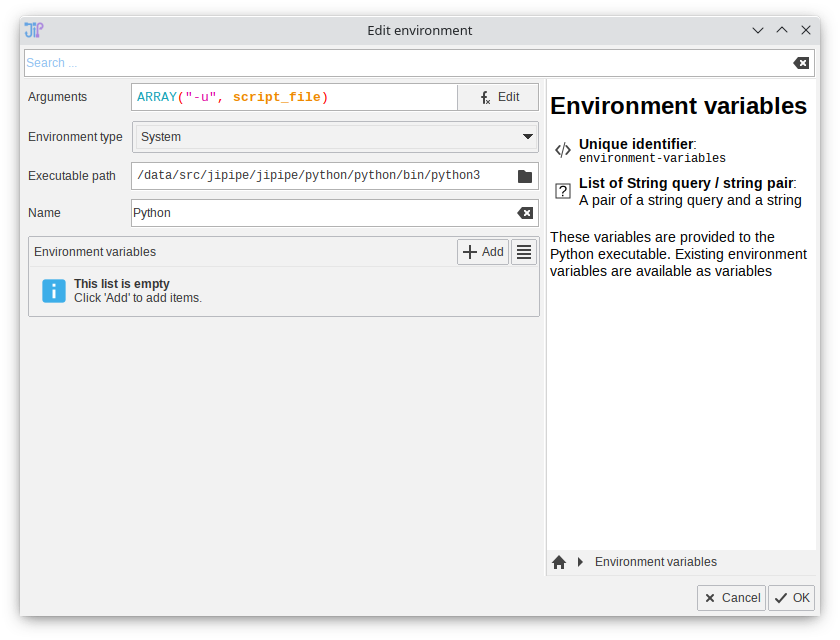
2. Change the configuration
In the environment editor you can change the following settings:- Arguments: An expression that returns an array of the parameters that are provided to the Python/Conda executable. Click the "Edit" button to list all available functions and variables. Example:
ARRAY("-u", script_file)would run Python withpython -u [script file] - Environment type: Indicates the type of Python environment. Set it to "System" if none of the available options match your settings
- Executable path: Path to the executable (usually Python or Conda)
- Environment variables: Allows to set environment variables based on expressions