Creating node groups I
Explains how to group a set of nodes into a single group node
Tutorial: Creating node groups
Step 1
Open the project file assigned to this tutorial.
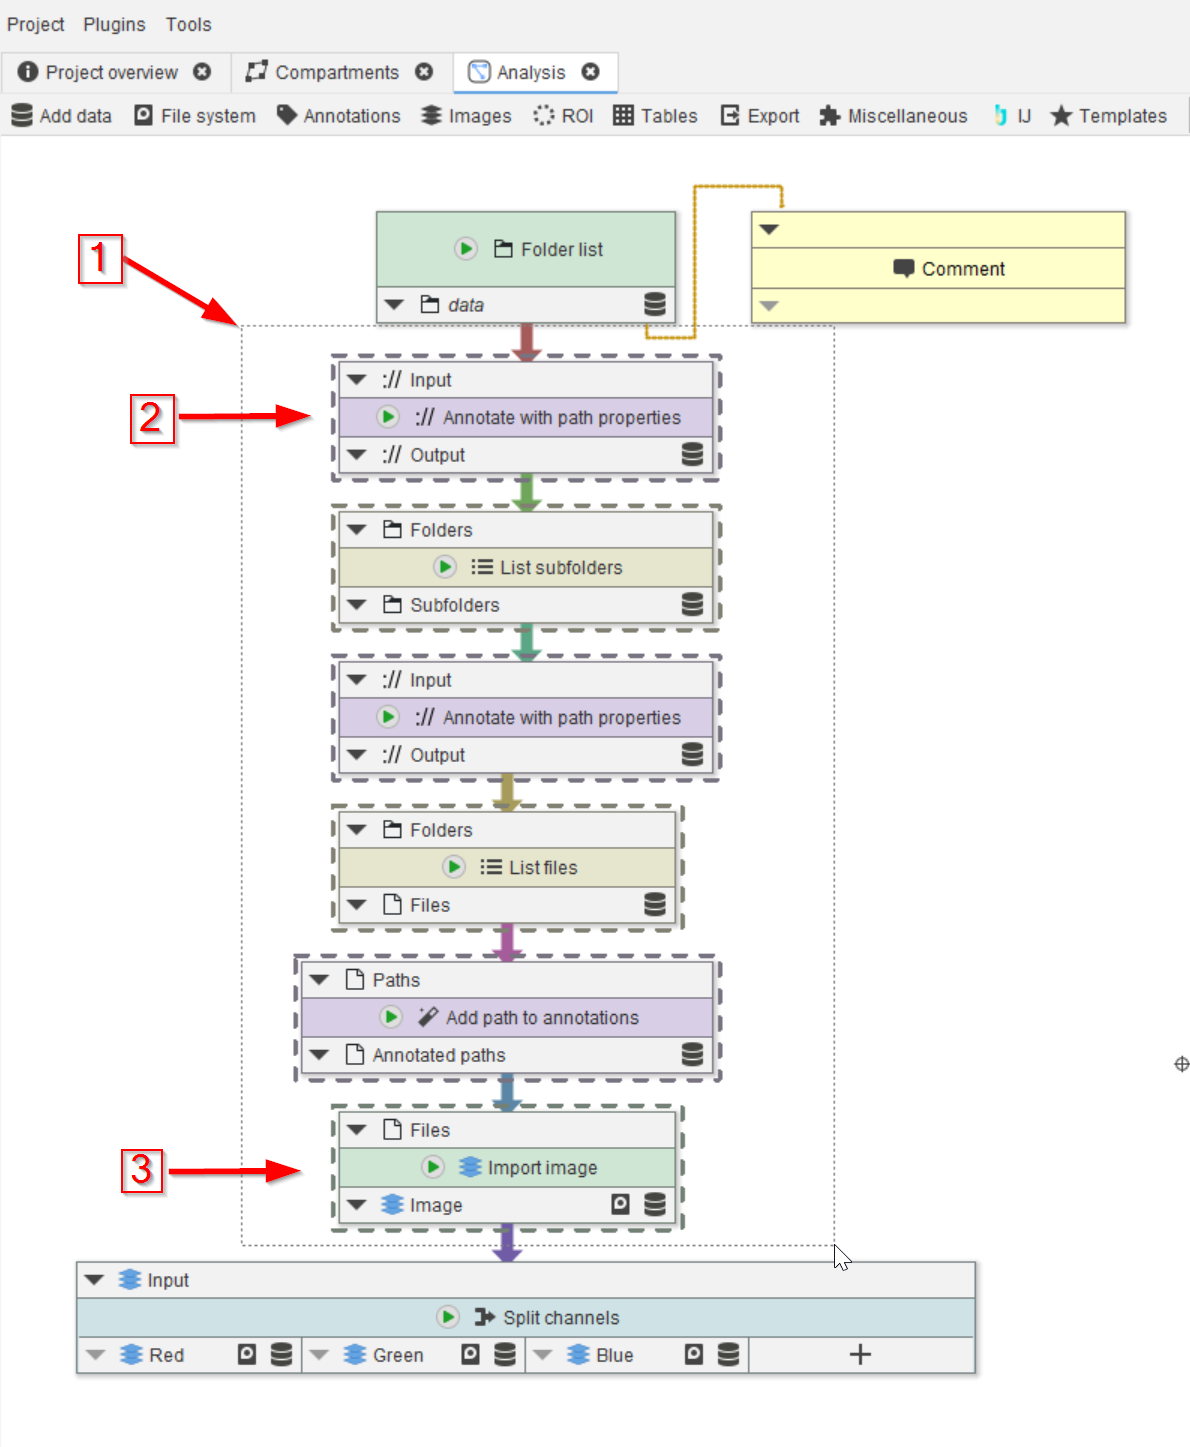
On the GUI, draw around a group of nodes using the mouse with the left button down (red arrow 1), resulting in the nodes inside the dotted rectangle to be selected (first selected node: red arrow 2, last selected node: red arrow 3).
Step 2
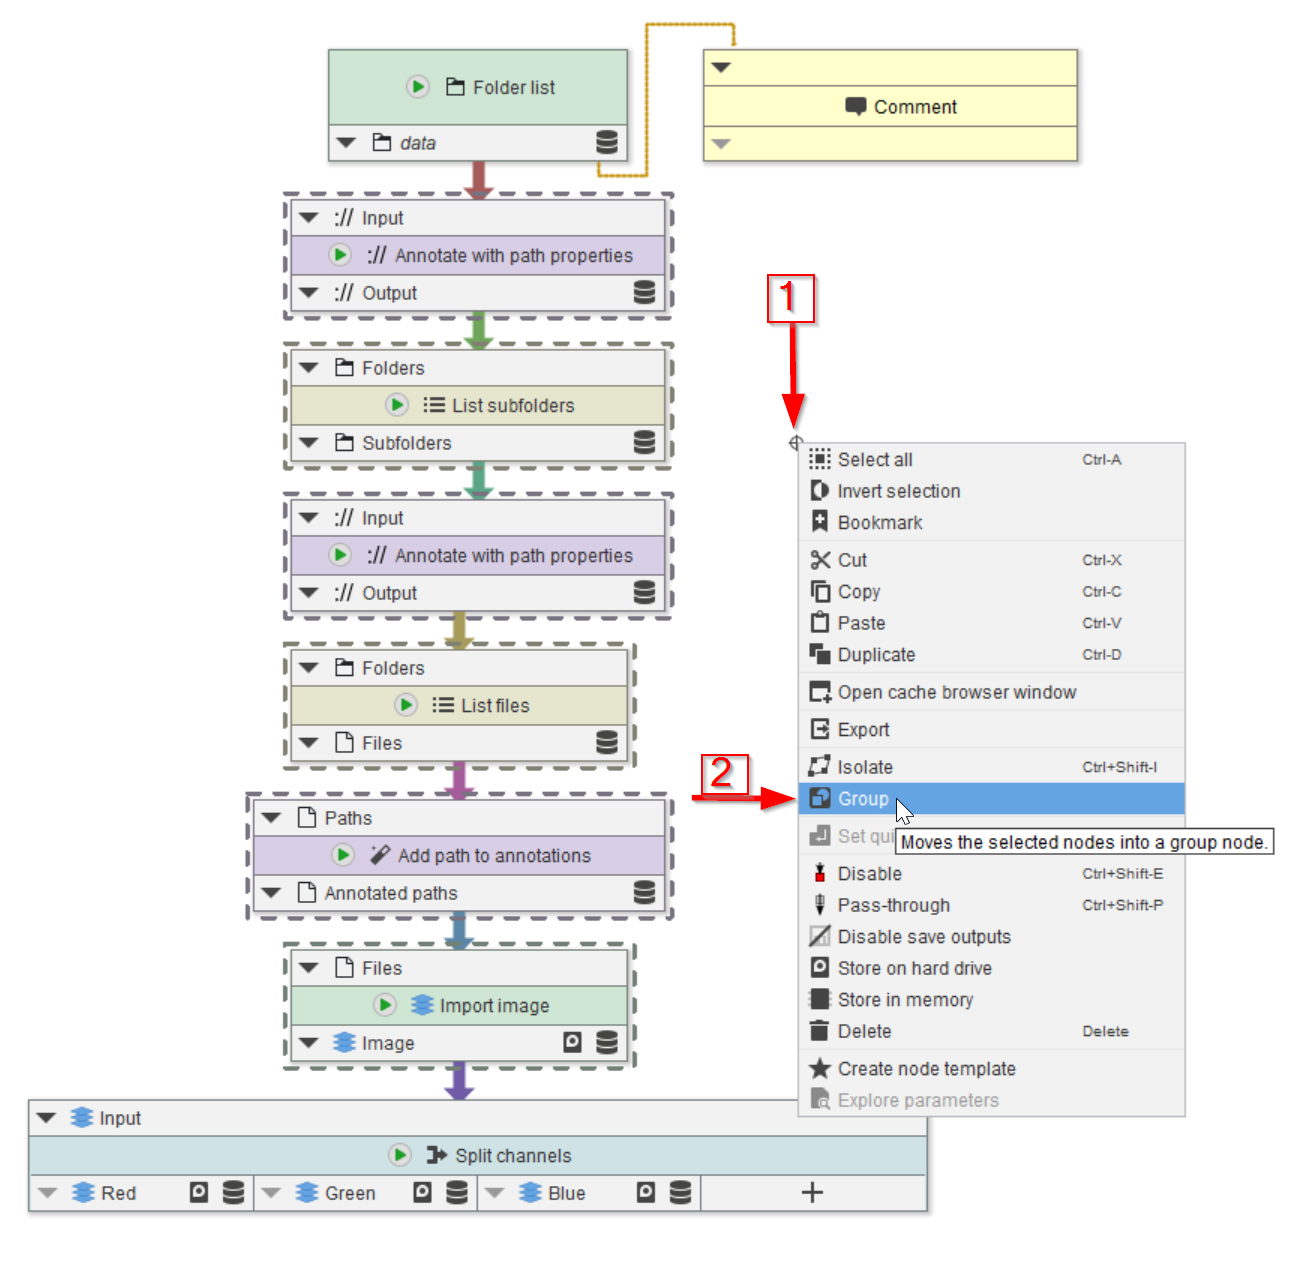
Right-click anywhere in the white area of the GUI (red arrow 1) and select the Group option (red arrow 2.)
The Group option will automatically add and configure a node of the type Group. You can also add node groups via already established means to add nodes.
Group nodes contain a dedicated pipeline that is automatically executed when the node itself is run.
Step 3
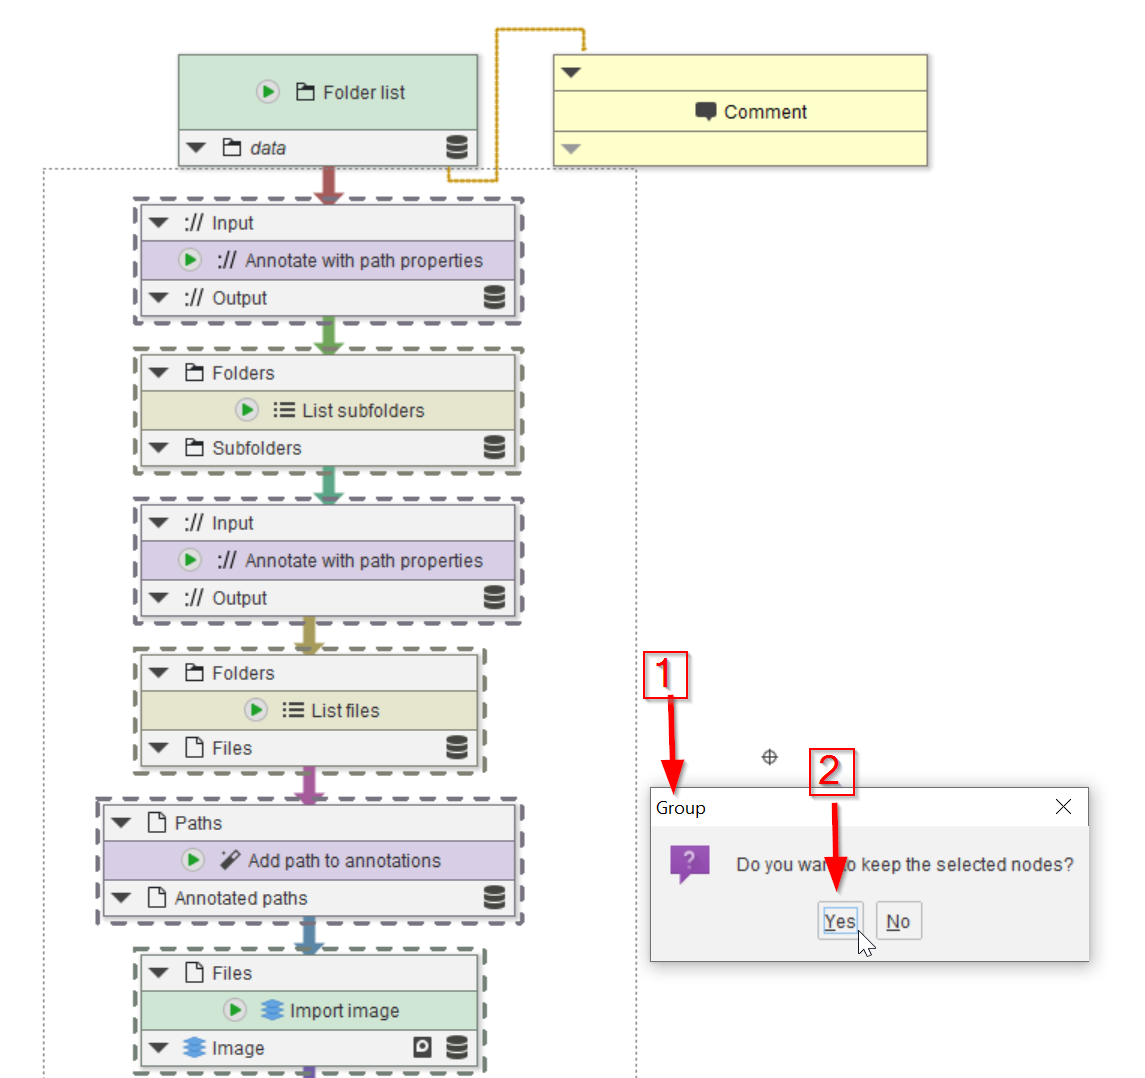
The group dialogue window (red arrow 1) will allow to choose between keeping the original nodes (red arrow 2) or not; for now, we will keep the original nodes, so as to be able to compare the outcome of the group with that of the original node array.
Another reason to keep the original nodes is that the nodes inside a group DO NOT provide a cache, thus we can’t check the outcome of the individual nodes inside a group.
Step 4
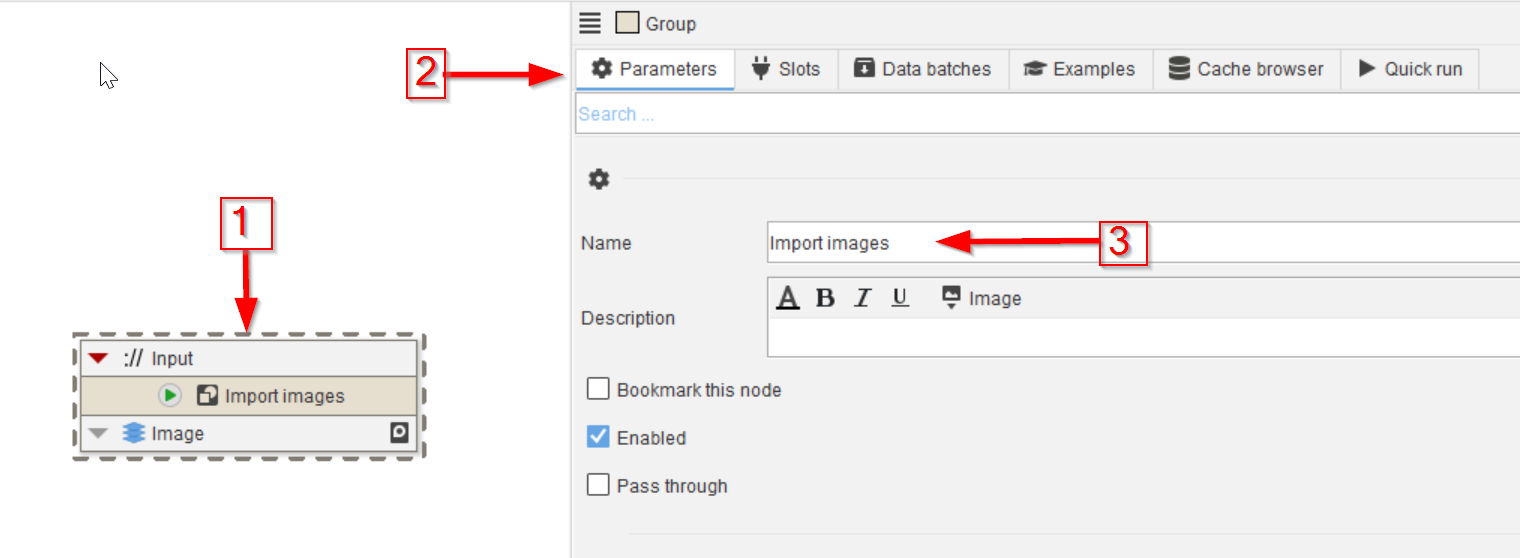
Select the new group node (red arrow 1), go to Parameters (red arrow 2) and change the name from the original Group to a more meaningful name (red arrow 3).
Step 5
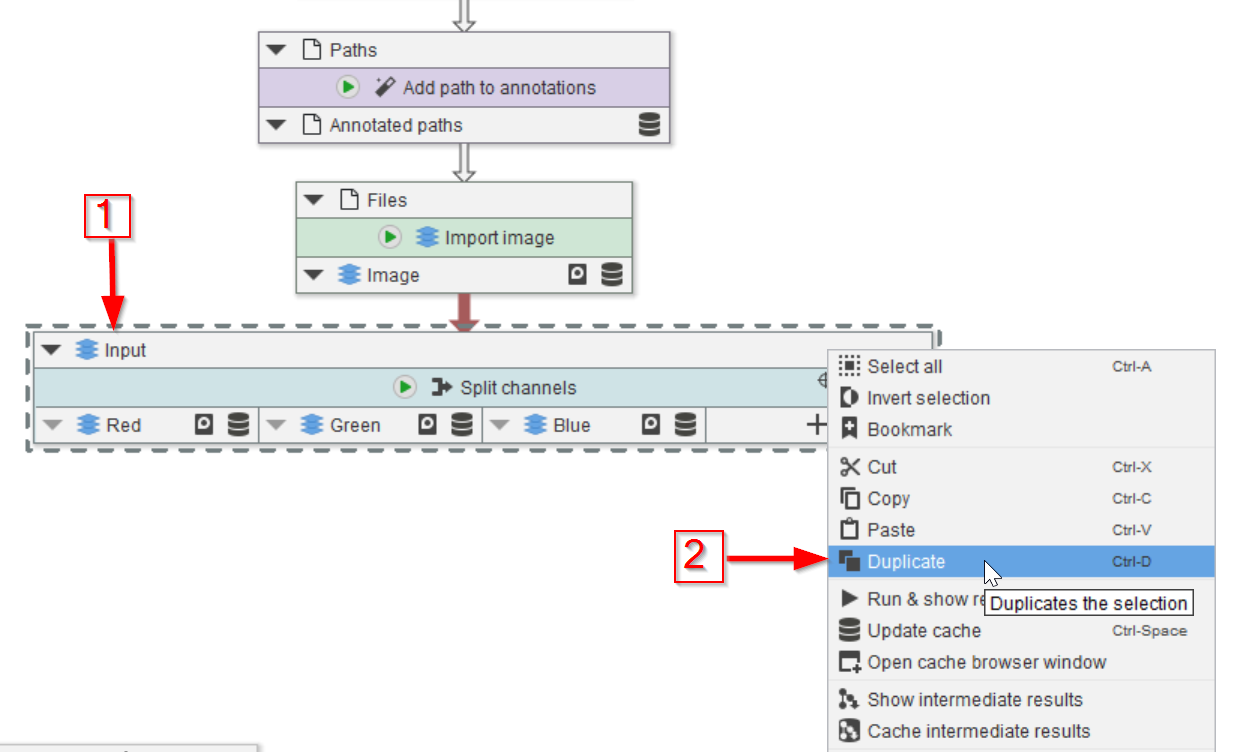
In order to use the new group node, we will connect it to the nodes preceding and proceeding the individual file reading nodes. Select the Split channels node (red arrow 1) and duplicate it (red arrow 2).
Here we opt to create a branching path instead of replacing the existing nodes. You are completely free to replace nodes with groups or implement a branching how you see fit.
Step 6
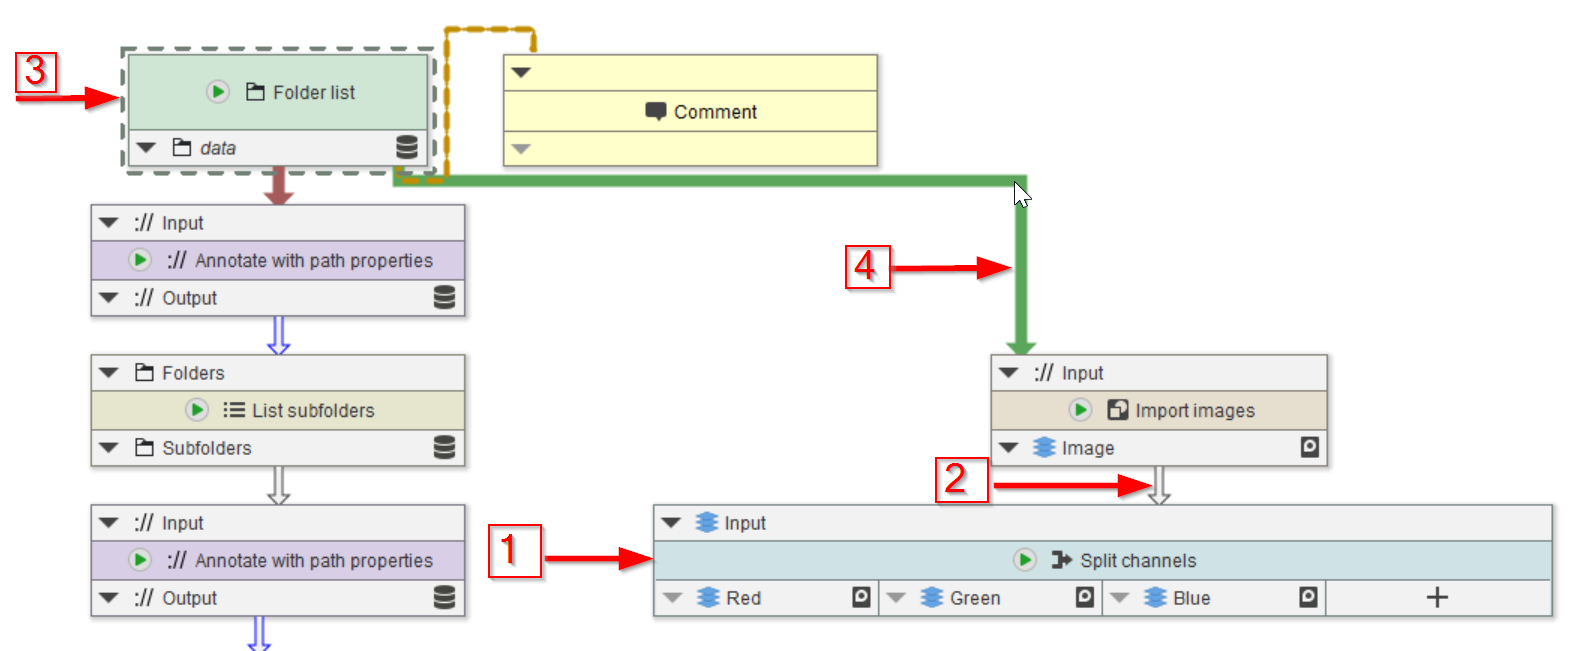
Move the duplicated node (red arrow 1) below the group node and connect them (red arrow 2). Now select the Folder list node (red arrow 3) and connect it to the group nodes (red arrow 4).
Step 7
Run the Split channels node (red arrows 1 and 2).
Step 8
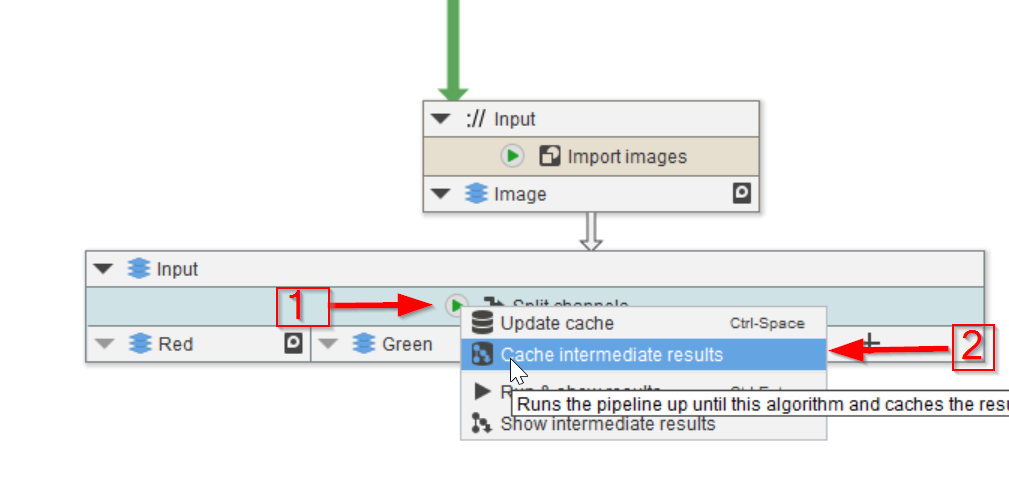
Observer the cache (red arrow 1). The outcome is the same as it was after executing the individual nodes (red line 2).

Step 9
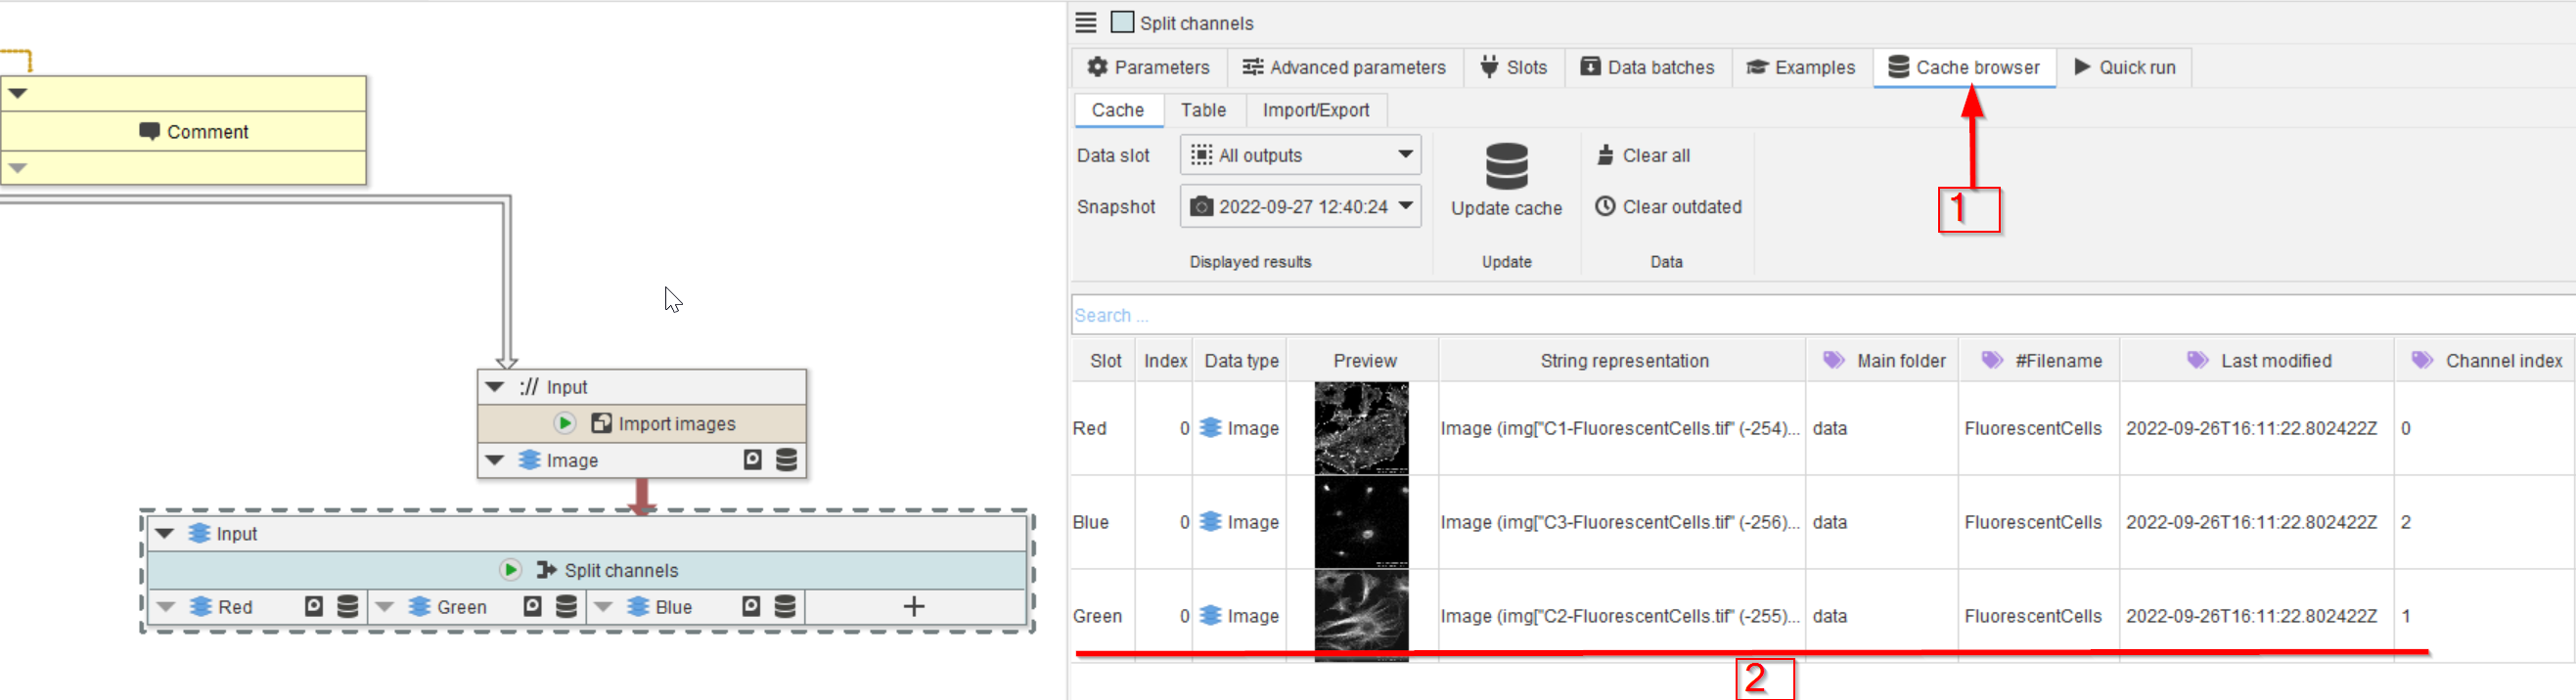
After having run the Split channels node (red arrow 1), observing the cache will show the resulting three channels (red line 2).