JIPipe for teaching
Gives an overview about the JIPipe features that help teaching image analysis
Table Of Contents

Introduction
JIPipe comes with various features that help lecturers to setup exercises where students can have hands-on experience and first achievements in creating image analysis workflows.
The following features will be explained:
- Graph compartments as means to structure the analysis into units with a clear purpose
- The project overview tab that allows to provide the list of tasks and explanations directly within the project file
- Comment nodes to annotate specific areas or nodes within a pipeline
- Node templates and its associated menu can be utilized to provide students with a selection of nodes to be used in a project
- A project permission system to prevent students from applying accidental modifications

Graph compartments
In many lectures it is common to teach that image analysis tasks can be divided into a steps, for example Preprocessing, Analysis, and Postprocessing.
JIPipe facilitates this concept by its graph compartment feature that can be accessed via the Compartments tab (red arrow 1). The compartment function separates the pipeline into units that can be connected to each other to enforce a specific order of operations (red arrow 2).

Graph compartments: Outputs
By double-clicking a compartment in the Compartments tab, it is opened in a pipeline editor tab (red arrow 1).
Compartments communicate to each other via interface nodes: each compartment has a dedicated output node that determines the outputs of the current compartment (red arrow 2).
👉 When creating exercises, use this feature to define the outputs of each specific compartment. This can help students who need guidance on what kind of data should be produced in each image analysis step.
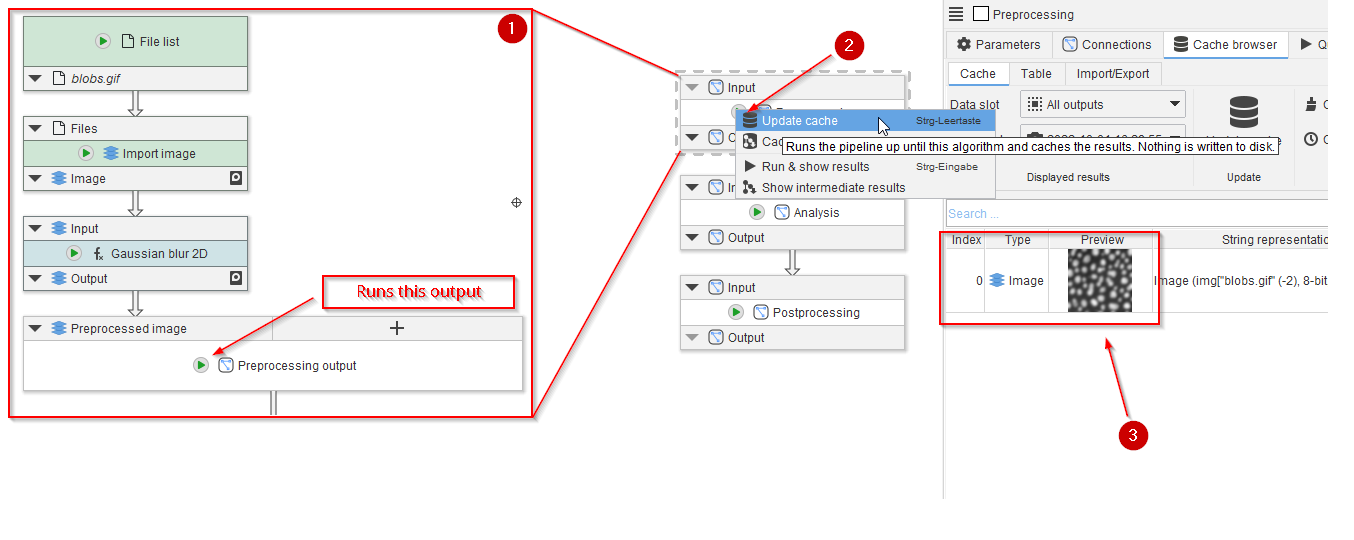
Graph compartments: Reviewing results
Designing exercises around the generation of compartment outputs simplifies the process of reviewing the results of an exercise.
As JIPipe compartment outputs can be directly run from within the Compartments tab, one can quickly test if the expected results are produced.
For example, if the pipeline within the Preprocessing compartment (red box 1) contains a file loading and Gaussian blurring process, the generated results can be directly generated (red arrow 2) and reviewed (red arrow 3) directly within the Compartments tab.

Project overview
Each JIPipe project comes with a customizable Project overview tab that can be accessed via the Help > Project overview menu (red box 1).
It contains the following elements:
- A customizable title with authors, website, contact info and more (red box 2)
- A customizable rich text description with text and images (red box 3)
- Quick access to bookmarked nodes and selected parameters (both fully customizable; red box 4)
👉 Save the project while the Project overview is open. JIPipe will then show the tab when a student opens the project. Alternatively, you can enforce via the project settings that the overview should be always opened first.
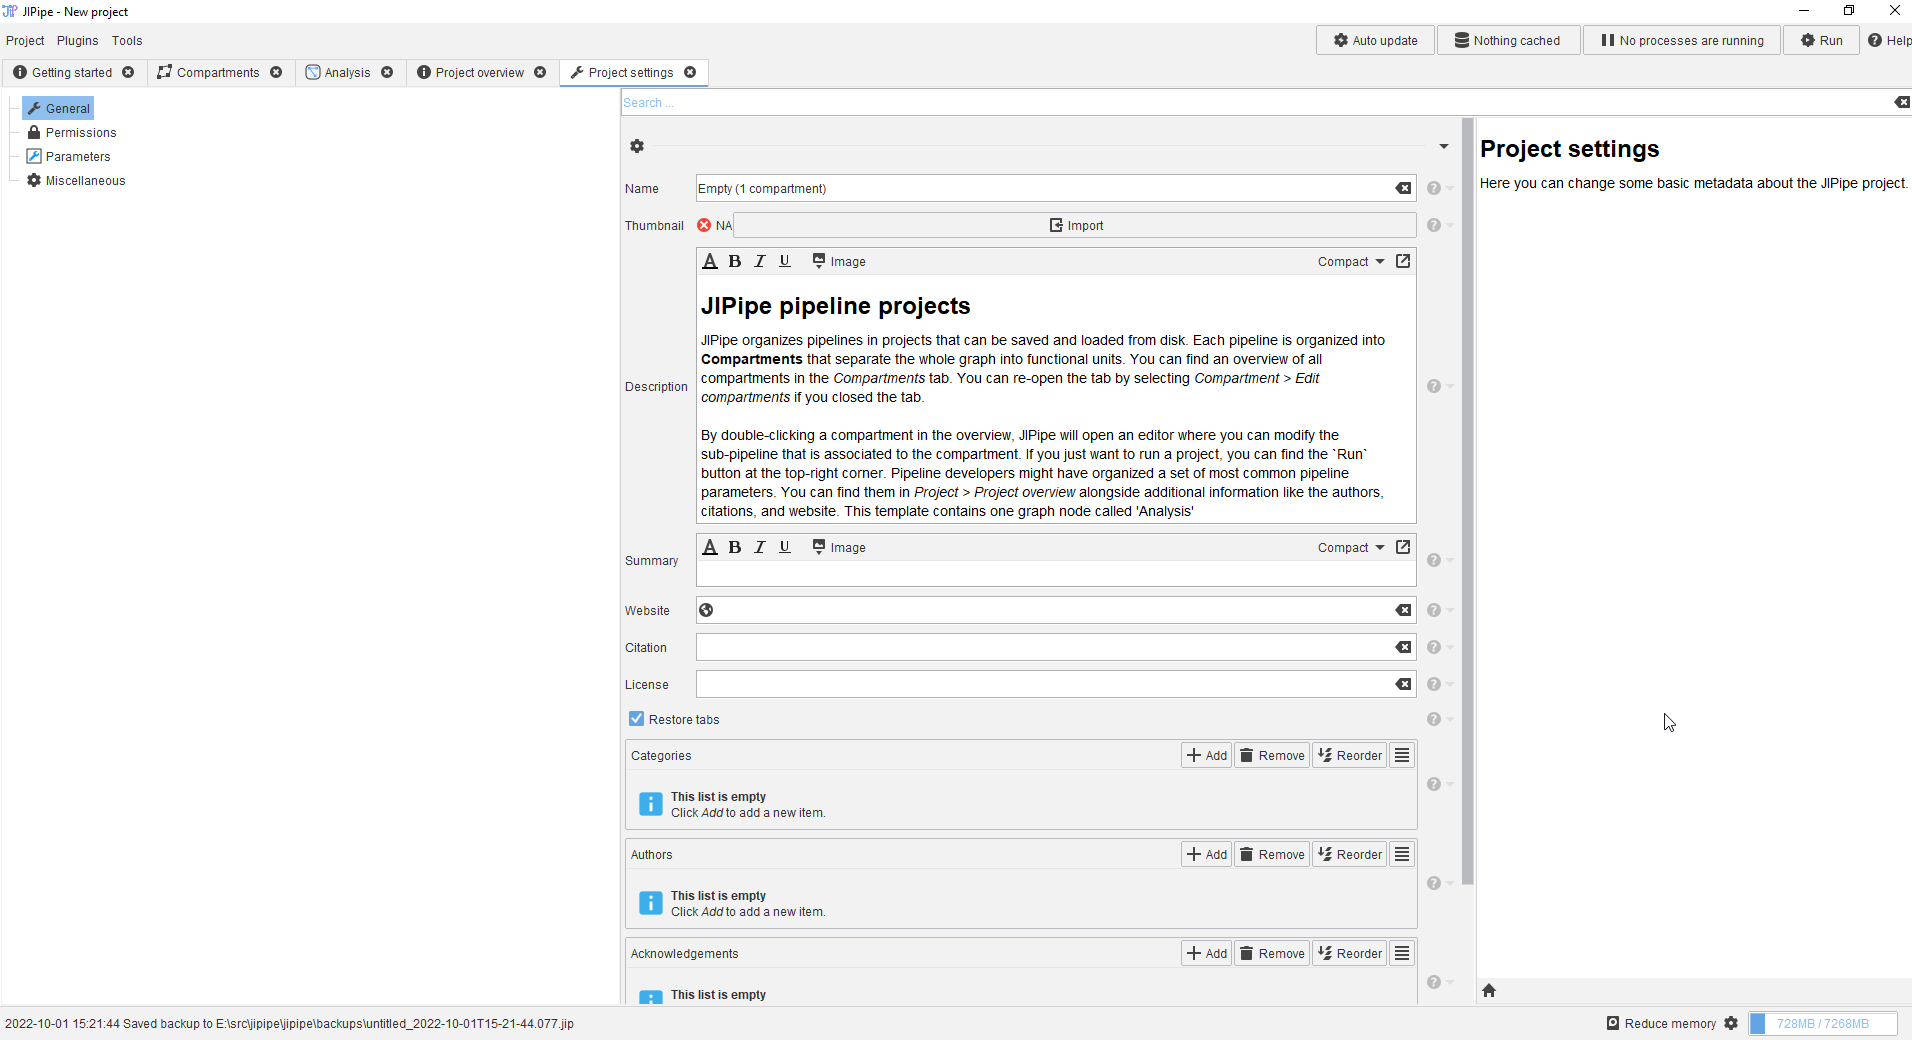
Project overview: Editing the metadata
The custom titles, authors, and descriptions can be edited via the Project settings that can be accessed in two ways:
- While the
Project overviewtab is open, clickEdit metadatain the top right panel - Navigate to
Project > Project settings
The General category includes the following settings:
- The project name/title
- The description editor
- Fields where other metadata like a citation, license, and website can be given
- The list of authors
- Acknowledgements
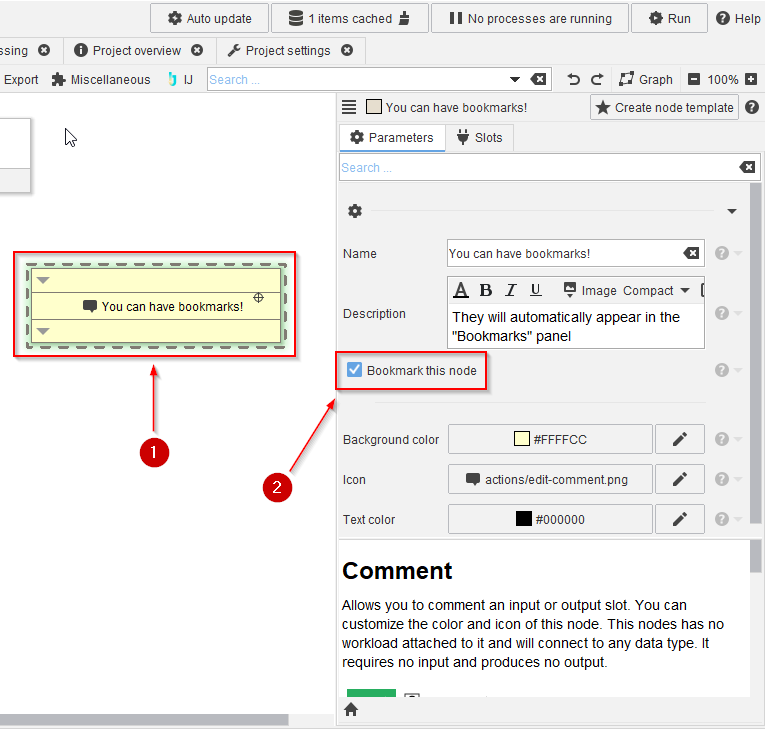
Project overview: Bookmarking nodes
Bookmarks are not edited within the Project settings tab, but by marking a node directly as bookmarked.
To do this, select your node of interest (red arrow 1) and check the Bookmark this node parameter within the Parameters tab.
👉 Bookmarked nodes are highlighted by a green shadow
👉 Bookmarked nodes automatically appear within the Bookmarks panel of the Project overview, as well as in a second Bookmarks tab that appears if no node is selected
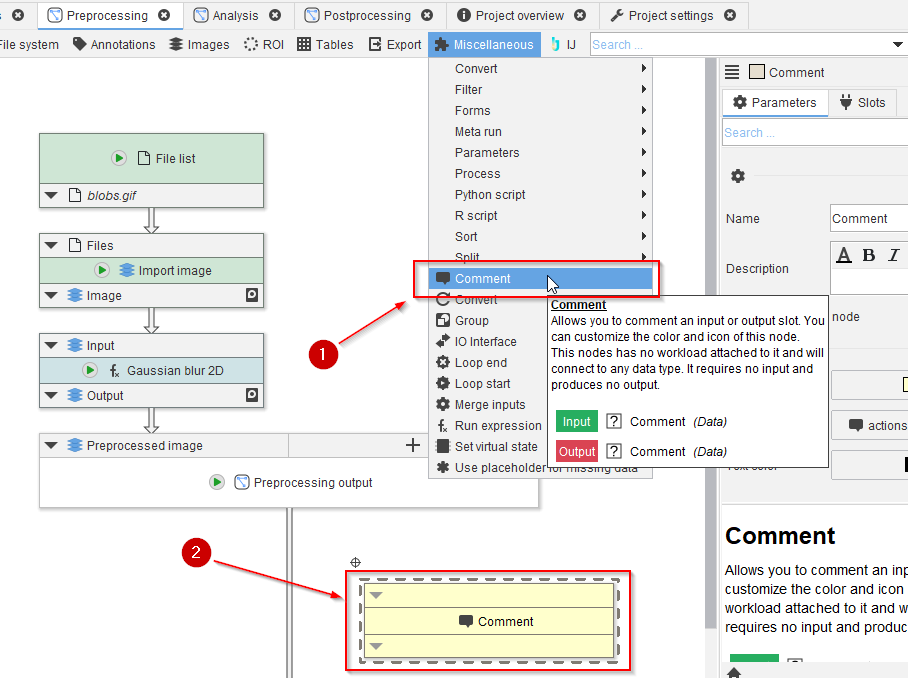
Comment nodes
Comment nodes are a great way to highlight a specific area or node of interest within the pipeline. For example, students can be pointed towards a node where the parameters should be adjusted to generate the expected results.
To add a Comment node, use the Miscellaneous menu and select Comment (red arrow 1). The node will appear within the current pipeline (red arrow 2).
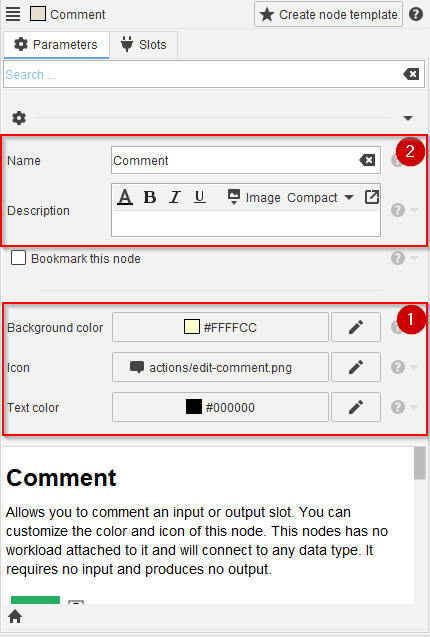
Comment nodes: Customization
Comment nodes can be customized in the Parameters tab via a custom background color, custom icon, and custom text color (red box 1).
As with any JIPipe node, you an change the name displayed within the pipeline and provide a rich text description with text and images (red box 2).
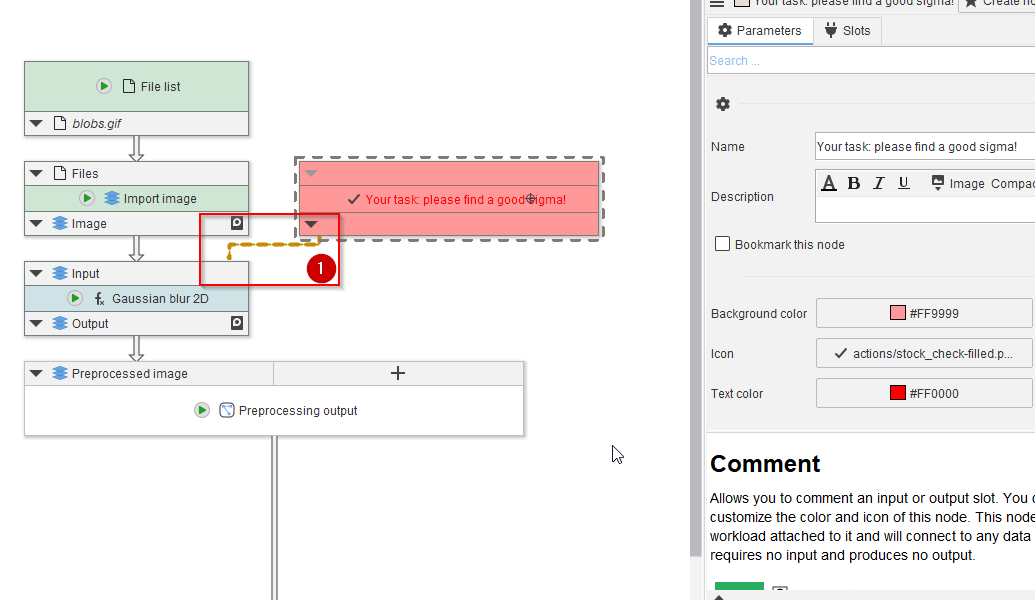
Comment nodes: Connecting to nodes
You can freely connect Comment nodes to the inputs or outputs of other nodes (red box 1).
👉 Comments are automatically excluded from pipeline runs, as they do not contain any workloads. You can freely connect them to anywhere you like without changing the behaviour of the pipeline.
Bookmark comments with tasks or other instructions, so that students can find them easily via the Bookmarks panel.
Bookmarks also render the description, so you can also use comments to ask for answers, e.g.,:
NameRun the pipeline and find out how many objects were detectedDescriptionYour answer (How many objects?): [insert your answer here]
Groups and node templates
Node groups and node templates enable full control over the following aspects:
- How to reduce the complexity of some operations?
- Which functions/parameters should be accessible to students to avoid confusion and frustration?
- Which nodes should students use?
- Which nodes are suitable for which compartment?
Groups and node templates: Compound nodes
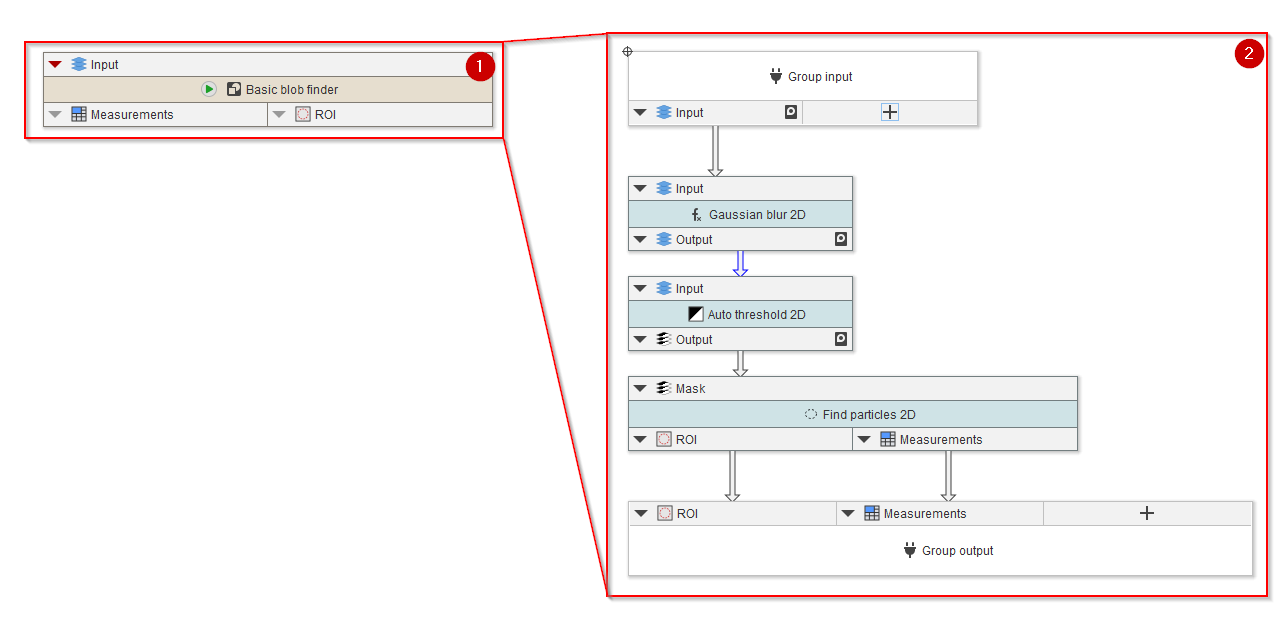
JIPipe node groups can be used to contain a set of multiple operations (red box 2) into a single node (red box 1). This is for example useful if advanced visualization or file loading processes should be provided to students without establishing all implementation details behind the operation.
👉 Node groups contents can be easily viewed by double-clicking them. This allows students who are interested in the operations behind the group to explore their functionality.
Groups and node templates: Exporting parameters from groups
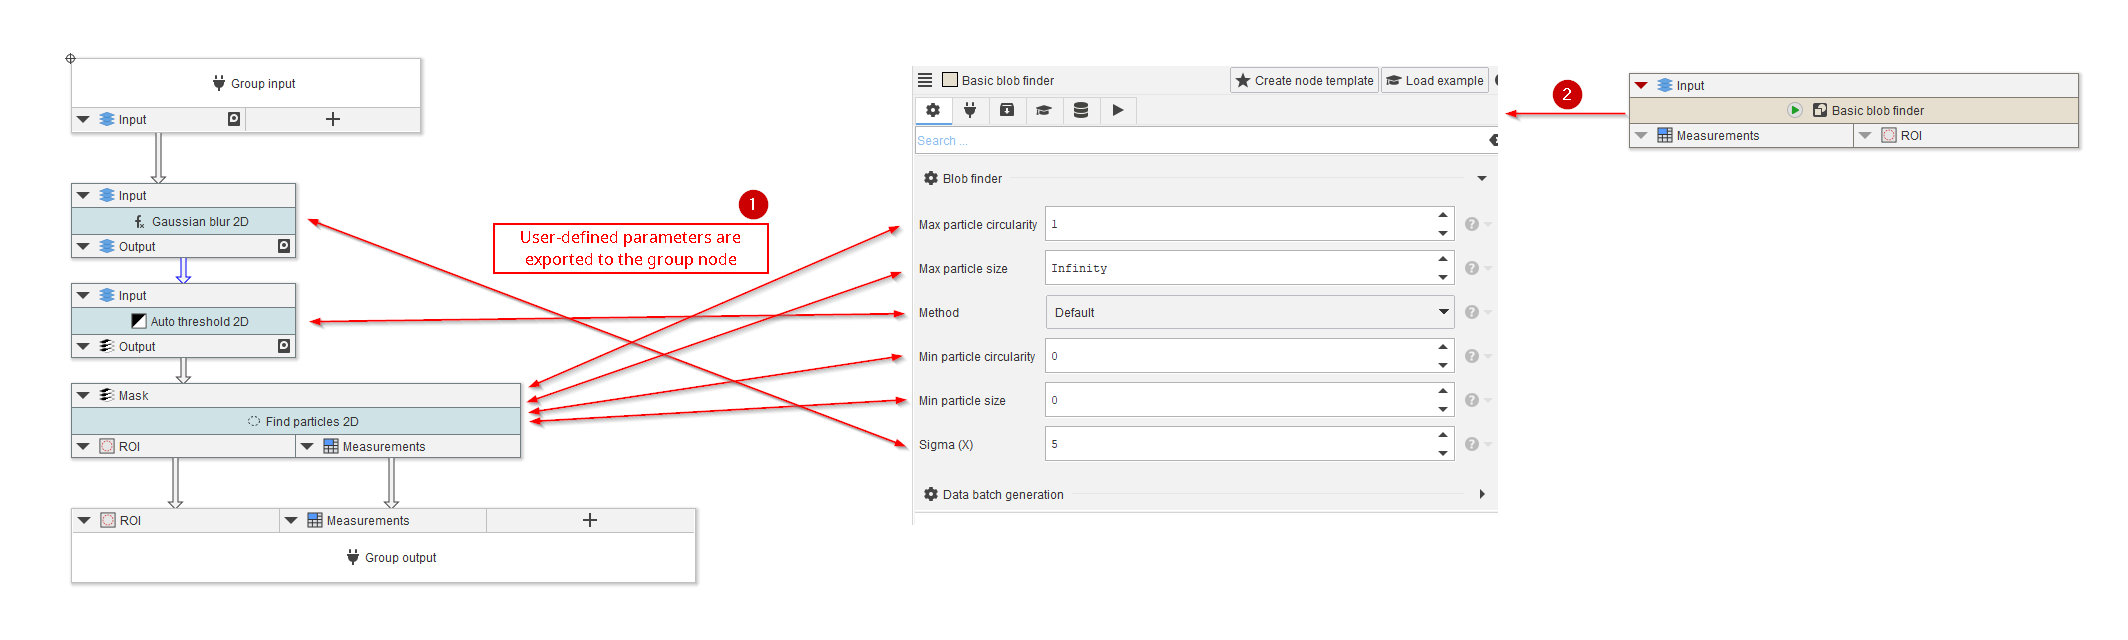
Groups by themselves are a an excellent mode of reducing the complexity of various operations. To still provide users of the group with means to customize the behaviour of the nodes contained within the group, Group nodes support the referencing/export of group-internal parameters (red box 1) to the group itself (red arrow 2).
👉 For example, teachers can provide a group responsible for segmenting and filtering objects with settings where students can input custom object size constraints:
Task: Glomeruli have a radius of15 µmto65 µm. Please setup theGlomeruli segmentationarea and circularity constraints that only objects with the appropriate size are segmented.
Groups and node templates: Providing nodes with the project
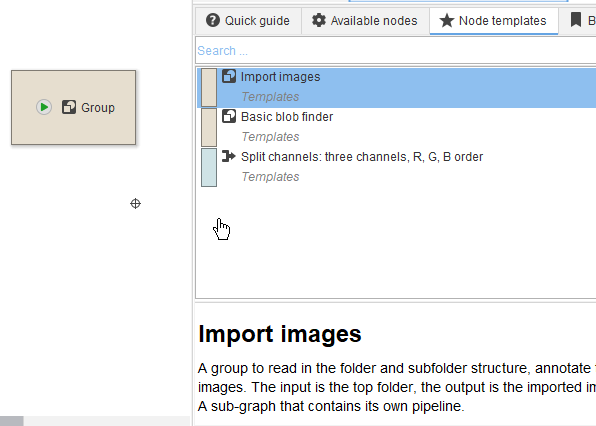
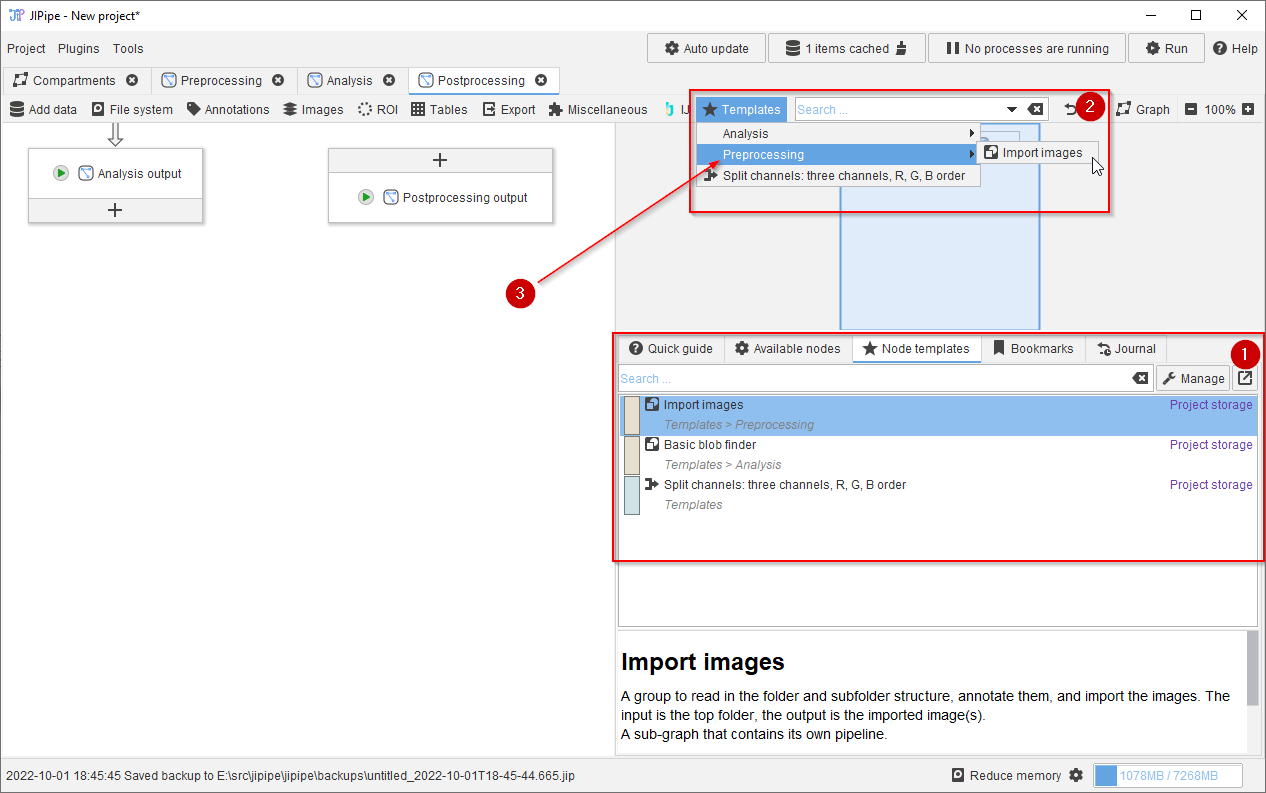
The node template system allows projects to carry a list of user-defined nodes. These node templates can be created for pre-configured nodes or a group with exported parameters.
👉 Create project-associated node templates for nodes that should be used by the students
Node templates appear both in the Node templates tab (red box 1), as well as in the Templates menu (red box 2).
👉 You can assign a menu path to node templates during their creation. Use this feature to sort nodes by their intended compartment (red arrow 3)
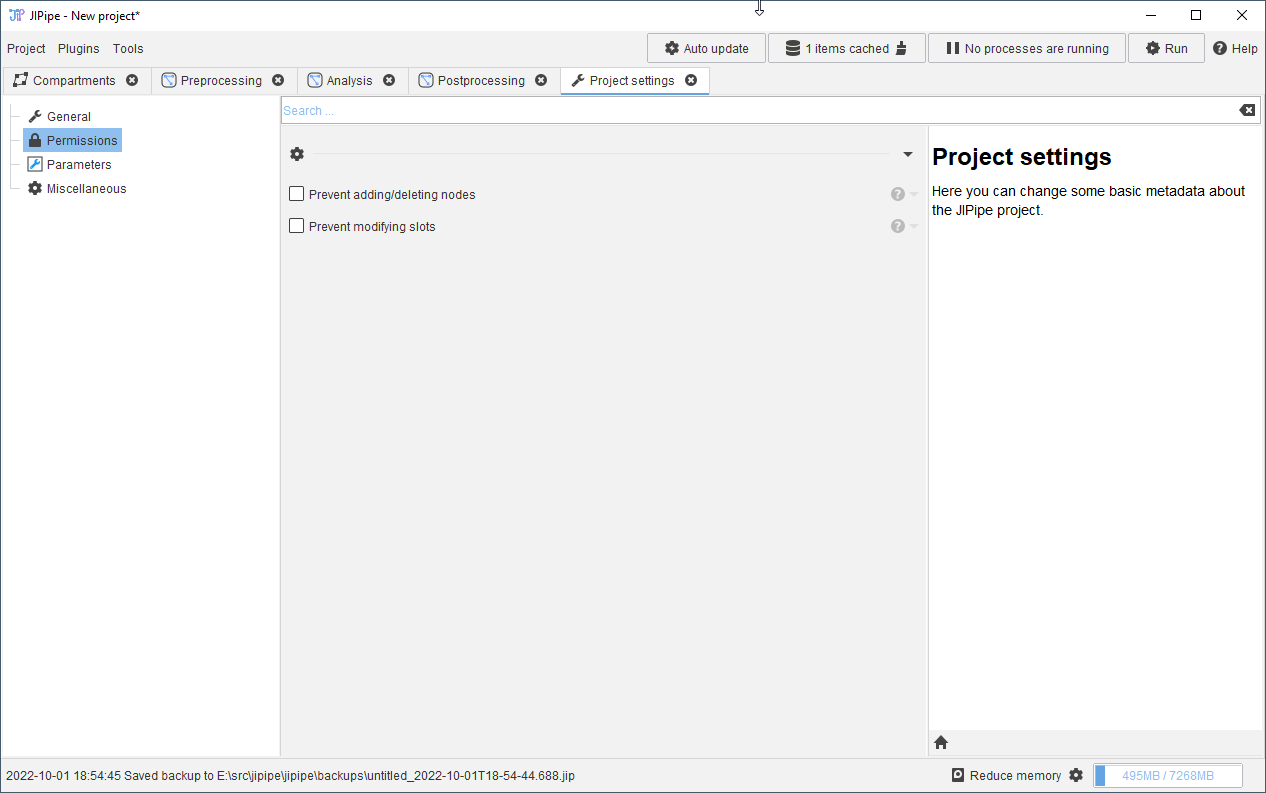
Project permissions
Project permissions can be accessed via Project > Project settings > Permissions. In the current iteration of this feature, you can prevent users from creating or deleting nodes, as well as adding/deleting/modifying slots.
👉 These settings are suitable for projects where students are provided with an existing set of unconnected nodes and are tasked to connect them into a pipeline