Comment nodes
Explains how to add comments with additional information into a pipeline
Tutorial: Handling multi-channel images I
Step 1
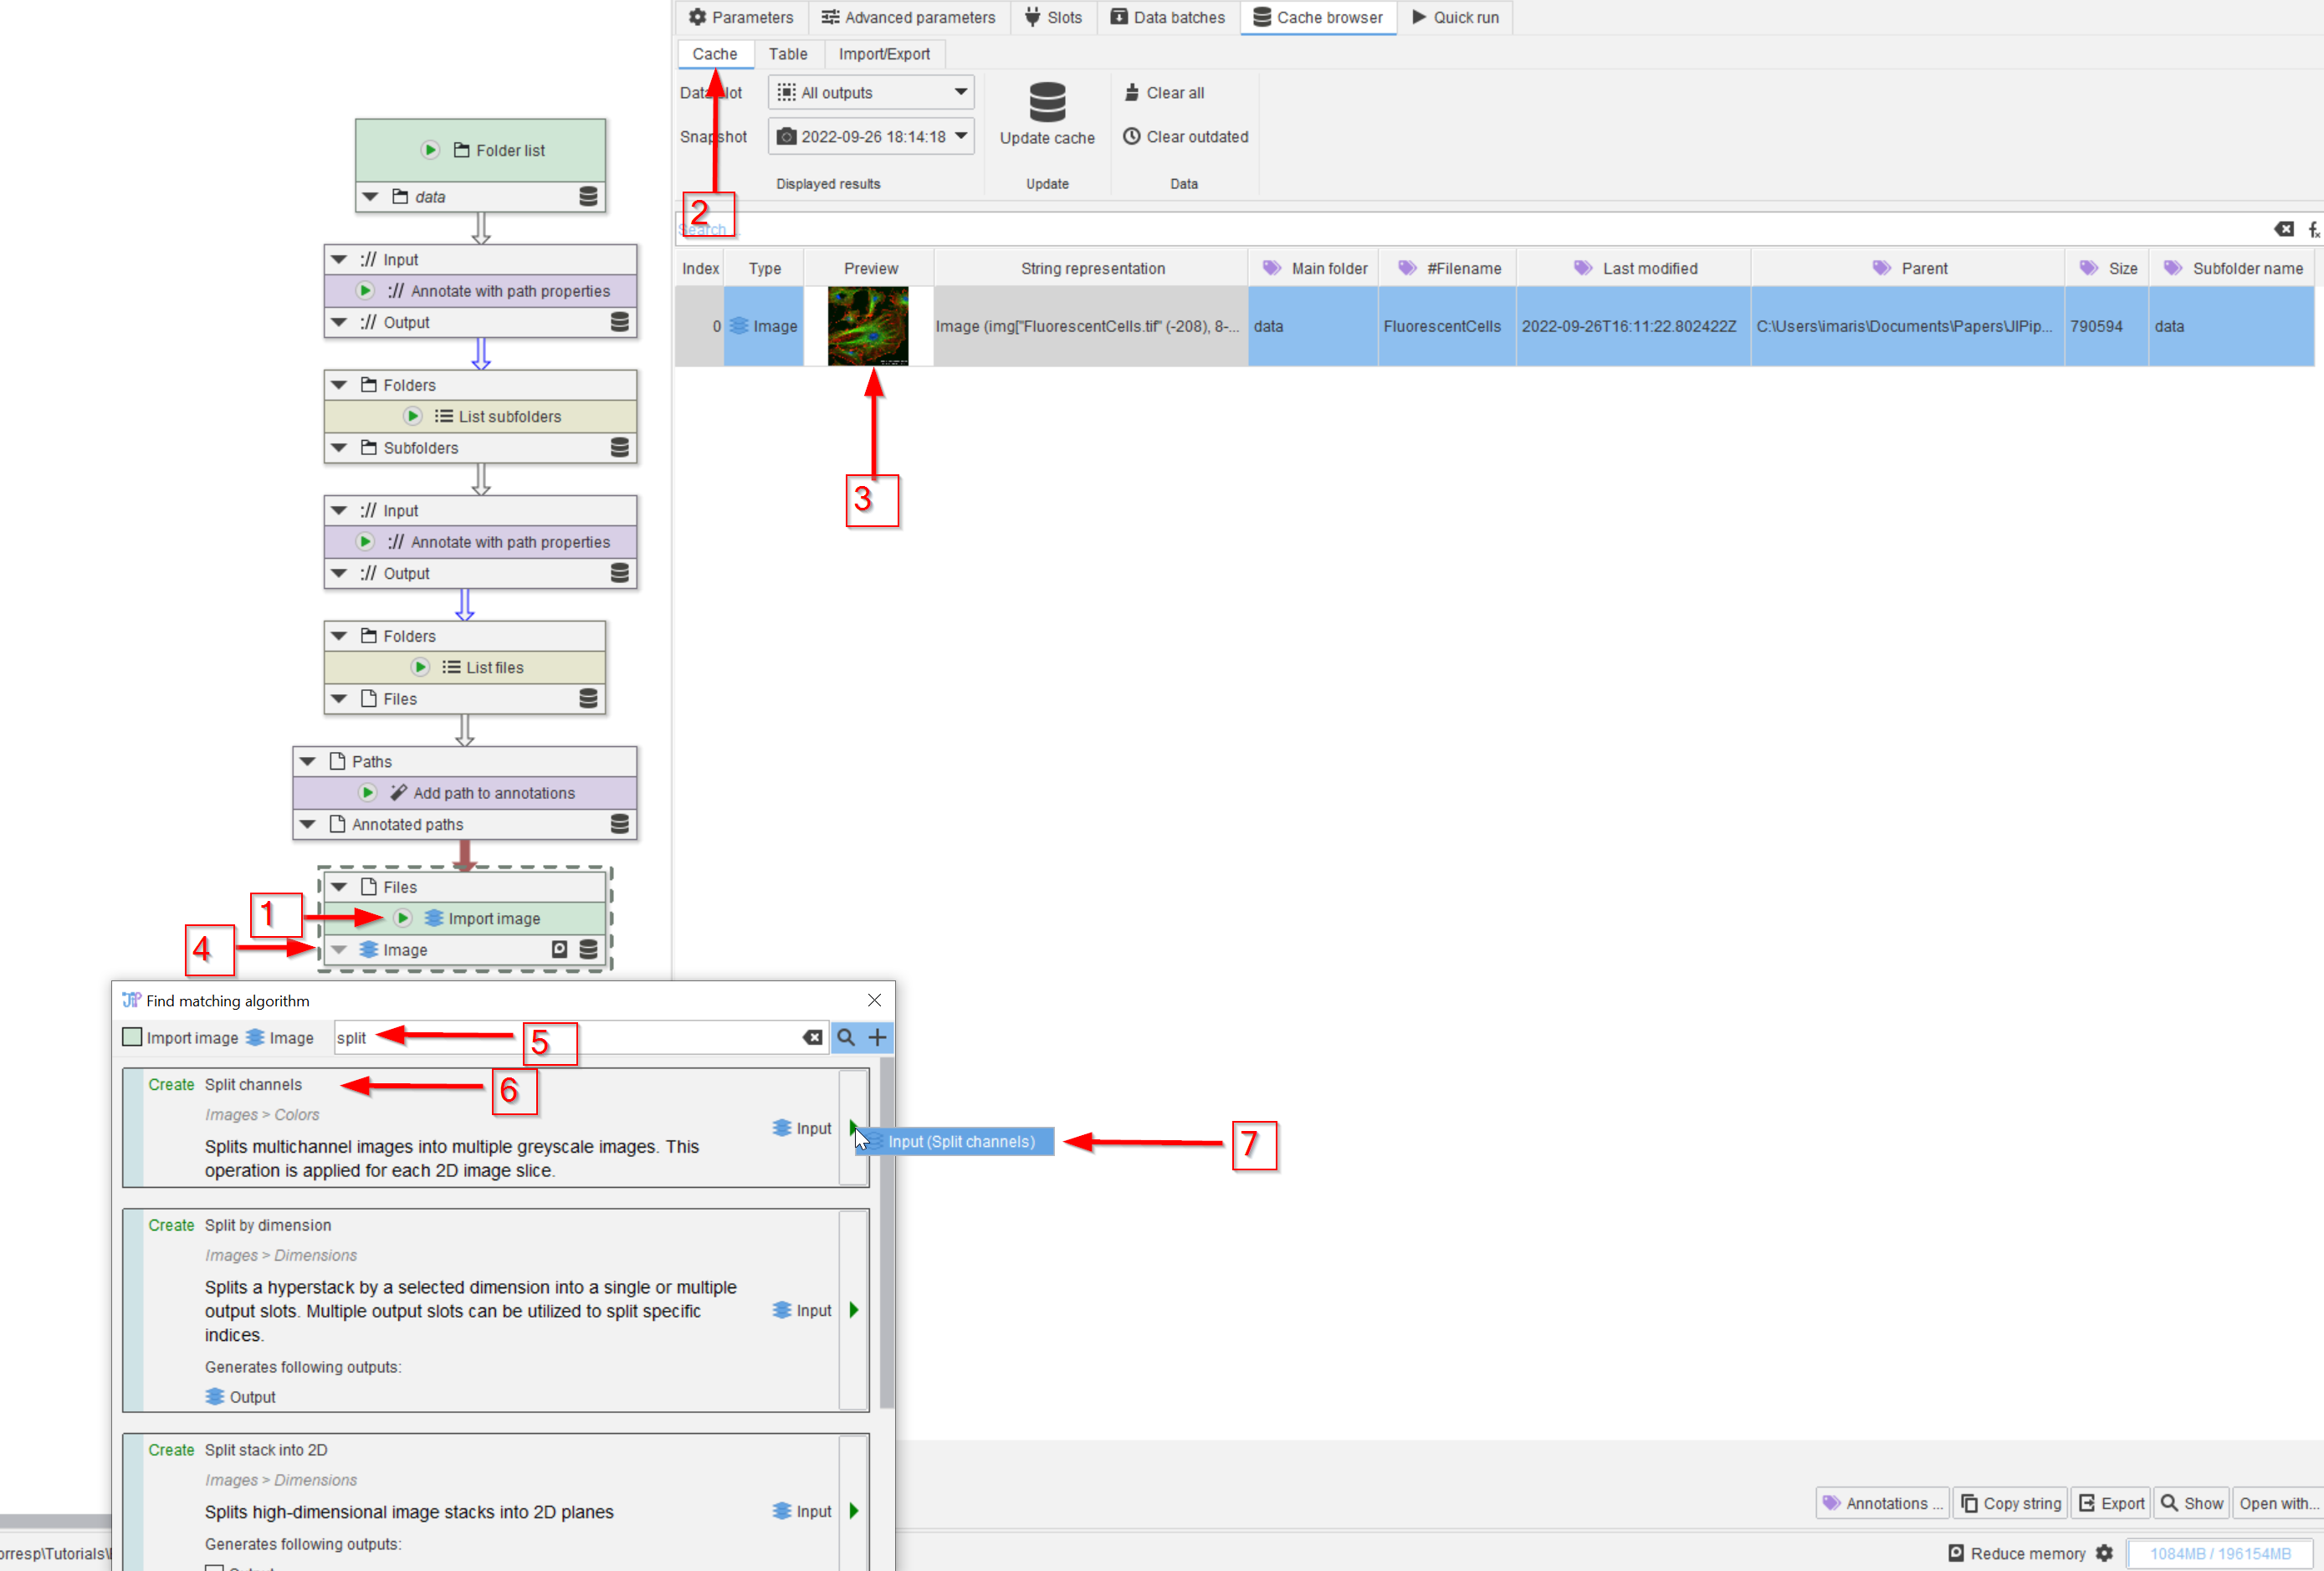
Open the project file and run the bottom node Import image (red arrow 1). Chose the Cache intermediate results option to see the outcome from all nodes. Observe the cache (red arrow 2) and notice that the image has multiple channels (red arrow 3). In order to split the channels, search for a suitable node (red arrow 4) with the keyword split (red arrow 5). Choose the Split channels node (red arrow 6) and add it to the pipeline (red arrow 7).
Step 2
This image is from the standard ImageJ samples, described in ImageJ as follows:
This image is made from a Molecular Probes demo slide:
Cells: bovine pulmonary arthery endothelial cells
Blue: nucleus stained with DAPI
Green: Tubulin stained with Bodipy FL goat anti-mouse IgG
Red: F-Actin stained with Texas Red X-Phalloidin
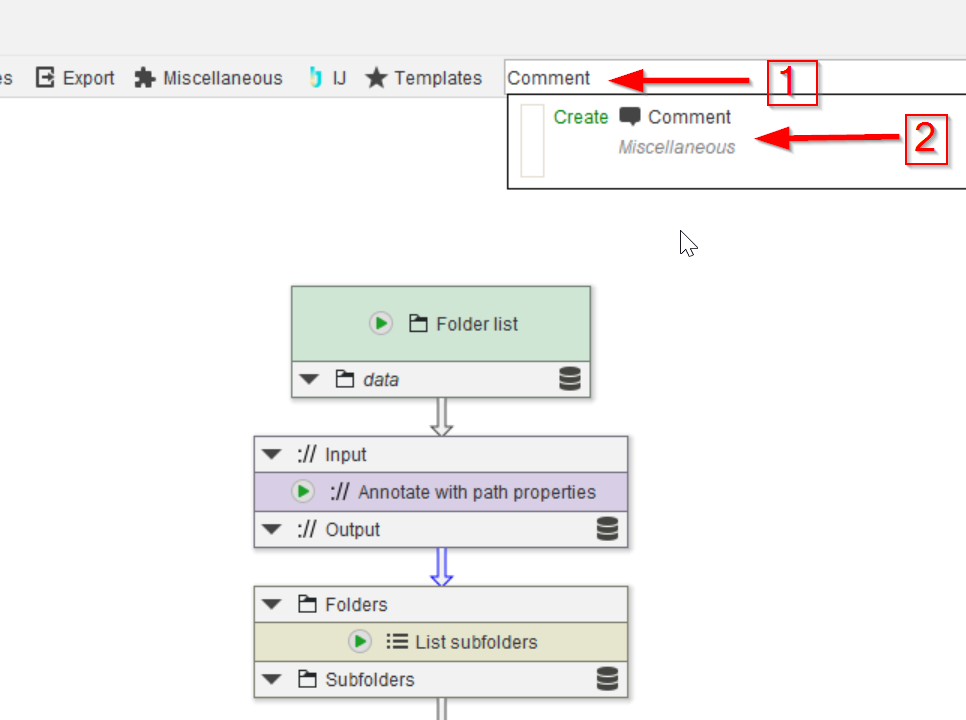
We can add this information as a comment to the pipeline. Use the search bar (red arrow 1) to find the Comment node (red arrow 2)
Step 3
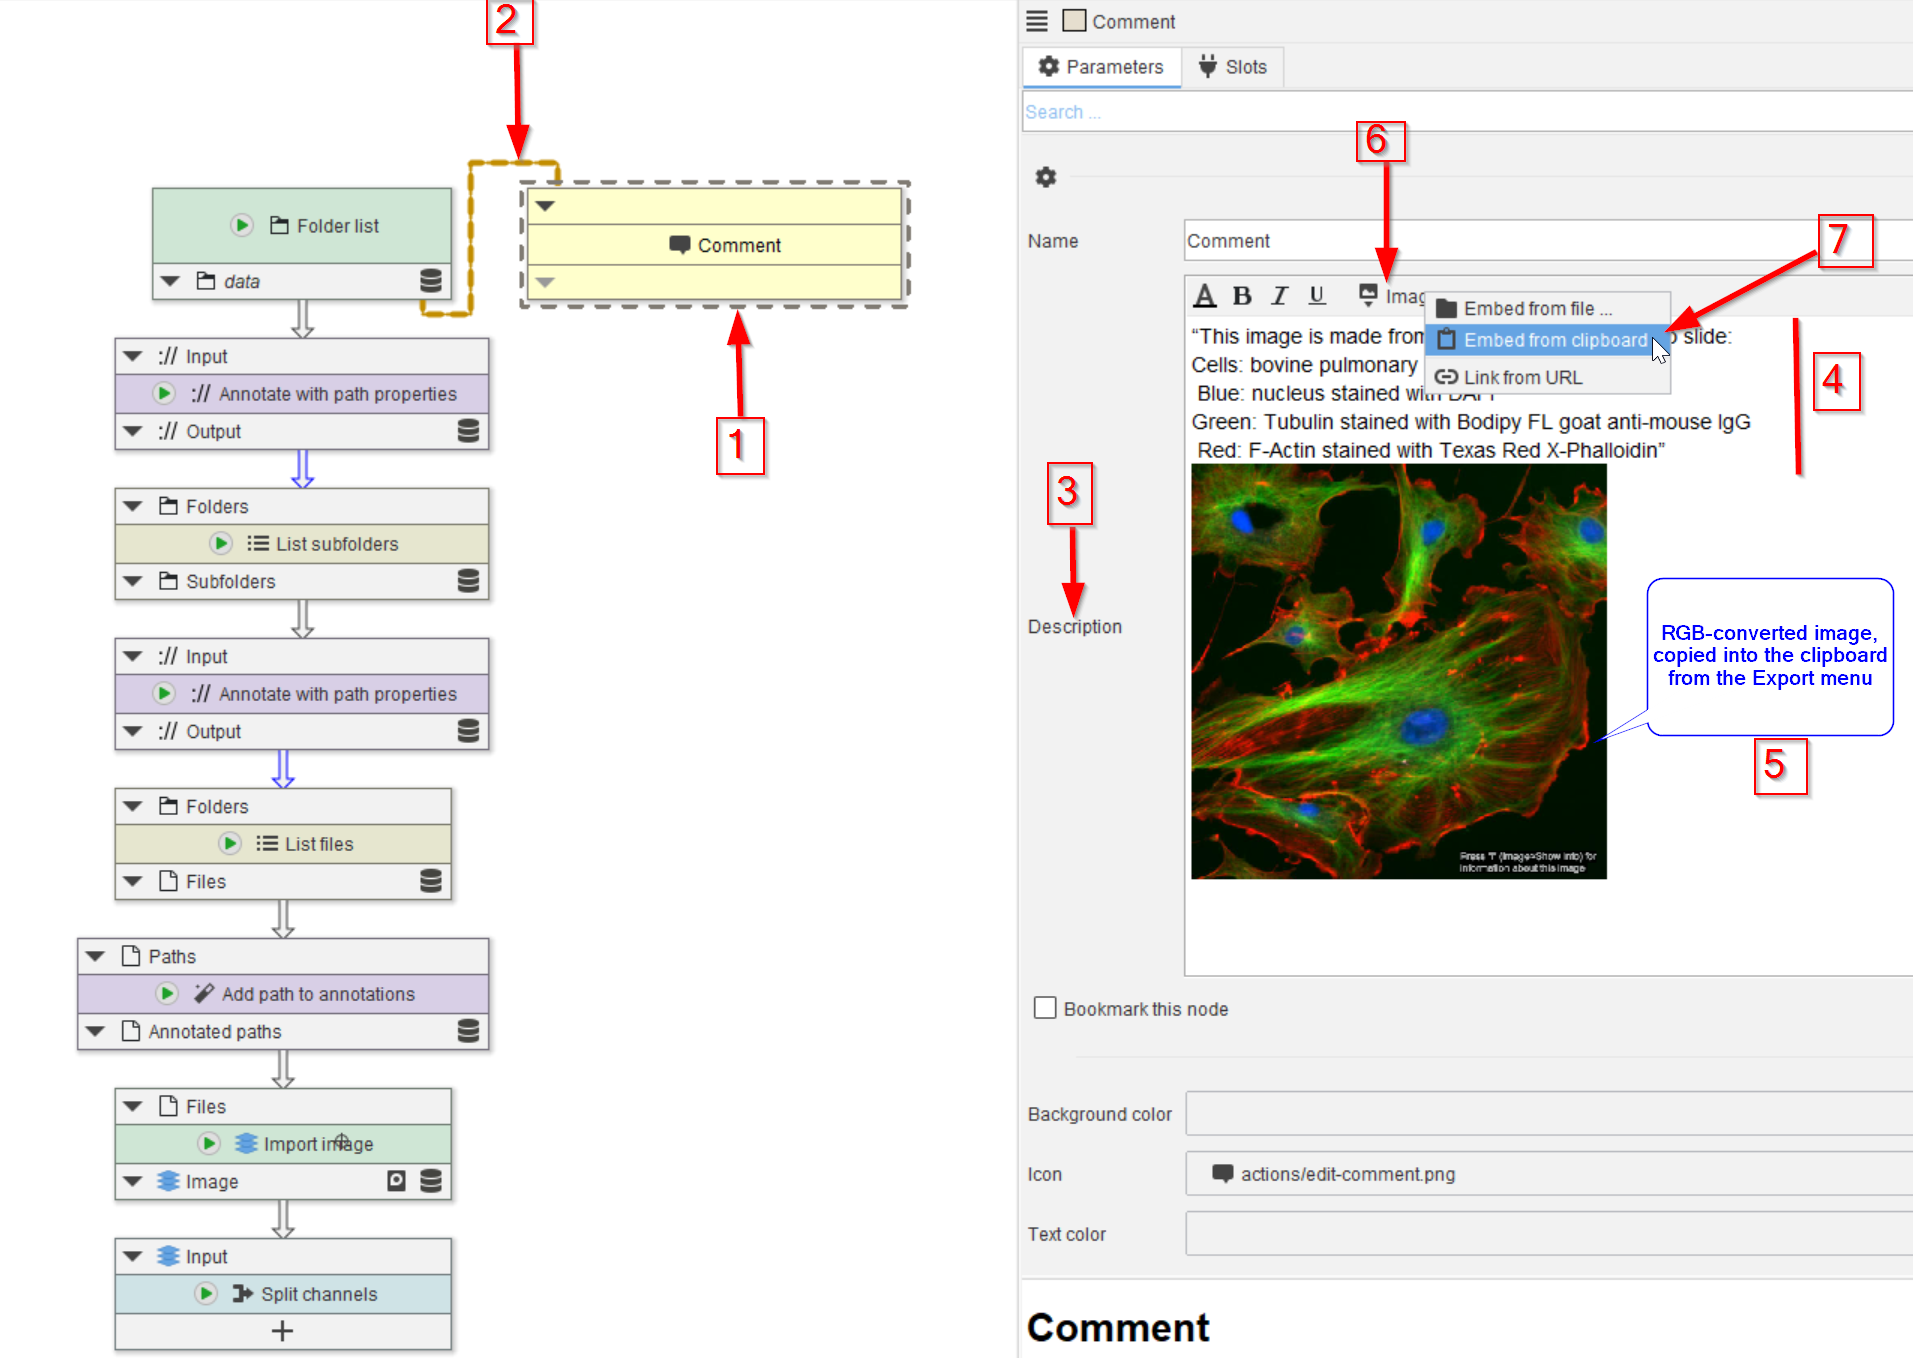
Add the Comment node to the GUI (red arrow 1). Link the node to the Folder list node (red arrow 2) (or to any node).
The Comment node does not execute any command, only stores additional information. The information can be text or image(s). We copy the text from the ImageJ info box into the node using the Description field (red arrow 3), using the text (red line 4) and the RGB-converted image from the image viewer of the Import image node (red arrow 5). The image can be added via the Image tab (red arrow 6), using e.g., the clipboard content (red arrow 7).
Here we used the image viewer export function, after having converted the image into RGB, as described in another tutorial.