Image viewer I
Briefly explains the basic features of the JIPipe image viewer, its ROI manager component, and how to interactively draw ROIs
Table Of Contents
Step 1
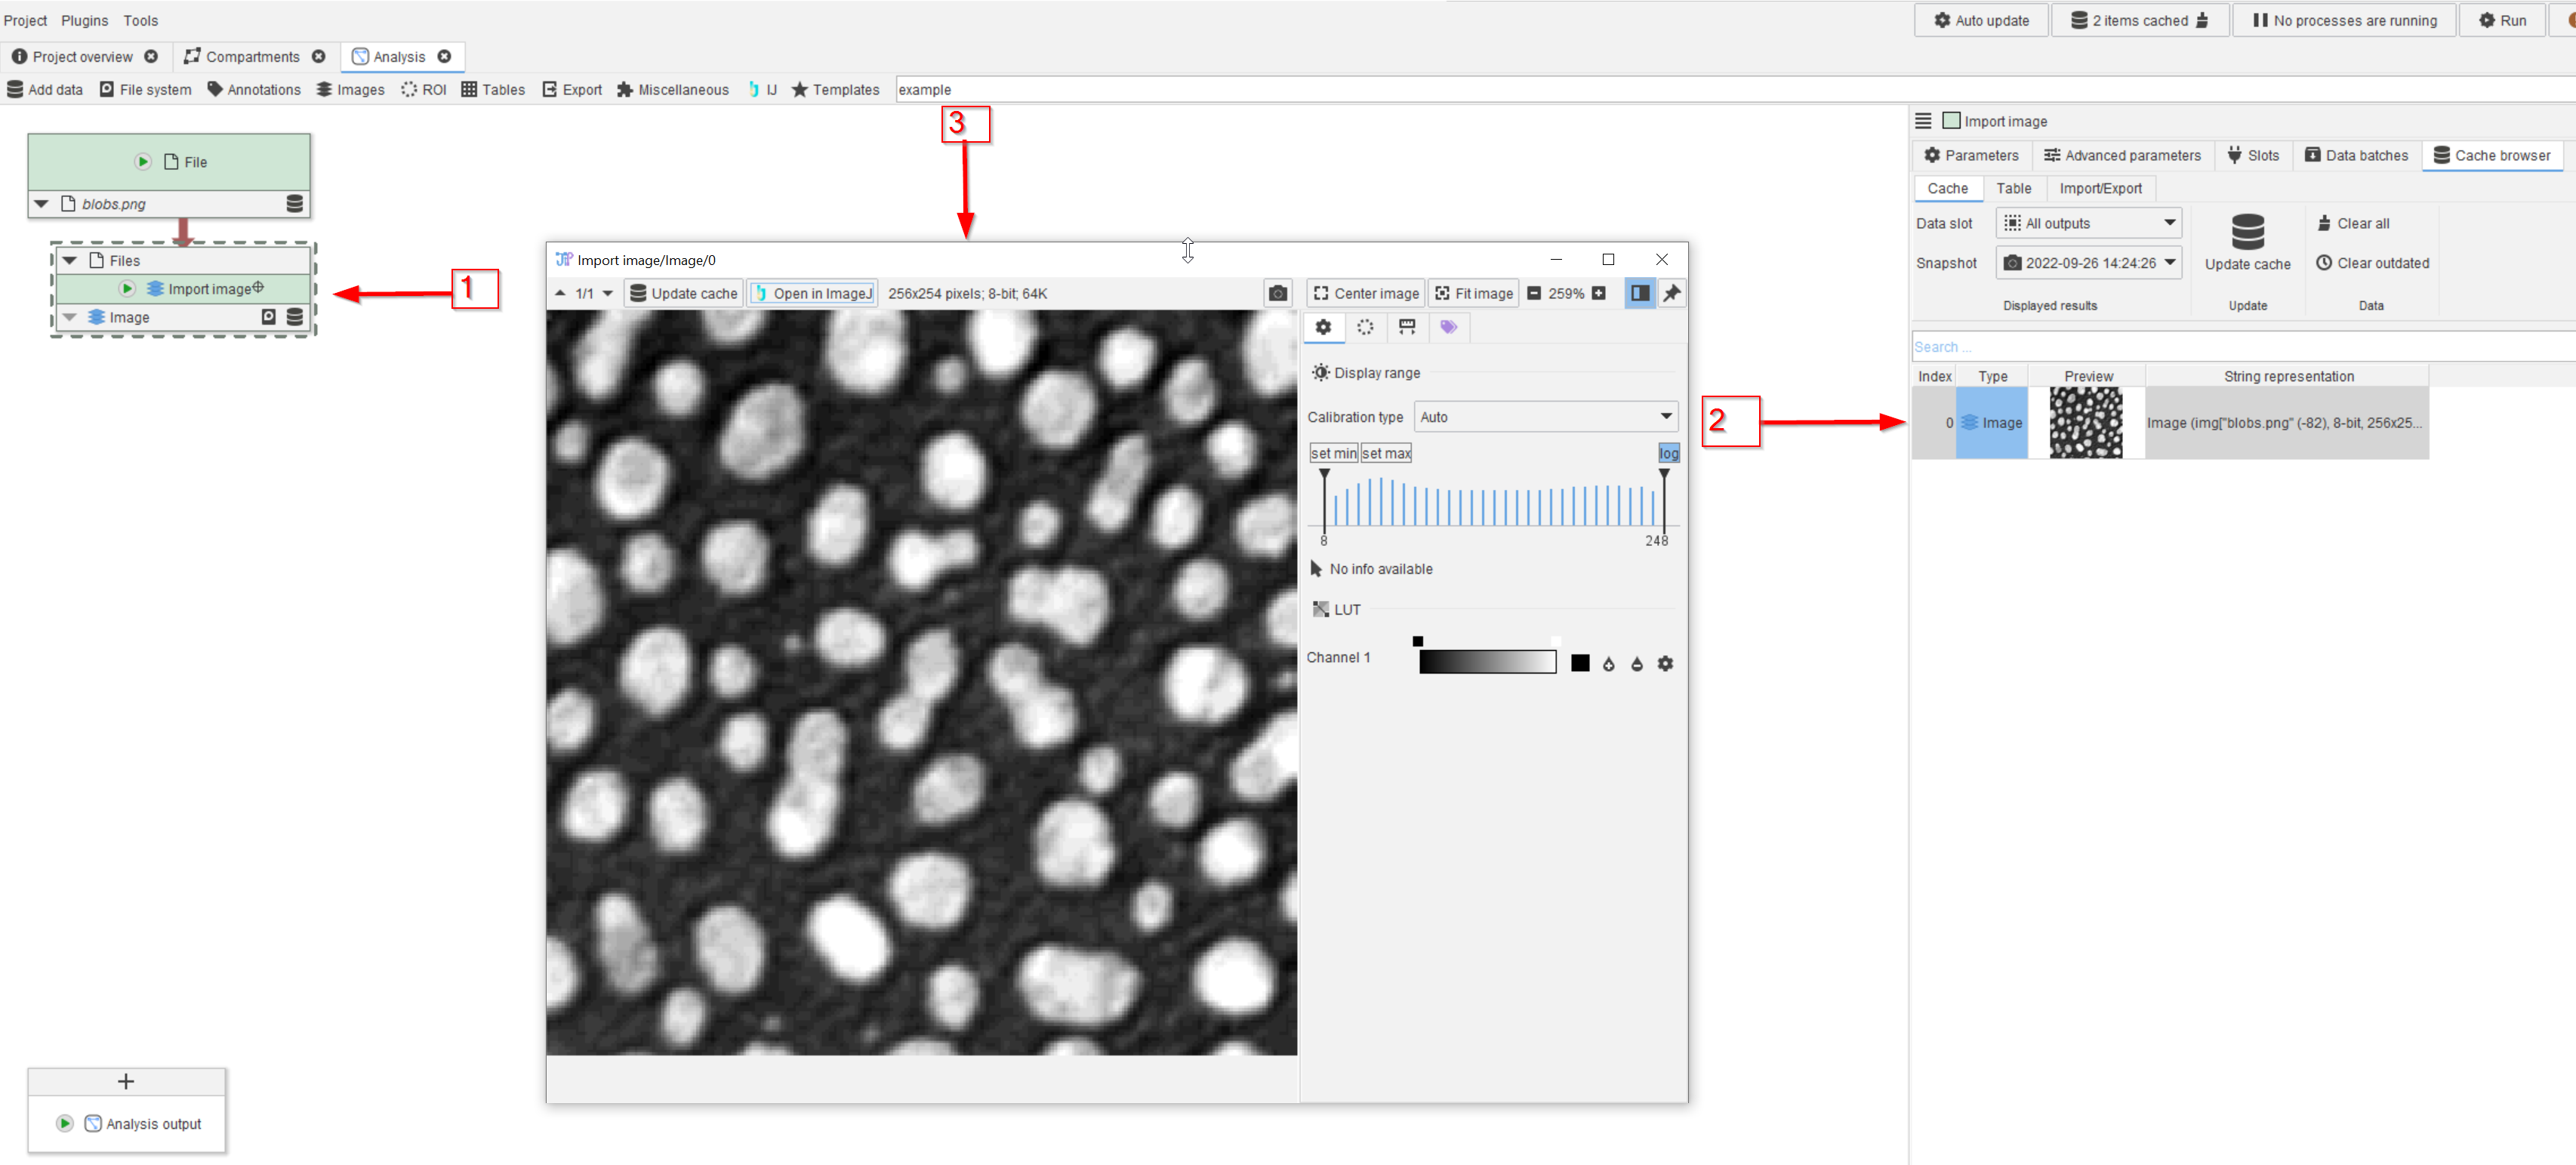
Open an image in a pipeline (red arrow 1), double-click on the output in the Cache (red arrow 2) and examine the pop-up Image Viewer (red arrow 3).
Step 2
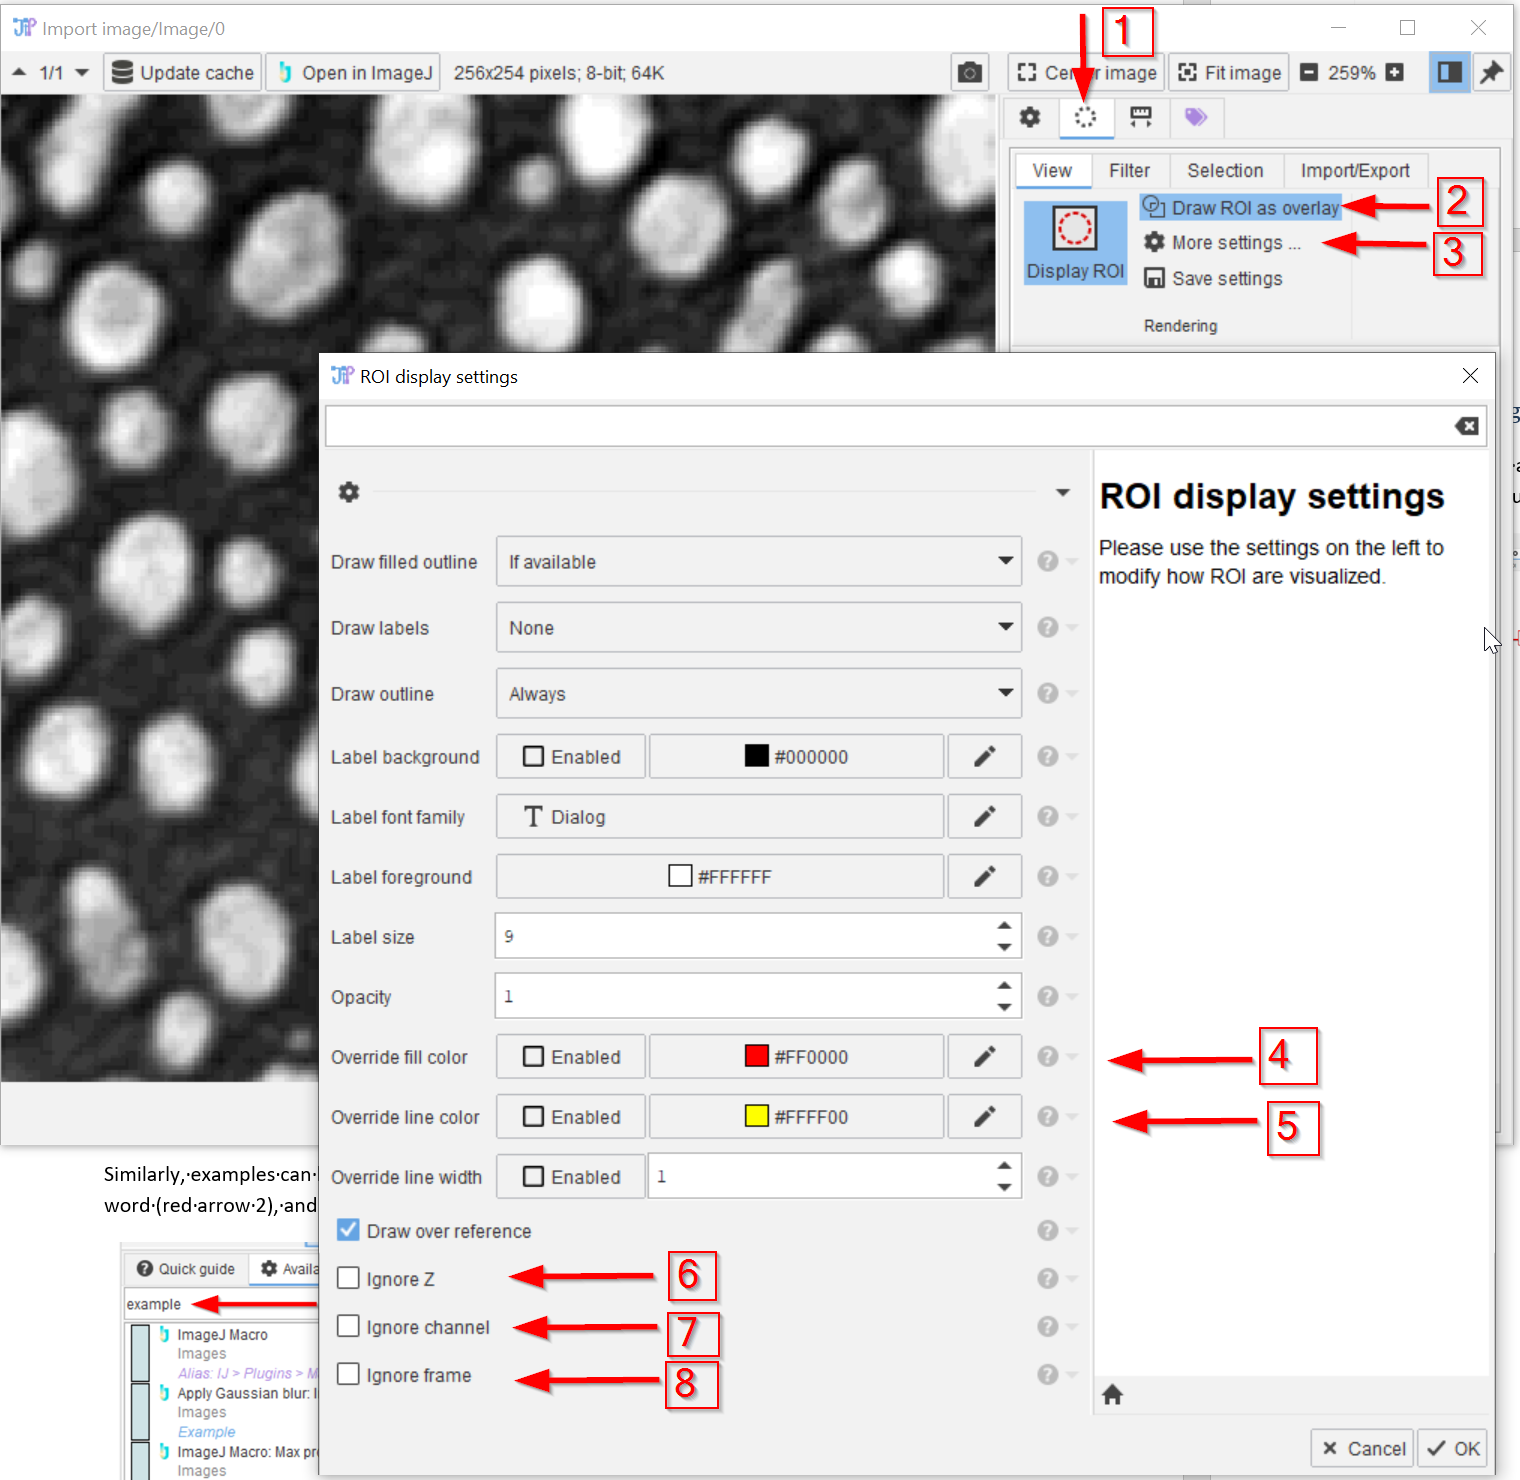
To draw ROIs, click on the ROI tab (red arrow 1), select to have ROIs as overlays (default!; red arrow 2), and click on More settings for further options (red arrow 3). Here the options to change the fill and line colors (red arrows 4 and 5, resp.), and to project the Z, the channel or the time dimension(s) are available (red arrows 6, 7, 8, resp.).
Step 3
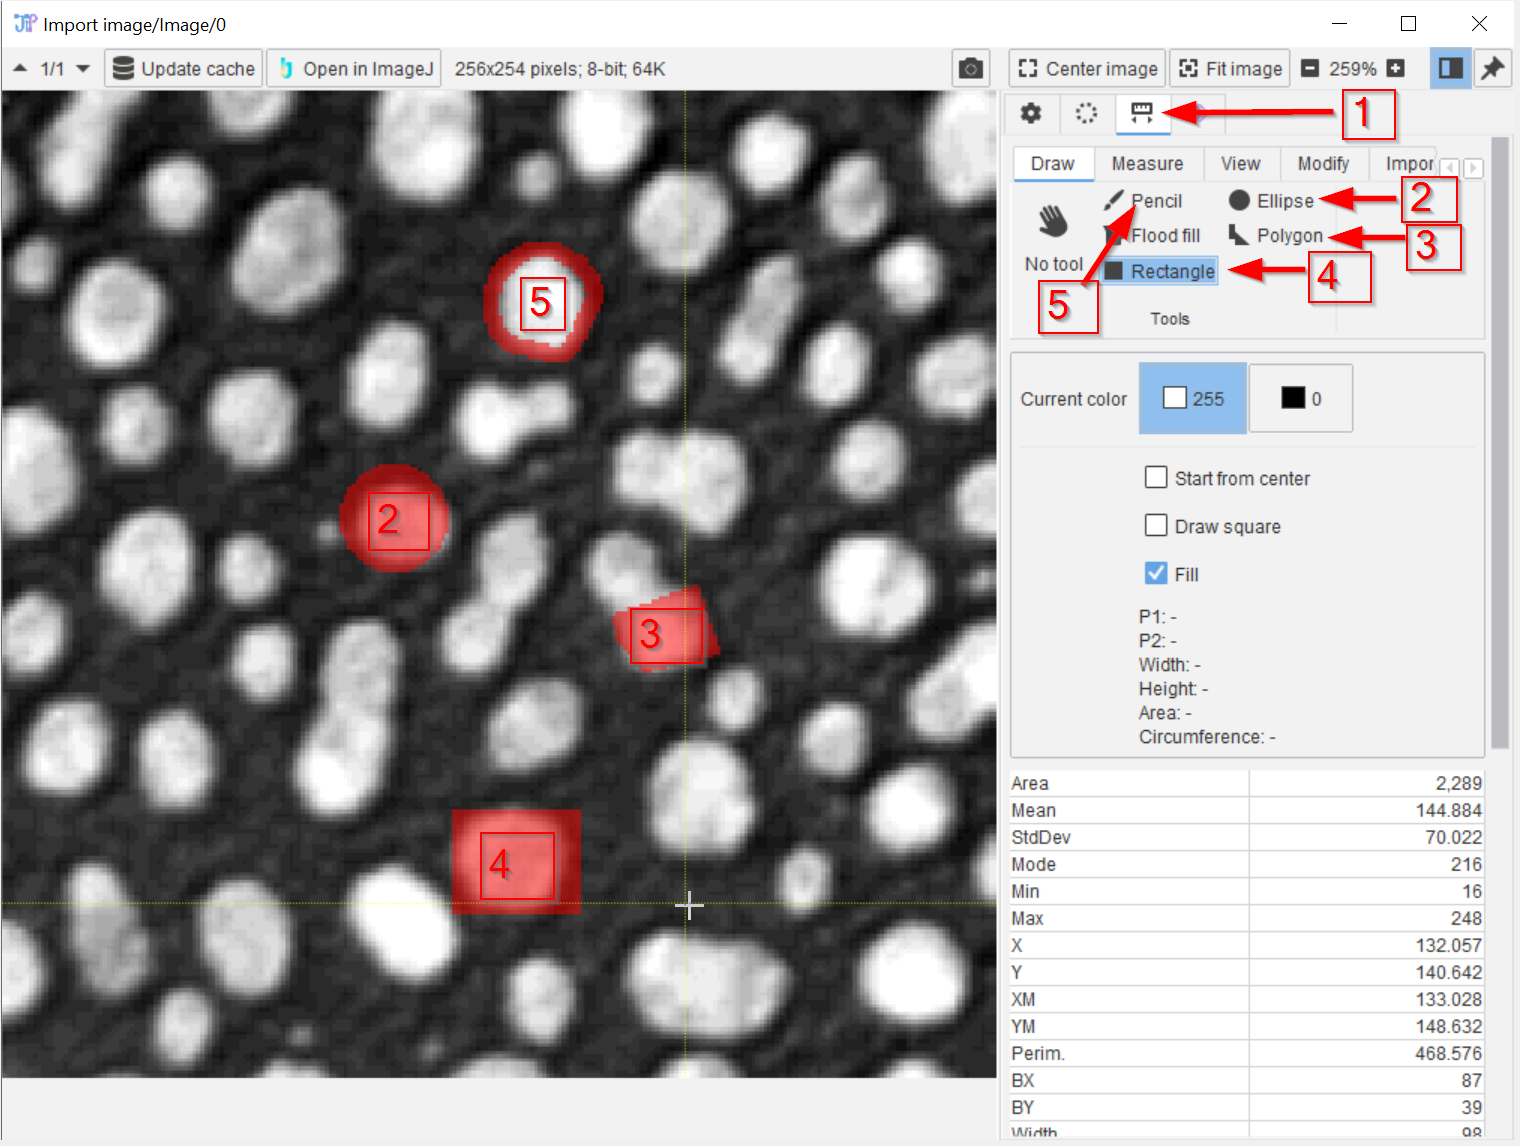
Activate the Drawing tools (red arrow 1), and use the Ellipse, Polygon, Rectangle, and Pencil tools (red arrows 2, 3, 4, 5, resp.) to draw the corresponding shapes on the image (red labels 2, 3, 4, 5, resp.).
Step 4
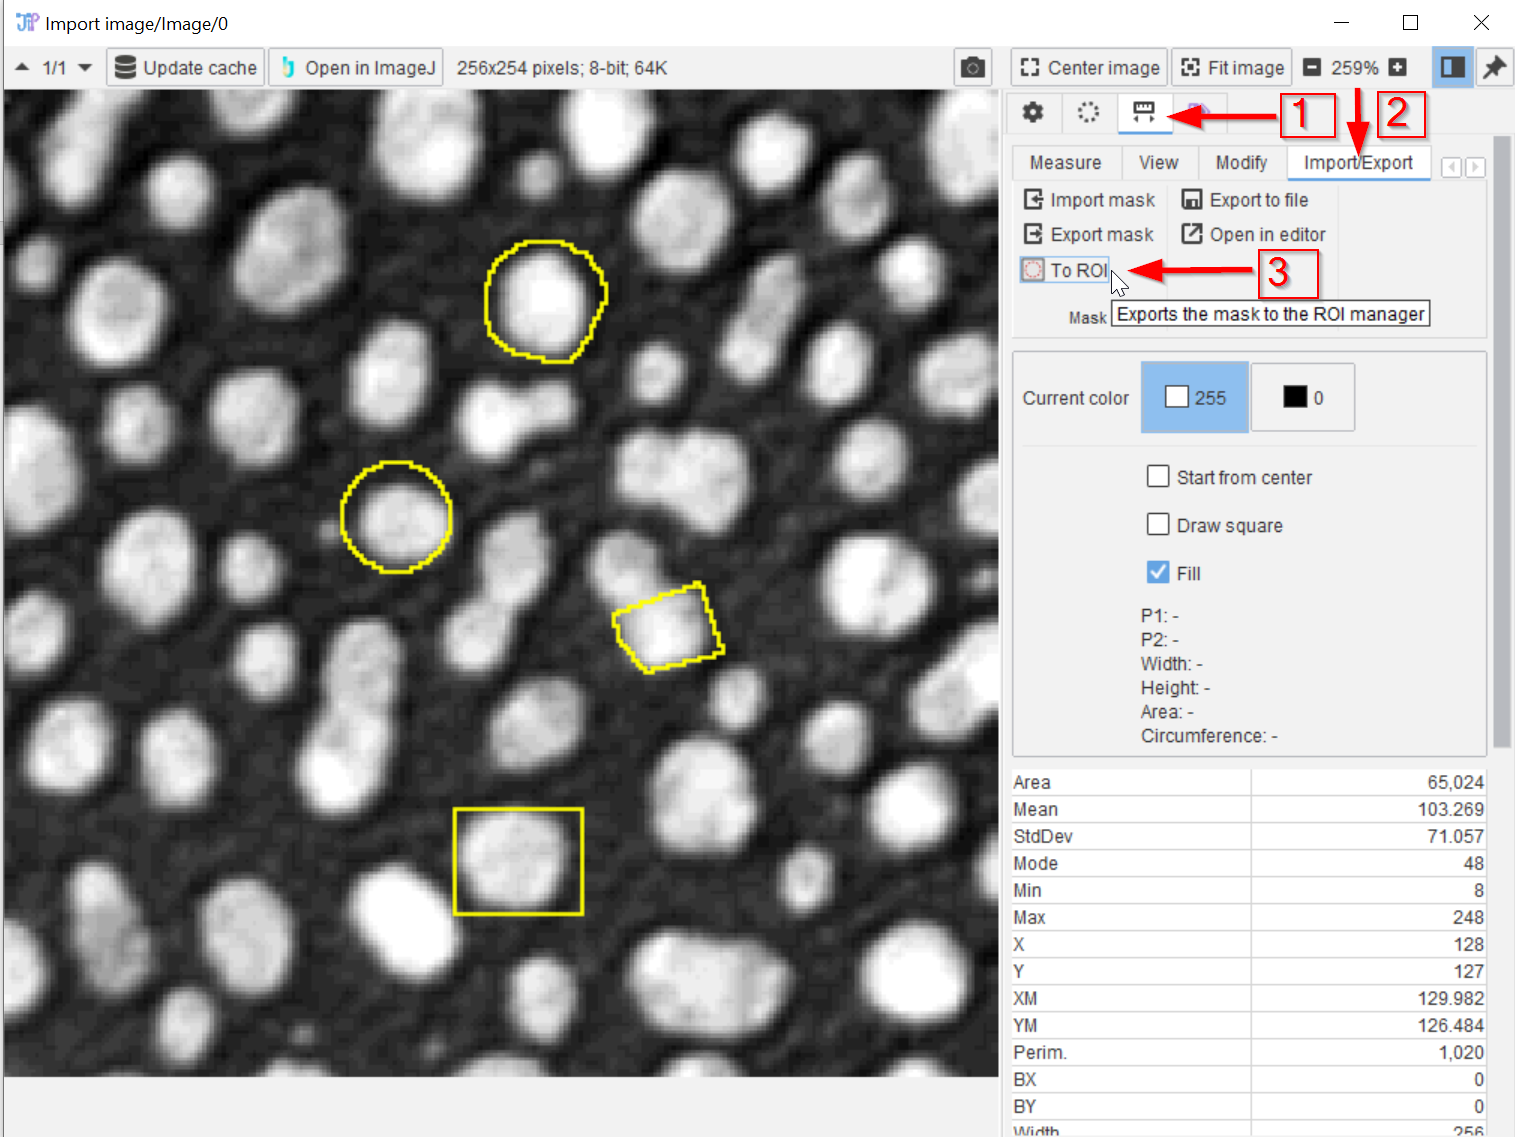
In the Draw menu (red arrow 1) activate the Import/Export tab (red arrow 2) and click on To ROI (red arrow 3) to convert the drawings to ROIs. Observe that the region outlines are now yellow, indicating that they are converted to ROIs.
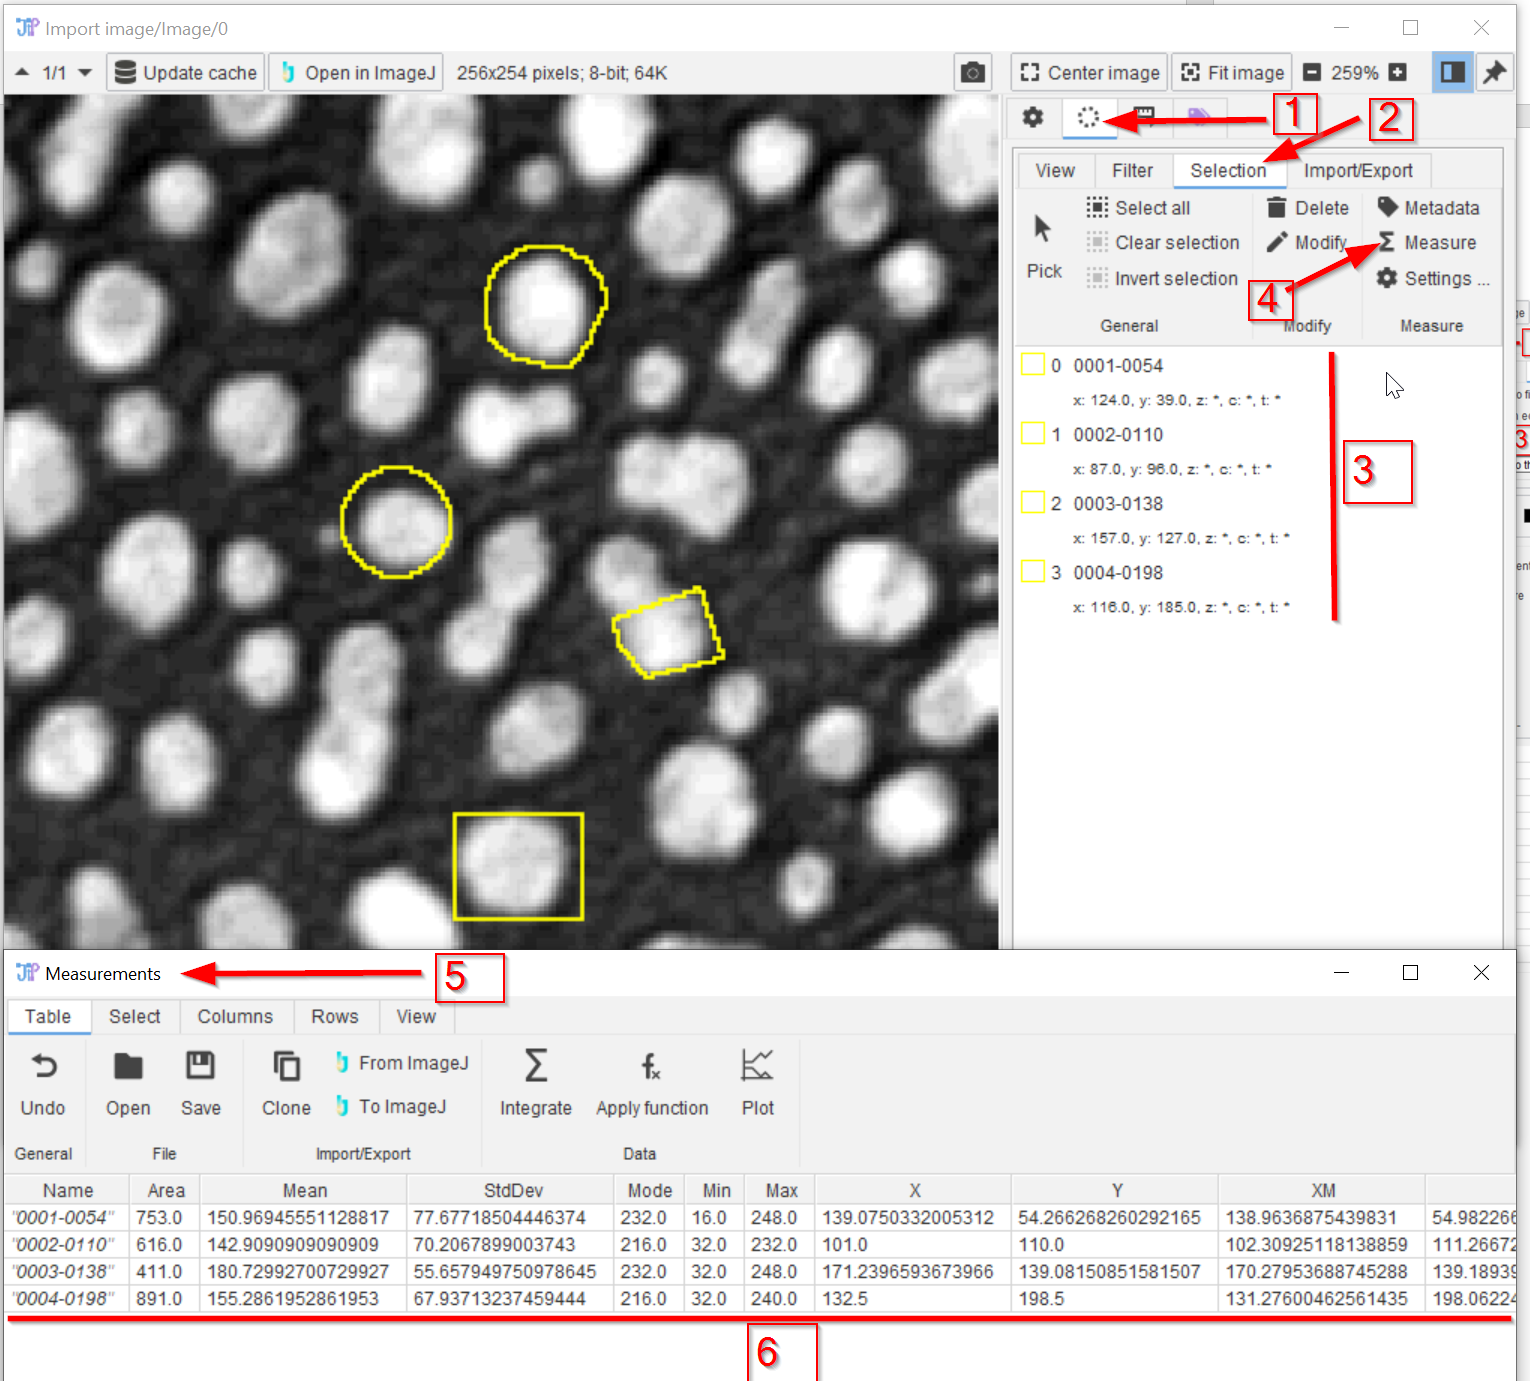
Step 5
In the ROI menu (red arrow 1) click on Selection (red arrow 2) and observe the list of the four new ROIs (line 3). Click on Measure (red arrow 4) to create the per-ROI analysis in a separate window (red arrow 5). The measurements are according to the ImageJ list of available parameters (red line 6).
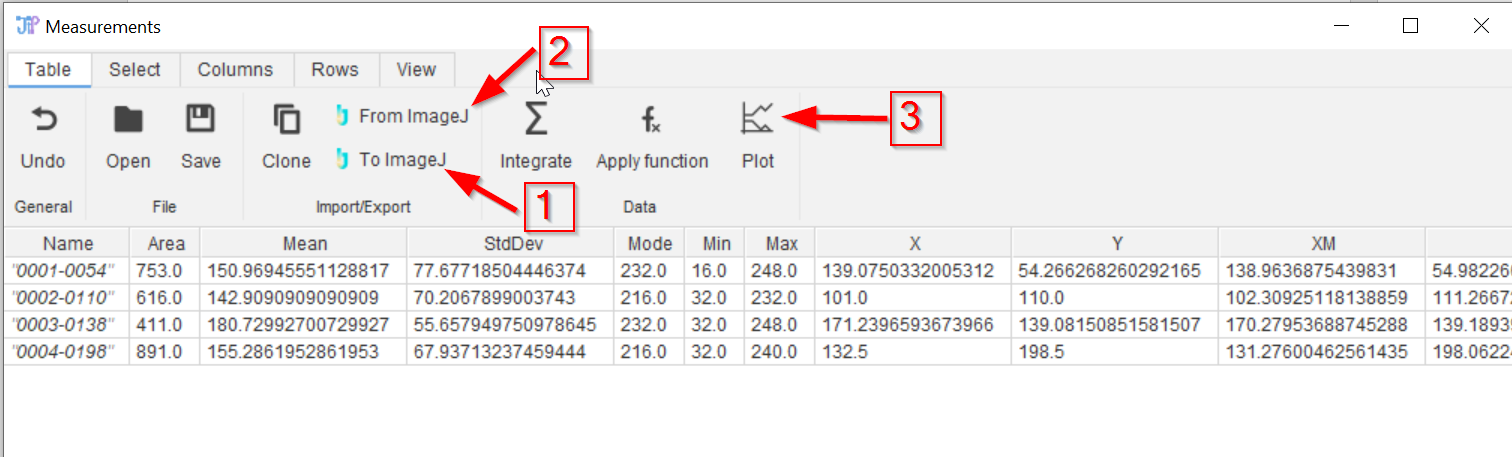
Step 6
The created ROIs can be exported directly to ImageJ (red arrow 1), imported from ImageJ’s ROI Manager (red arrow 2), and the results can be plotted (red arrow 3))
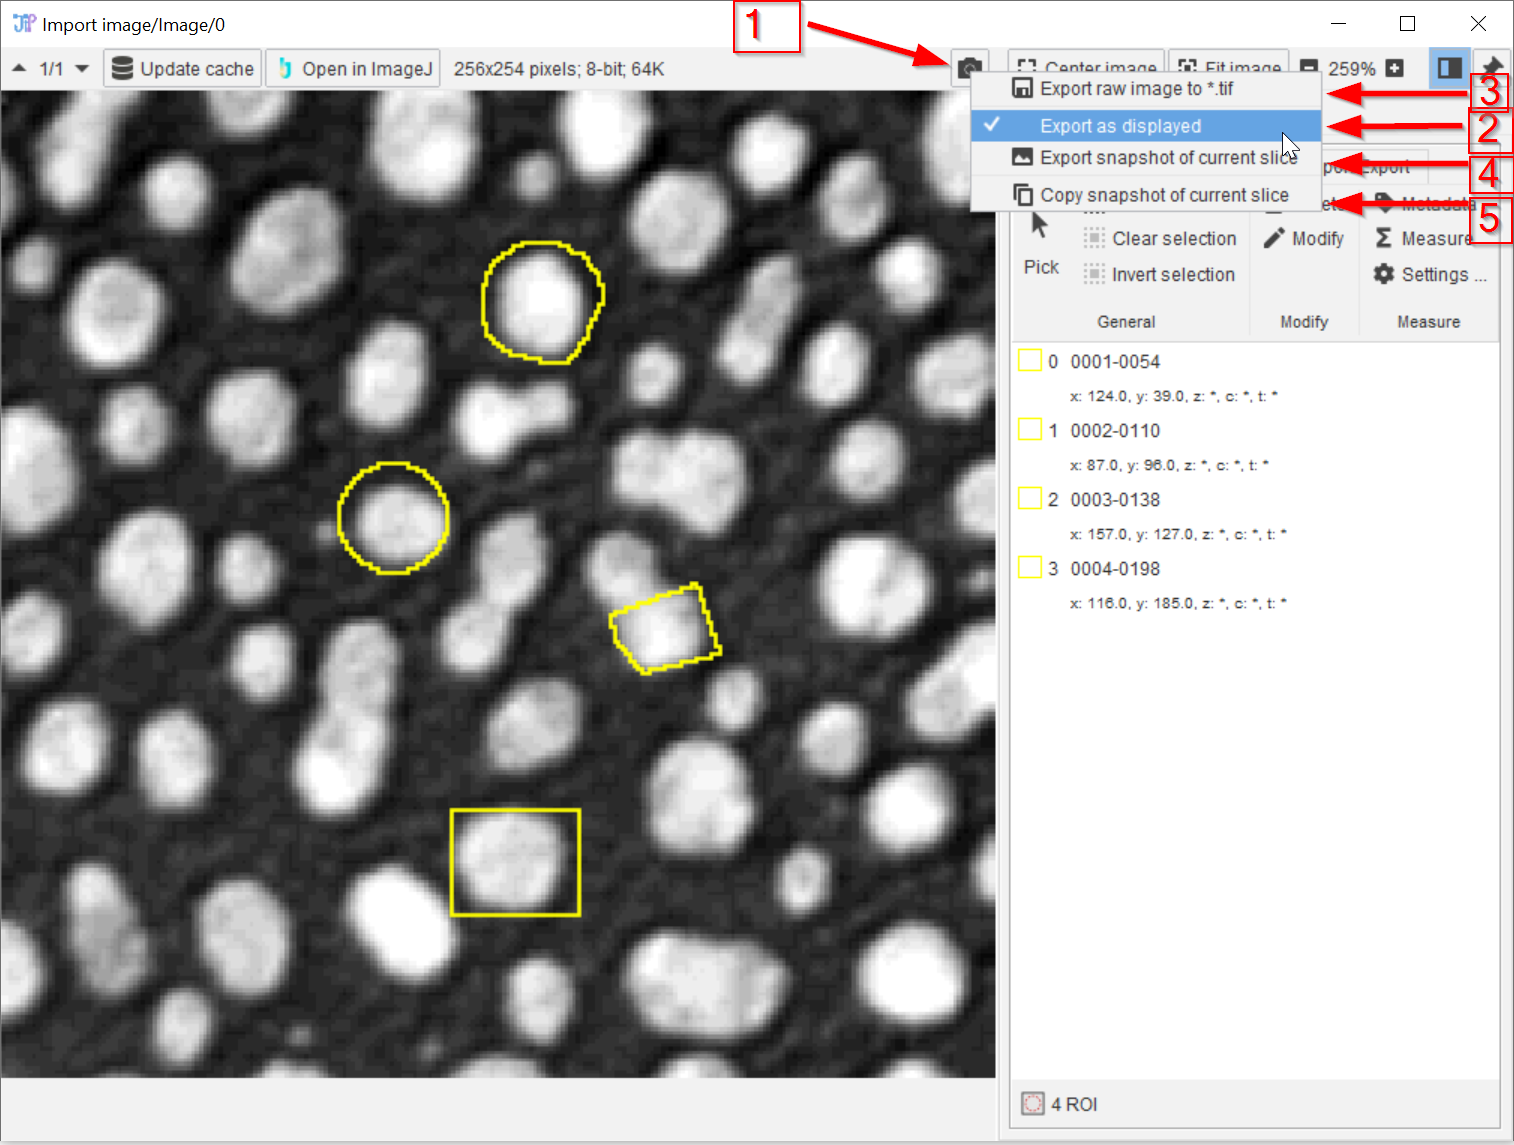
Step 7
Exporting the content of the image viewer is possible by clicking on the photo button (red arrow 1), and selecting the saving of the displayed image in a TIFF format (red arrow 3), or as-displayed (red arrow 2) in a PNG/JPEG/BMP format (red arrow 4), or by placing it in the system memory for copy-pasting into an image editor (red arrow 5).