


Preliminary steps
👉 This tutorial requires that you have installed node template Import images.
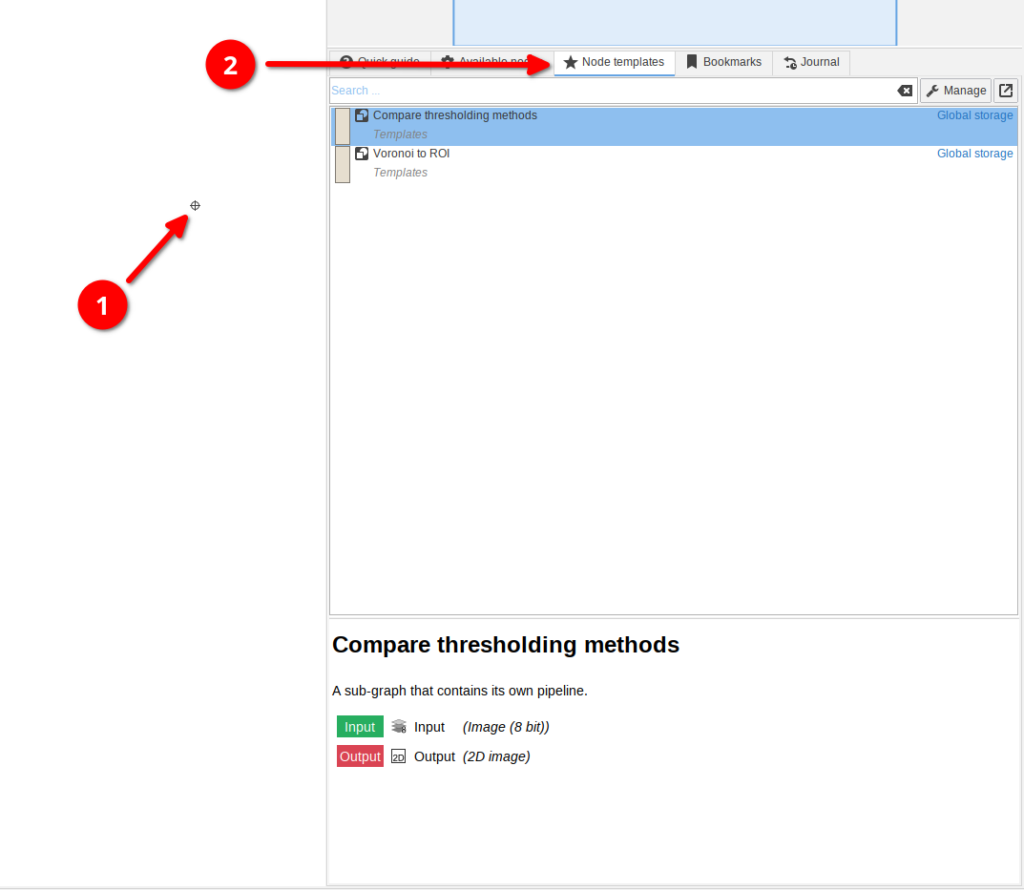
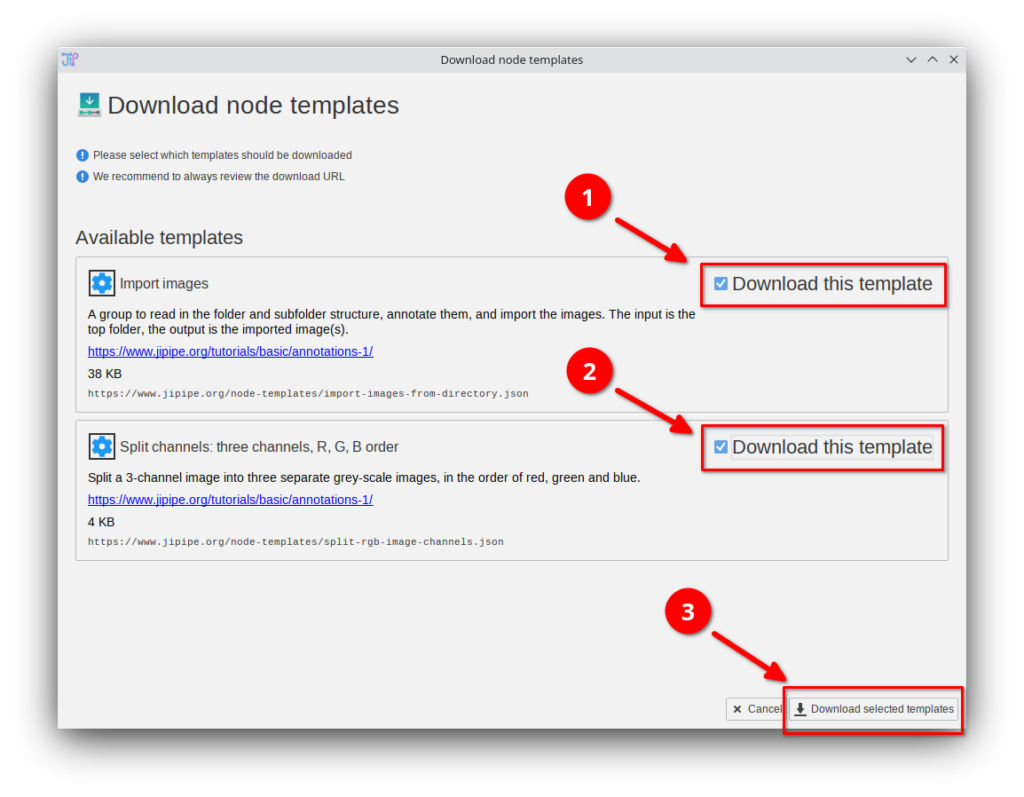
If you do not have these templates, you can download them via Manage > Download more templates or by importing the Templates.json file that is provided in the data package. If you do not know how to download or import node templates, please check out our tutorial.
Step 1
Create a new project with one compartment.
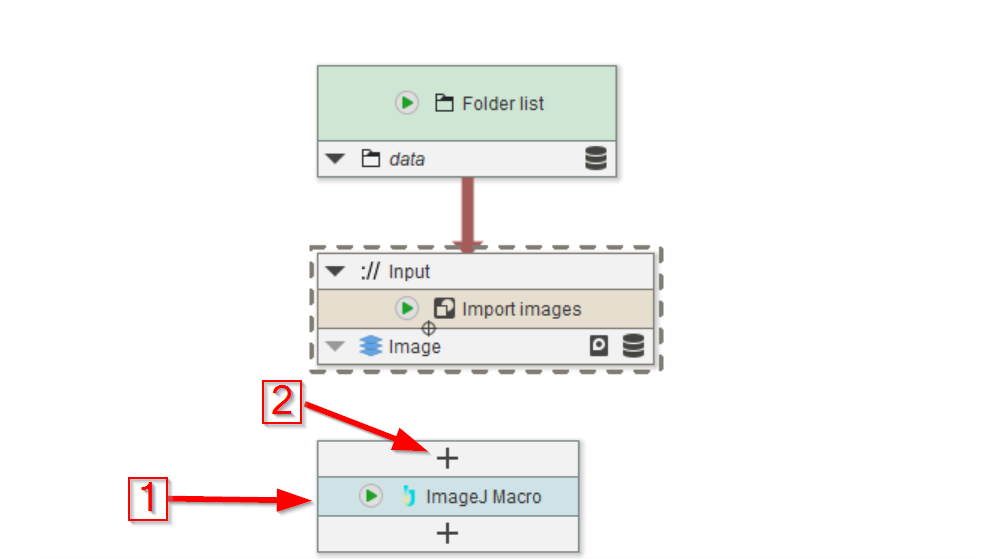
Drag the data folder of the tutorial to the UI.
Add the Import images template from the node templates list. Connect the output of the Folder list node to Import images.
Add an ImageJ Macro node to the UI (red arrow 1).
Here you could add a new input slot (red arrow 2) and configure the node manually, but we will instead load an example for convenience reasons.

Step 2
In the macro node (red arrow 1), choose the Examples tab (red arrow 2) and select the option Input and output an image (red arrow 3).
It will auto-configure the node with one image input and one image output, as well as provide a convenient scaffold for adding custom macro code.
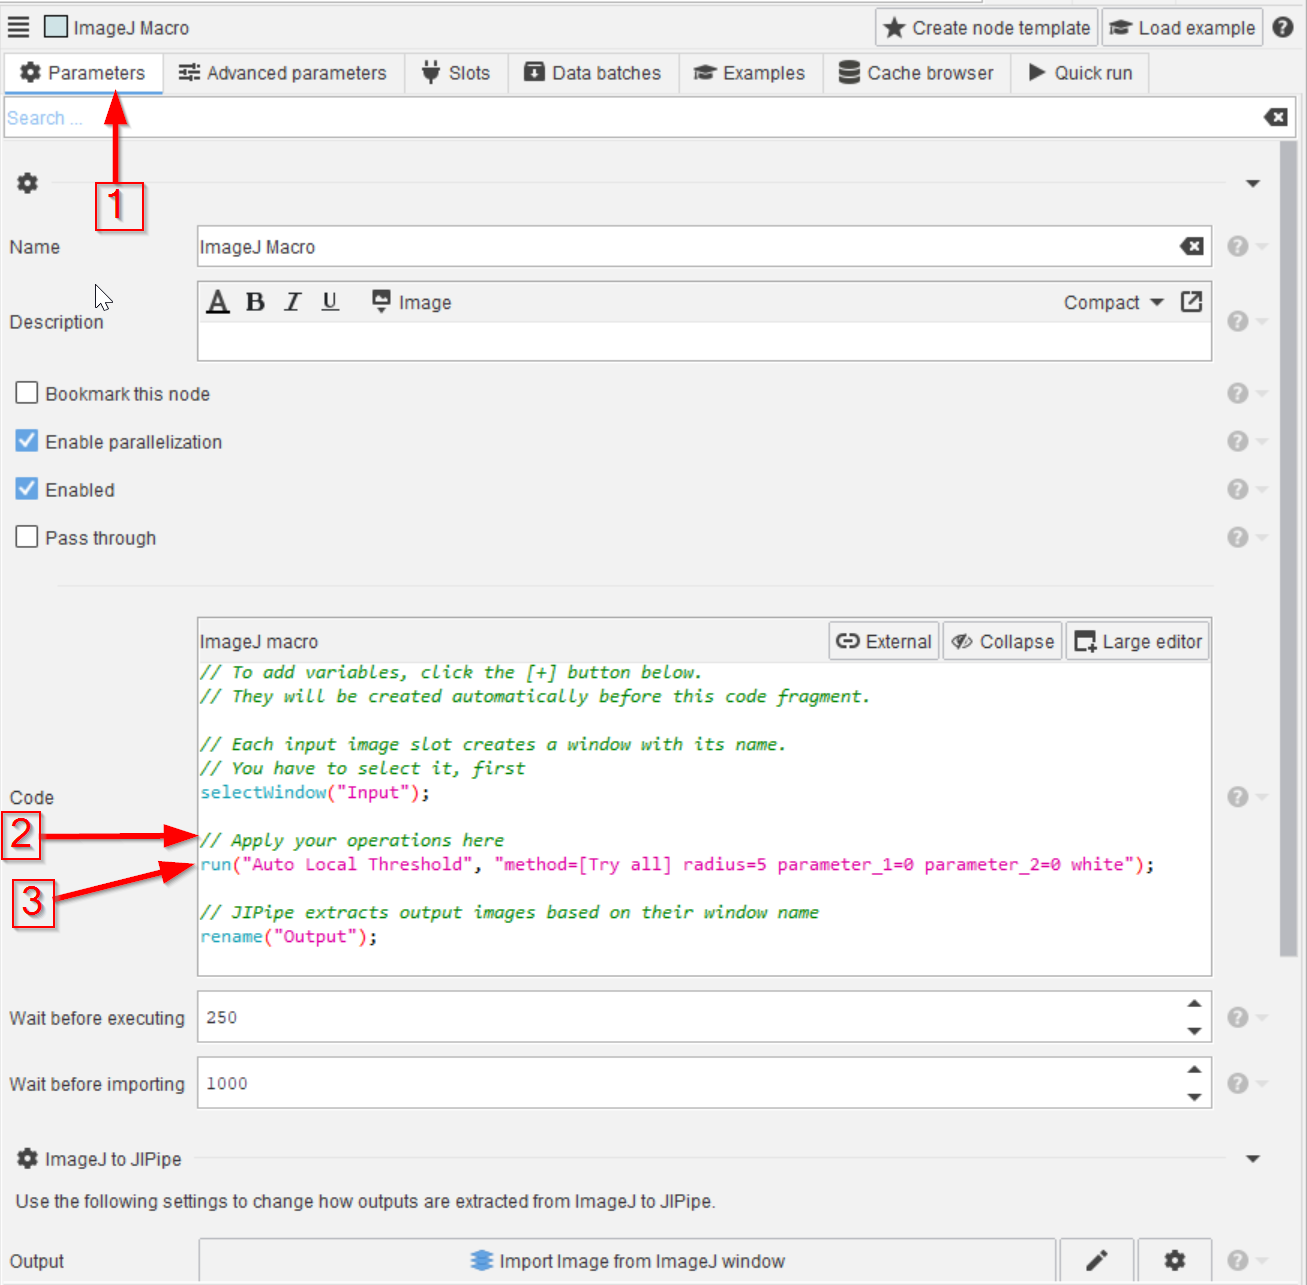
Step 3
Go back to Parameters (red arrow 1) and add the following macro code to the indicated place (red arrow 2) that needs to be executed here (red arrow 3):
run("Auto Local Threshold",
"method=[Try all] radius=5 parameter_1=0 parameter_2=0 white")
This example macro executes the 15 local thresholding methods of ImageJ on the blob image, using a radius of 5.
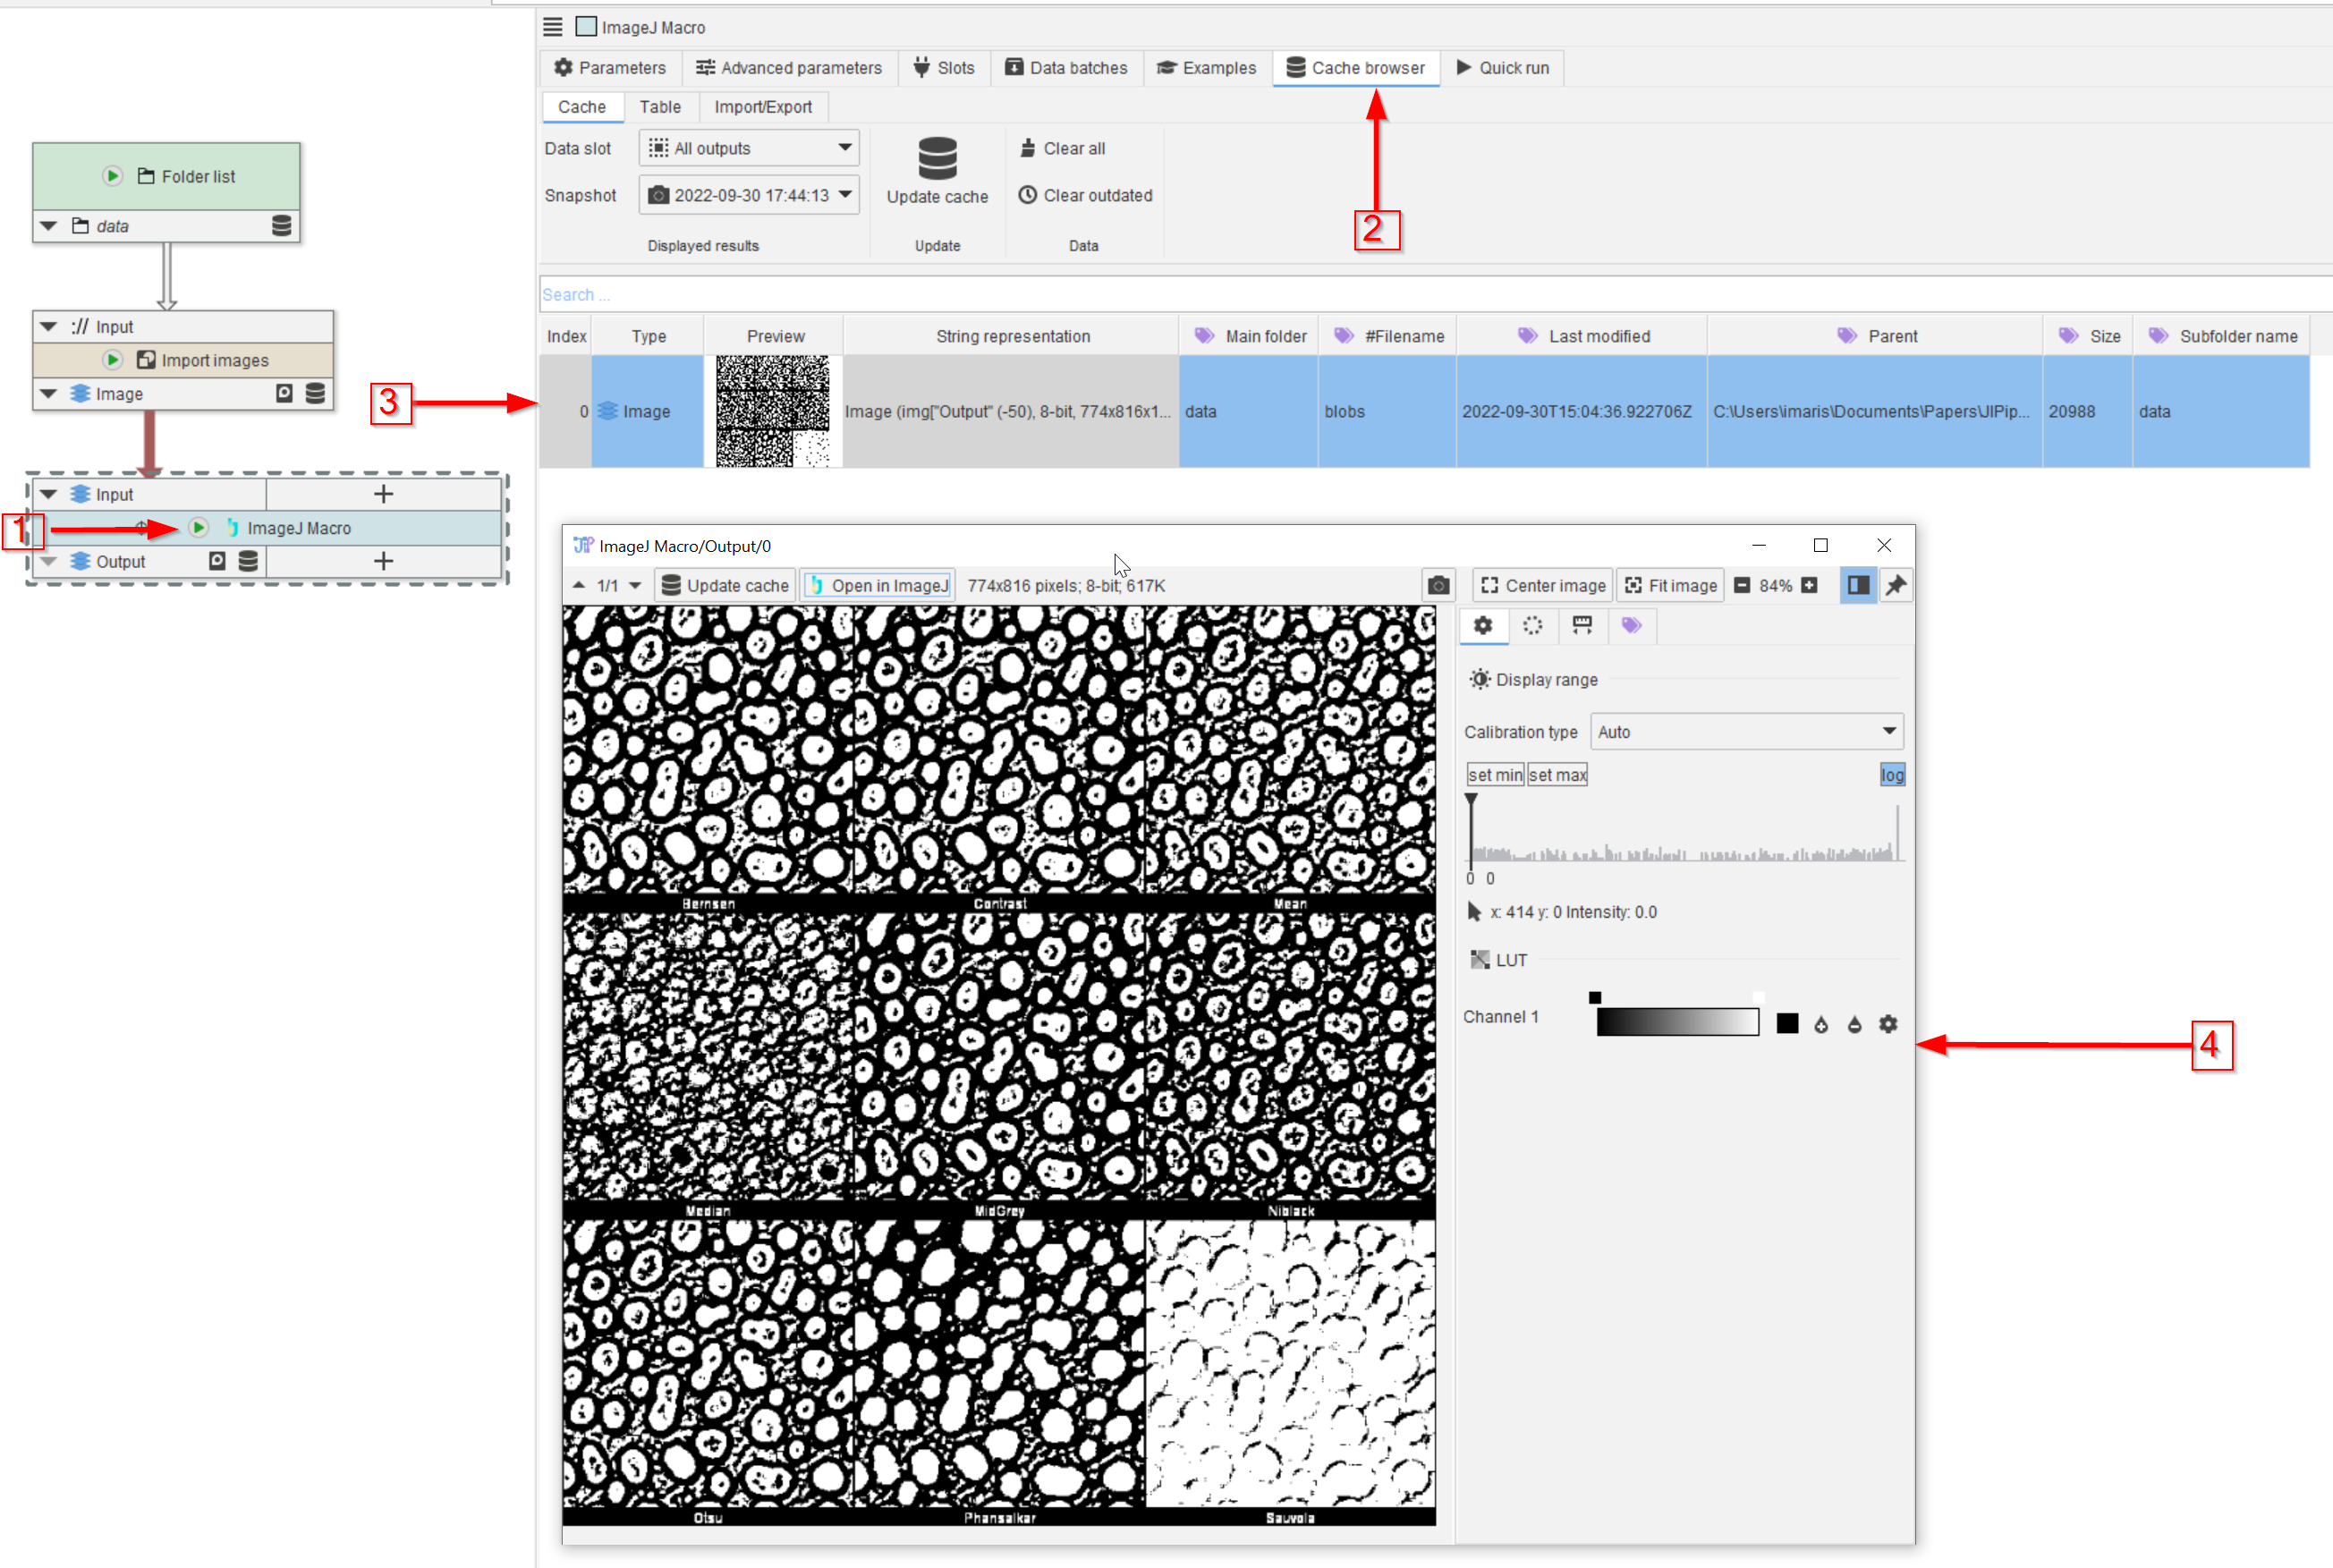
Step 4
Go back to Parameters (red arrow 1) and add the following macro code to the indicated place (red arrow 2) that needs to be executed here (red arrow 3):
run("Auto Local Threshold",
"method=[Try all] radius=5 parameter_1=0 parameter_2=0 white")
This example macro executes the 15 local thresholding methods of ImageJ on the blob image, using a radius of 5.
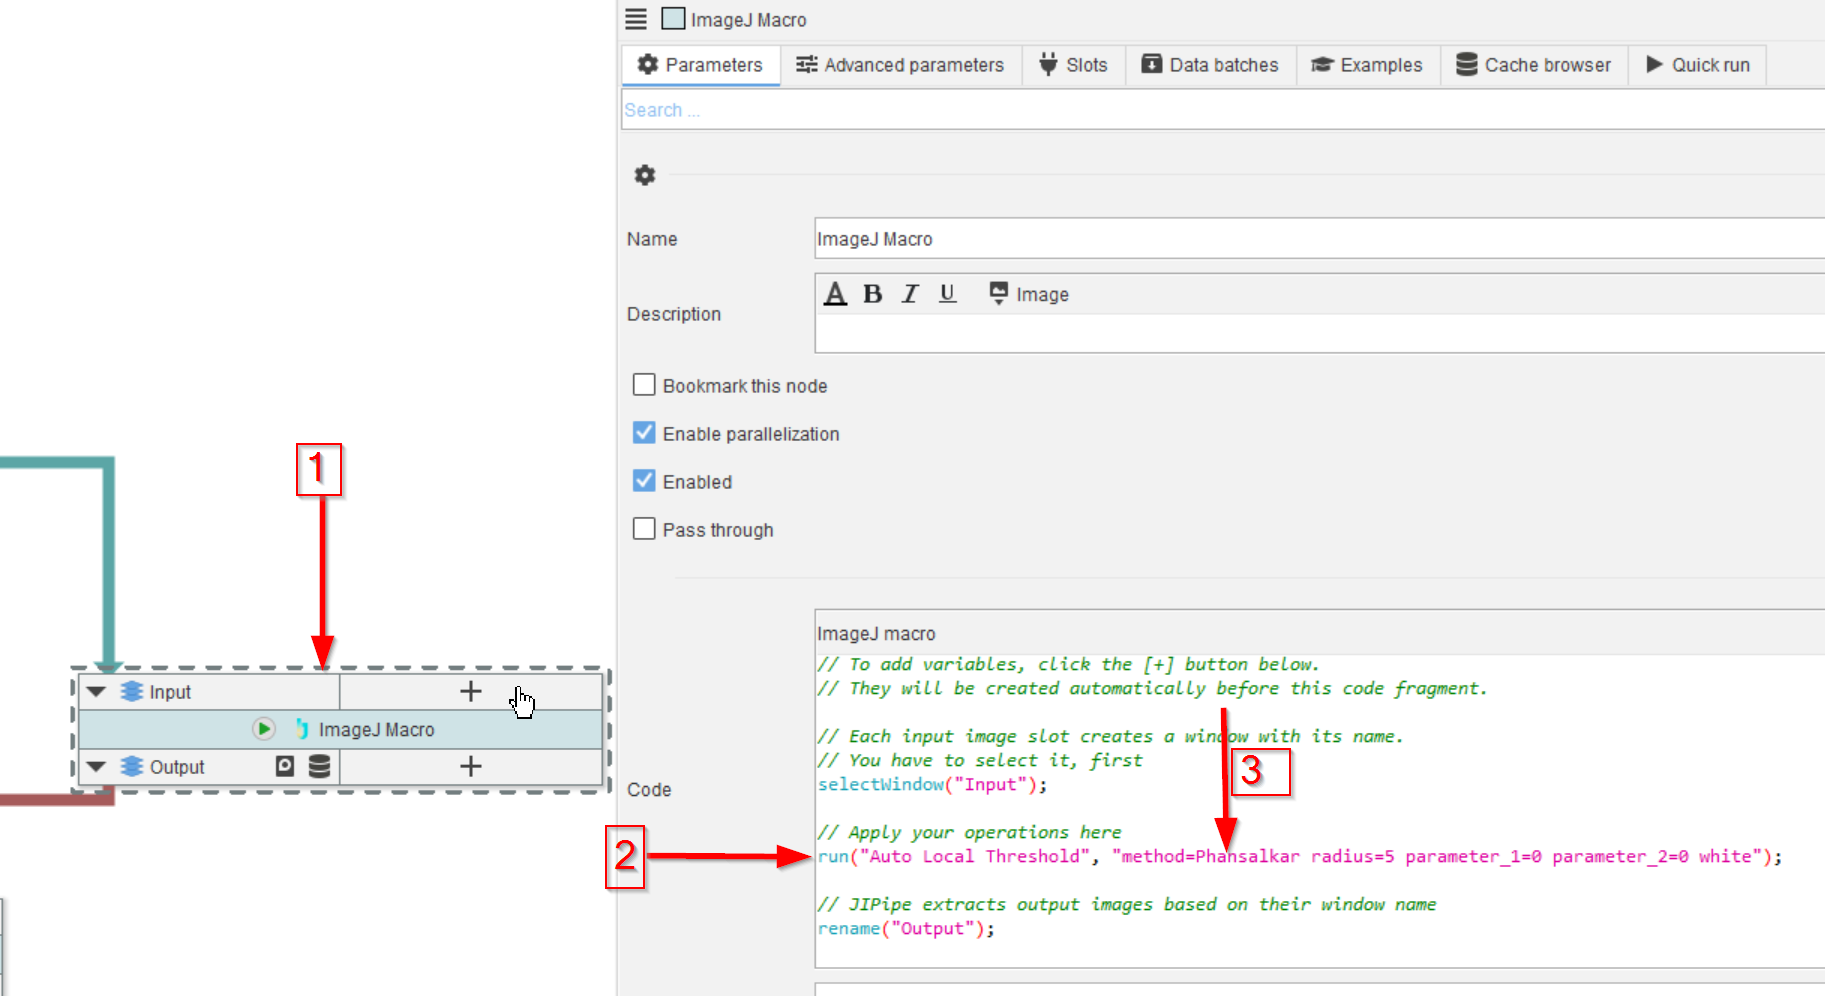
Step 5
Now we build-in another macro node, this time we will only use the Phansalkar method, as this is judged to be the most successful thresholding method after examining the output of the first macro node. The new node (red arrow 1) was set up as the first one, the macro code (red arrow 2) will run this specific method only (red arrow 3).
run("Auto Local Threshold",
"method=Phansalkar radius=5 parameter_1=0 parameter_2=0 white")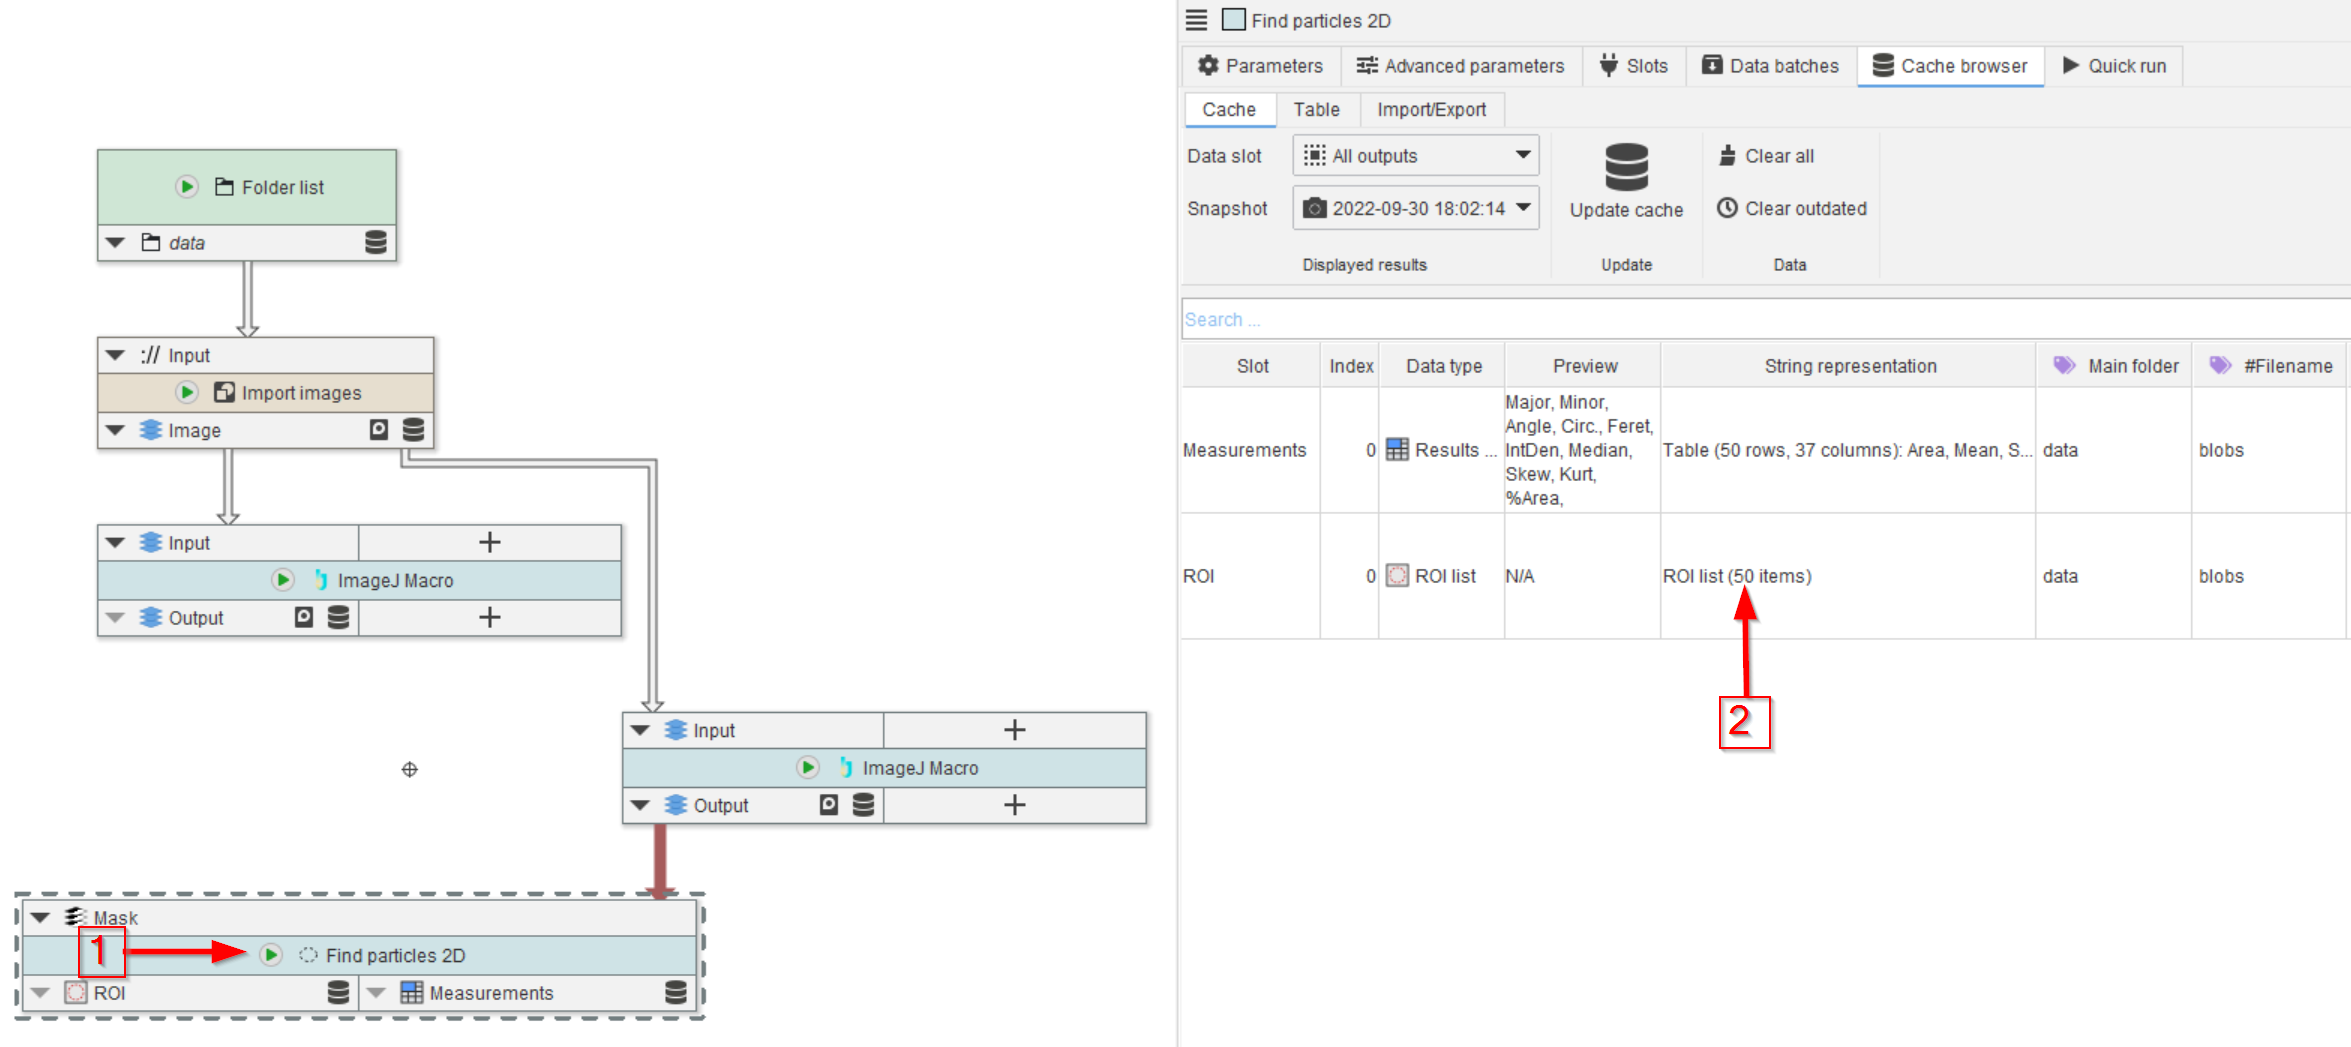
Step 6
After running the particle finder node (red arrow 1), the local thresholding method finds 50 blobs (red arrow 2).

Step 7
The quality of the segmentation can be observed by adding a visualization node as shown before (red arrow 1), where the cache entry (red arrow 2) indicates a good match between the raw image and the segmentation when observed in a viewer (red arrow 3).