Intermediate tutorials

Grouping nodes (1/2)

Summary

Explains how to group a set of nodes into a single group node

Tutorial data

This tutorial has accompanying data. Please download the data if you want to follow the guide.

Step 1

Open the project file assigned to this tutorial.

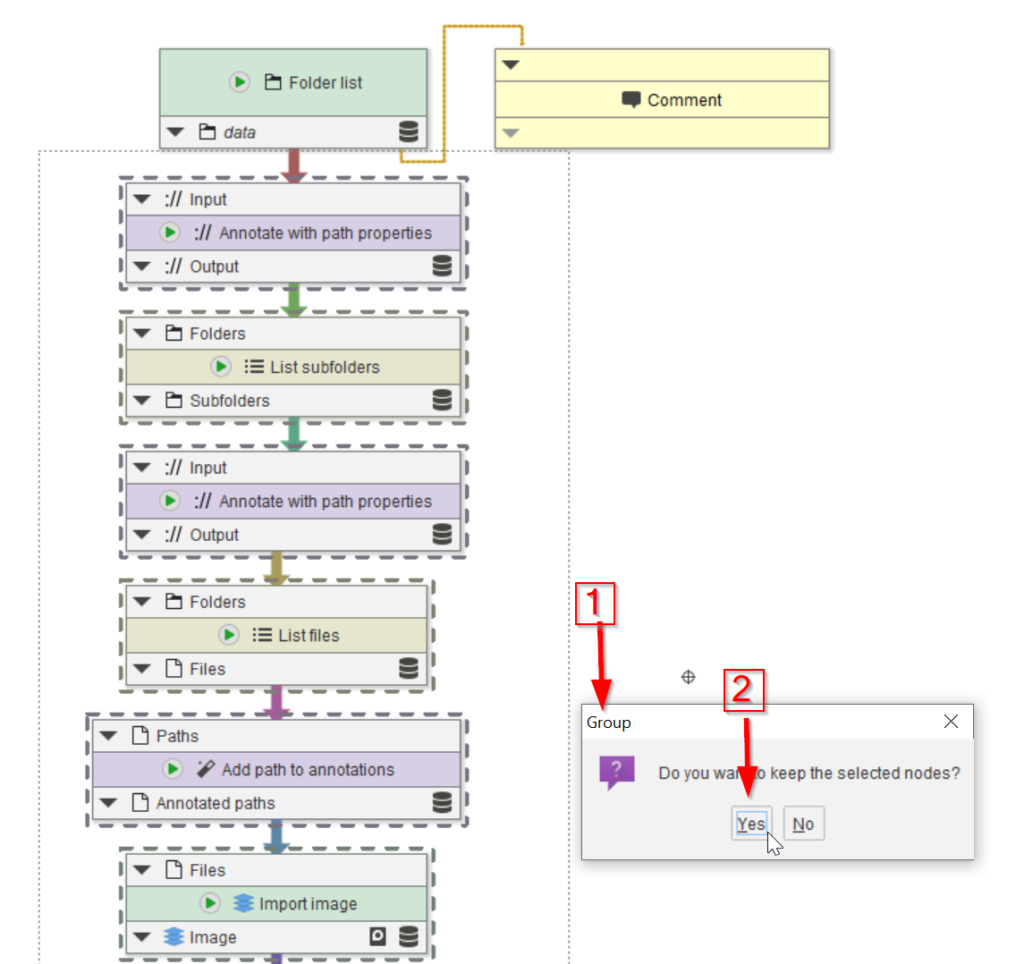
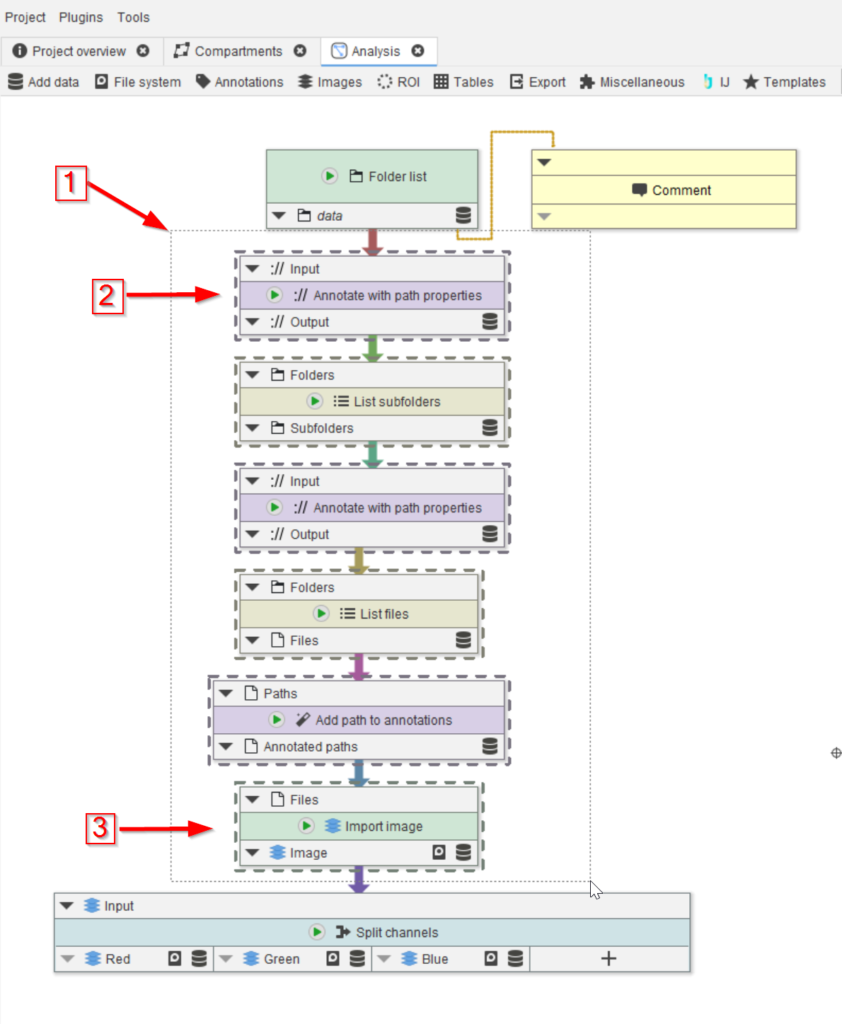
On the GUI, draw around a group of nodes using the mouse with the left button down (red arrow 1), resulting in the nodes inside the dotted rectangle to be selected (first selected node: red arrow 2, last selected node: red arrow 3).

Step 3

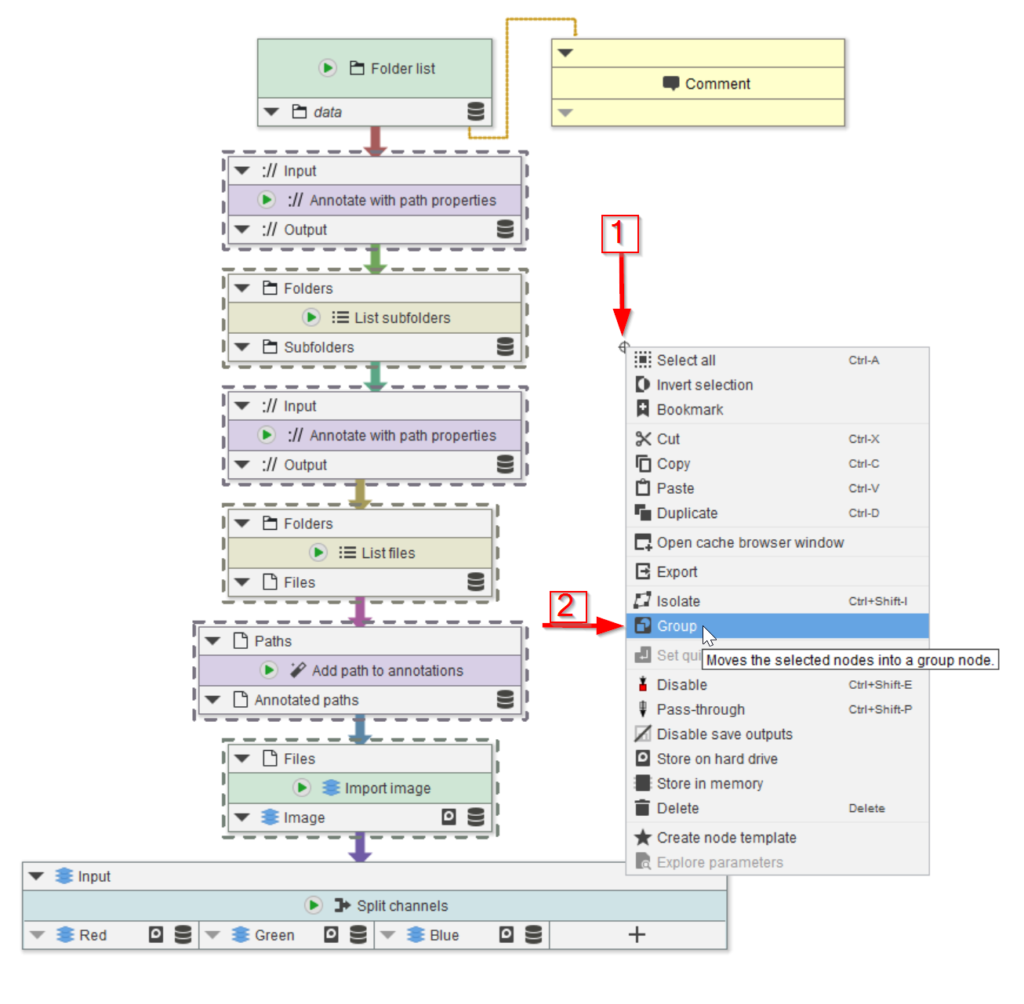
The group dialogue window (red arrow 1) will allow to choose between keeping the original nodes (red arrow 2) or not; for now, we will keep the original nodes, so as to be able to compare the outcome of the group with that of the original node array.

Step 4

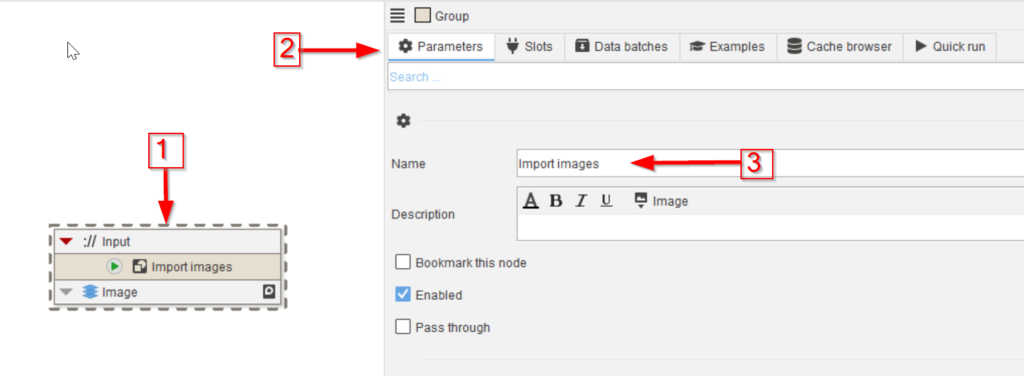
Select the new group node (red arrow 1), go to Parameters (red arrow 2) and change the name from the original Group to a more meaningful name (red arrow 3).

Step 5

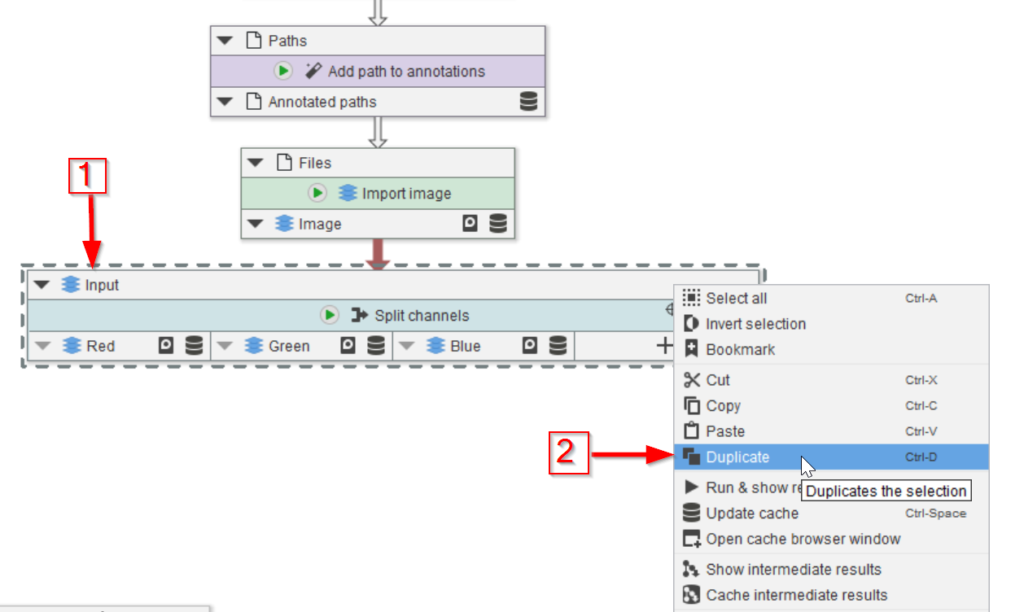
In order to use the new group node, we will connect it to the nodes preceding and proceeding the individual file reading nodes. Select the Split channels node (red arrow 1) and duplicate it (red arrow 2).
Step 6

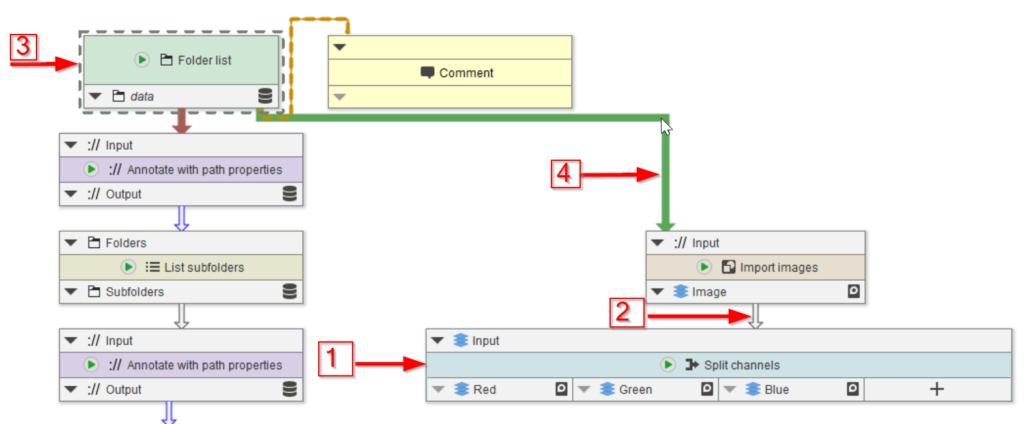
Move the duplicated node (red arrow 1) below the group node and connect them (red arrow 2). Now select the Folder list node (red arrow 3) and connect it to the group nodes (red arrow 4).

Step 7

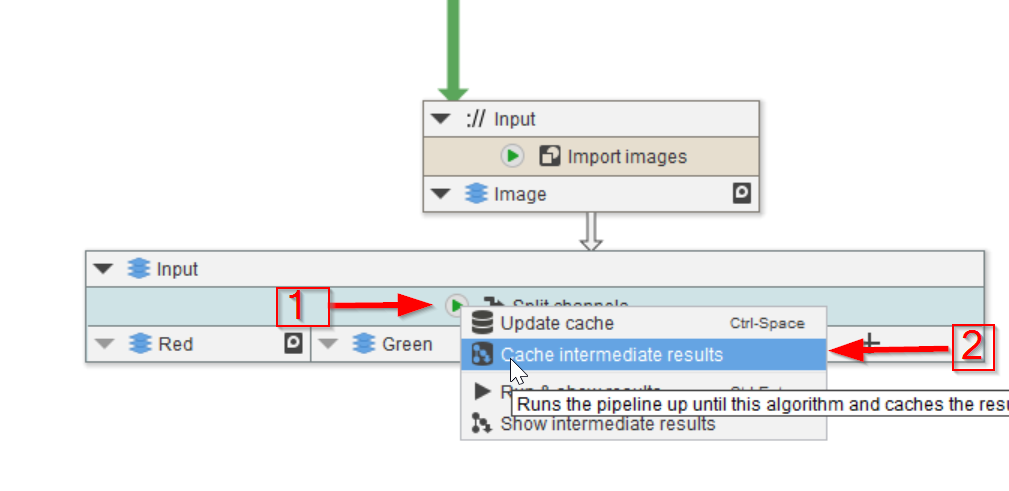
Run the Split channels node (red arrows 1 and 2).

Step 8

Observer the cache (red arrow 1). The outcome is the same as it was after executing the individual nodes (red line 2).

Step 9

After having run the Split channels node (red arrow 1), observing the cache will show the resulting three channels (red line 2).