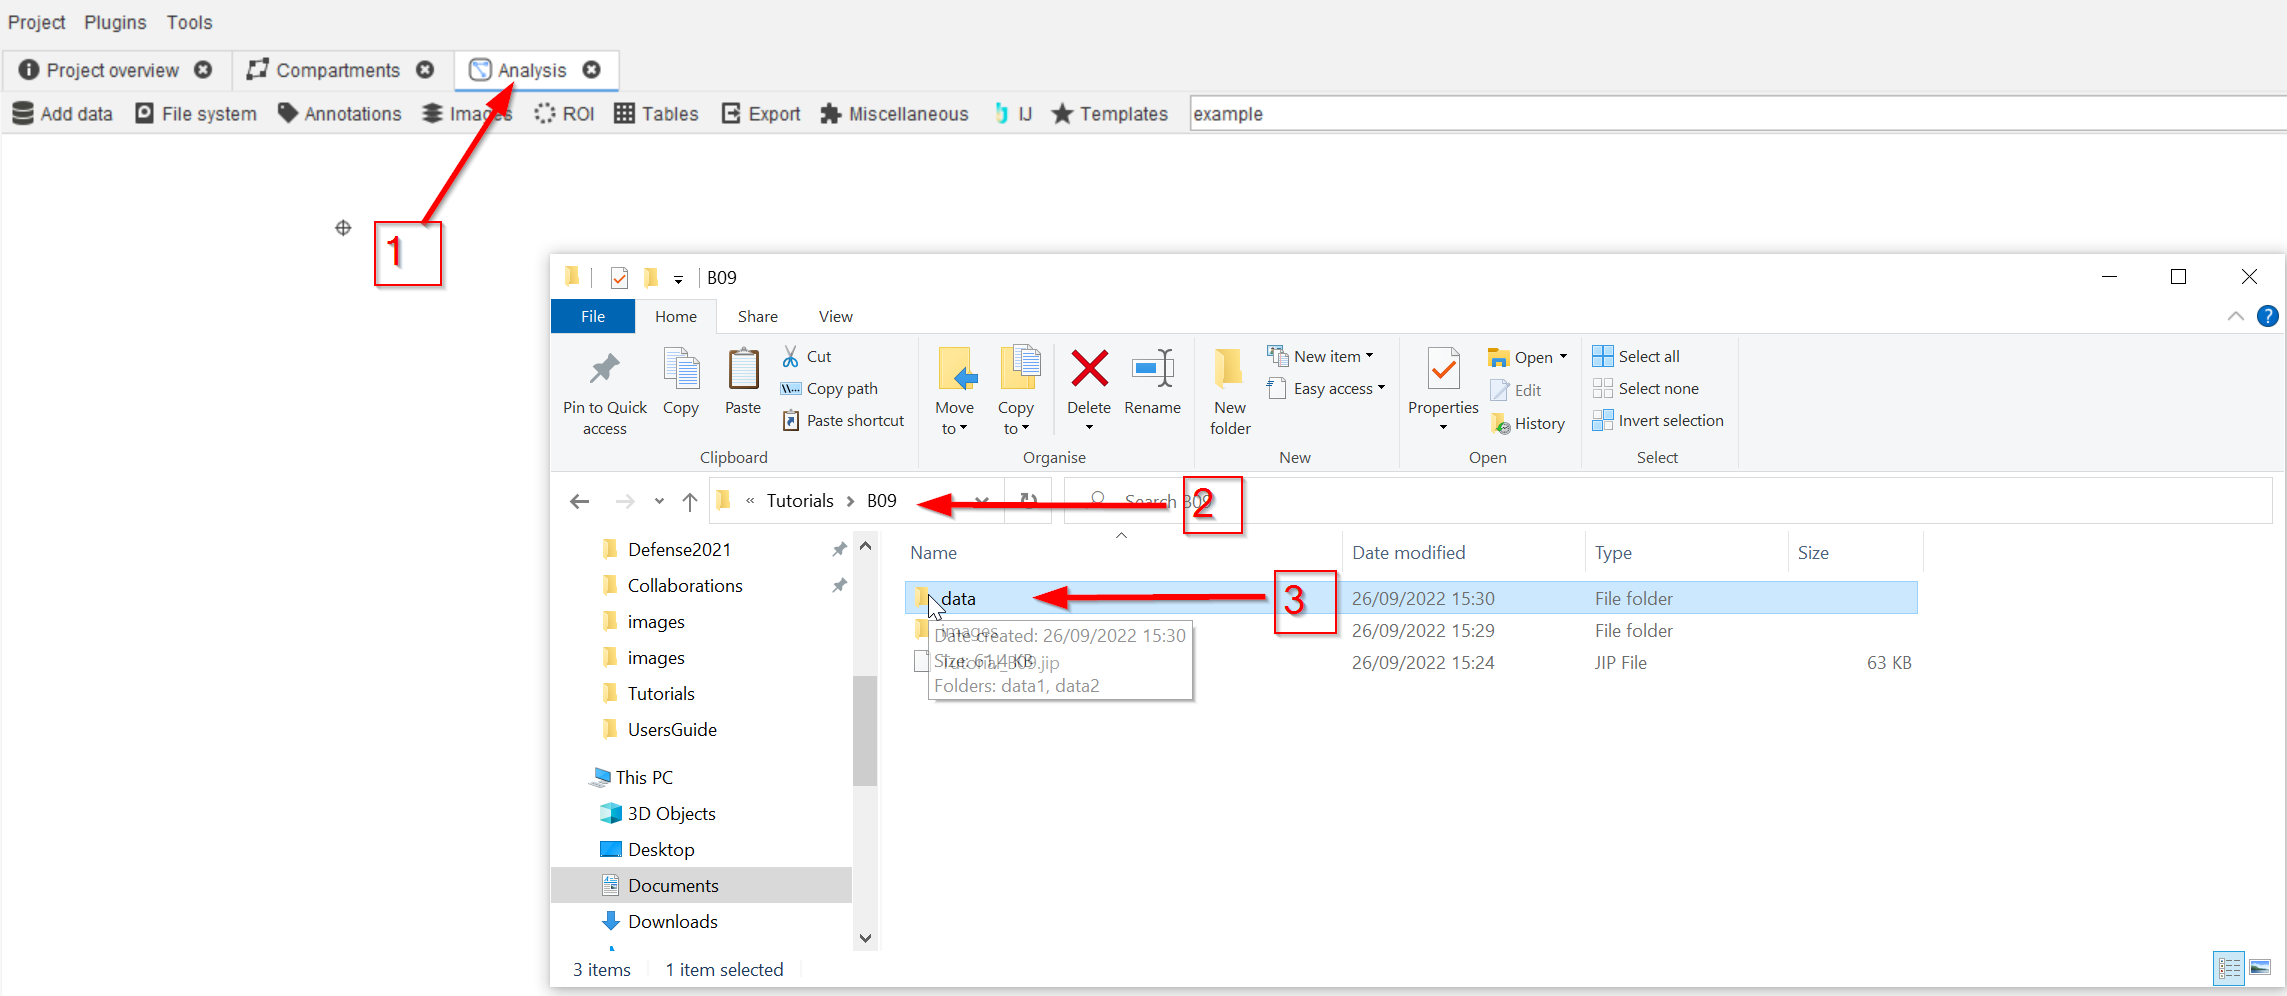
Step 1
Create a new project file based on the one-compartment template and go to the Analysis compartment (red arrow 1). In the system file explorer, navigate to the tutorial folder after downloading it (red arrow 2) and find the data folder (red arrow 3).
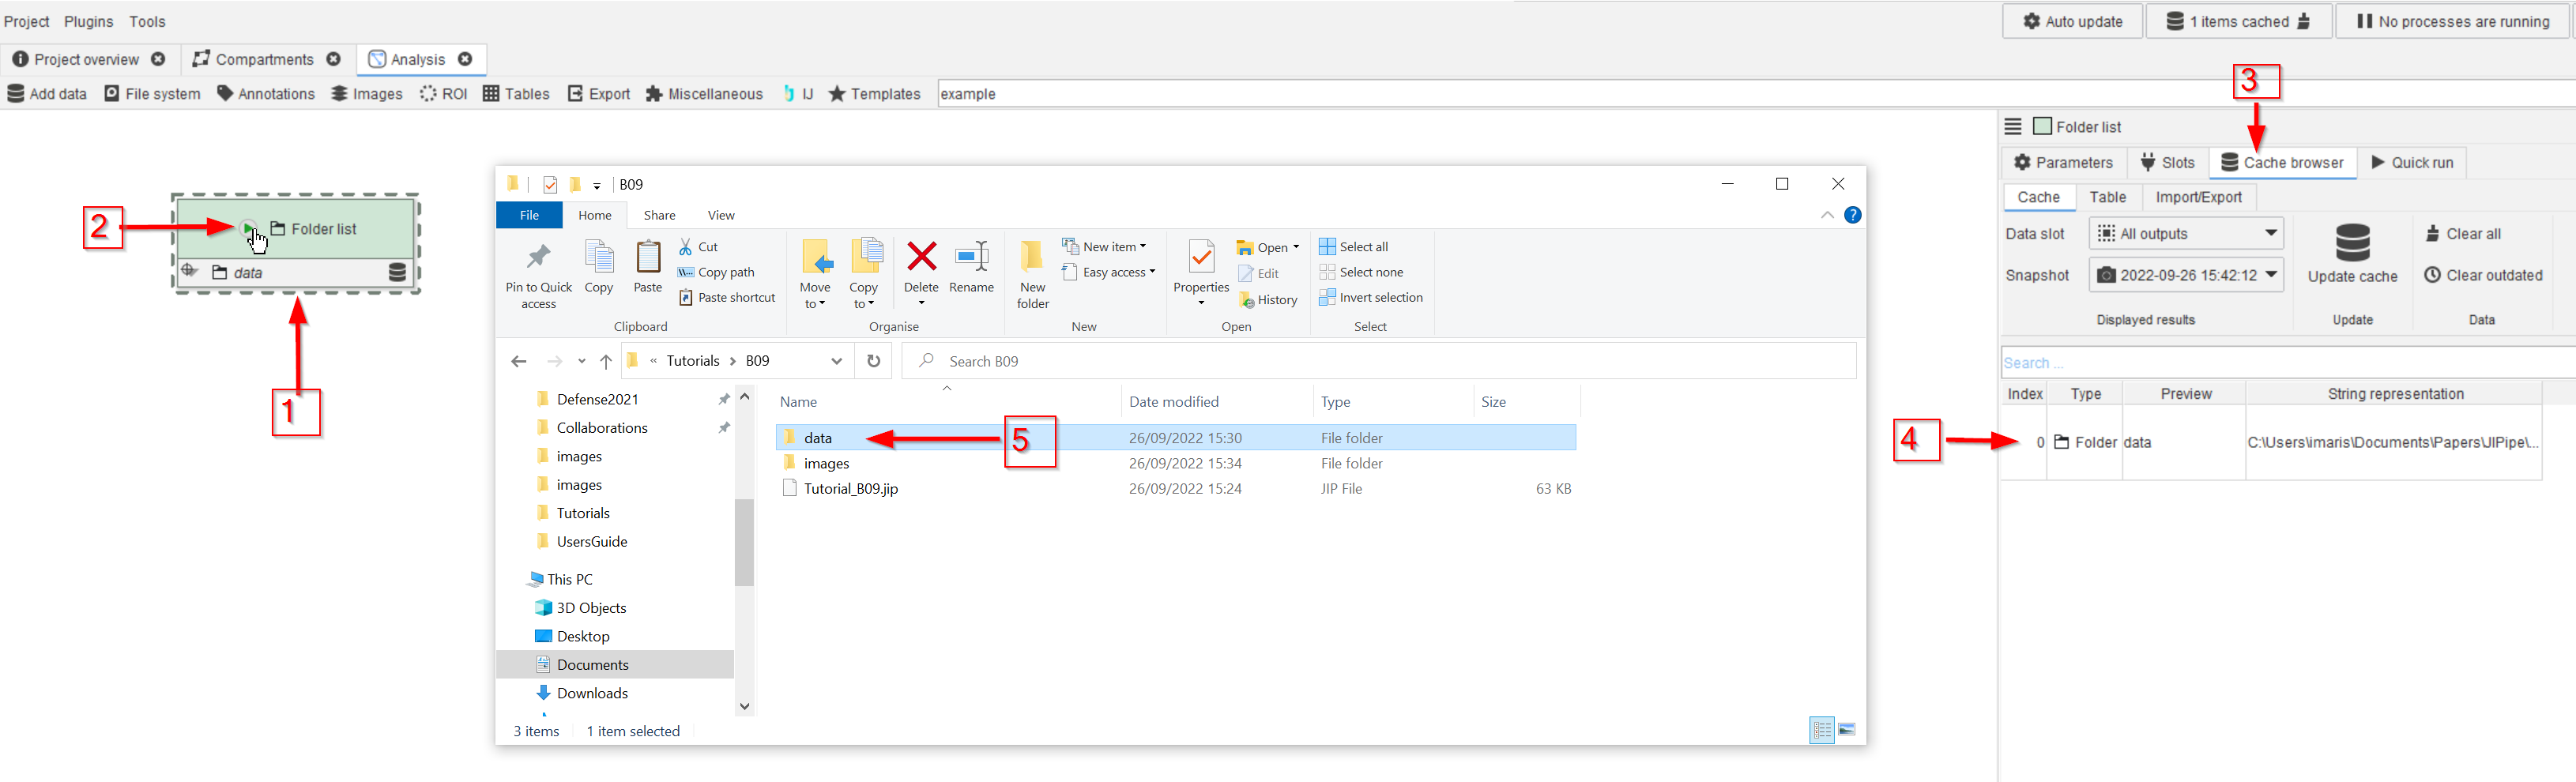
Step 2
Drag the data folder to the GUI (red arrow 1) and run the node (red arrow 2). Go to the Cache browser (red arrow 3) and observe the entry, which corresponds to the newly added folder. Double-clicking the cache entry will open the folder in the file explorer (red arrow 5).
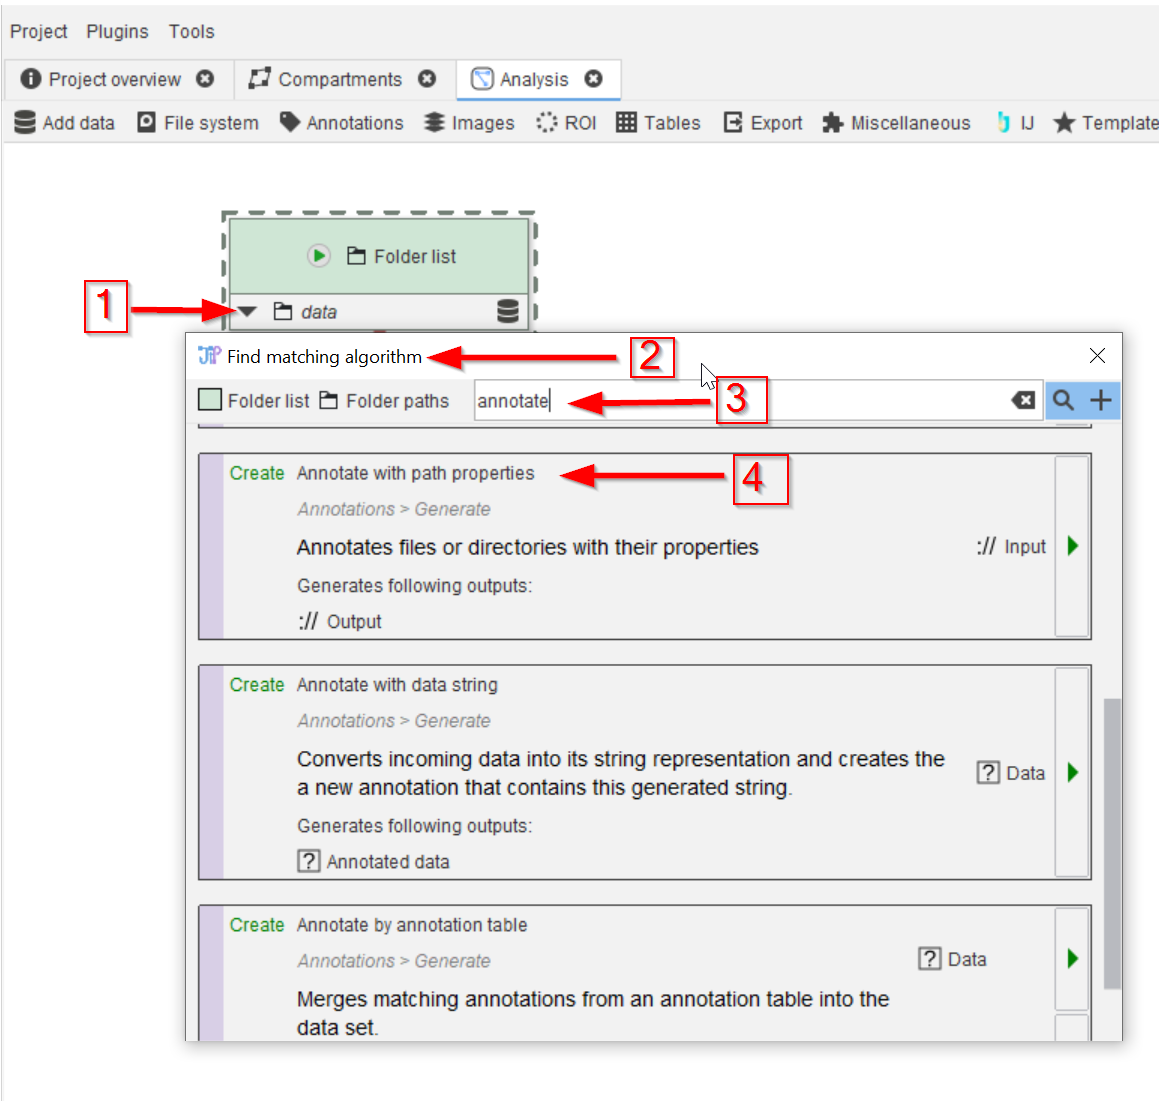
Step 3
Use the Find matching algorithm option (red arrows 1 and 2) to look for annotation nodes (red arrow 3) that are compatible with the folder node, and choose the Annotate with path properties node (red arrow 4)
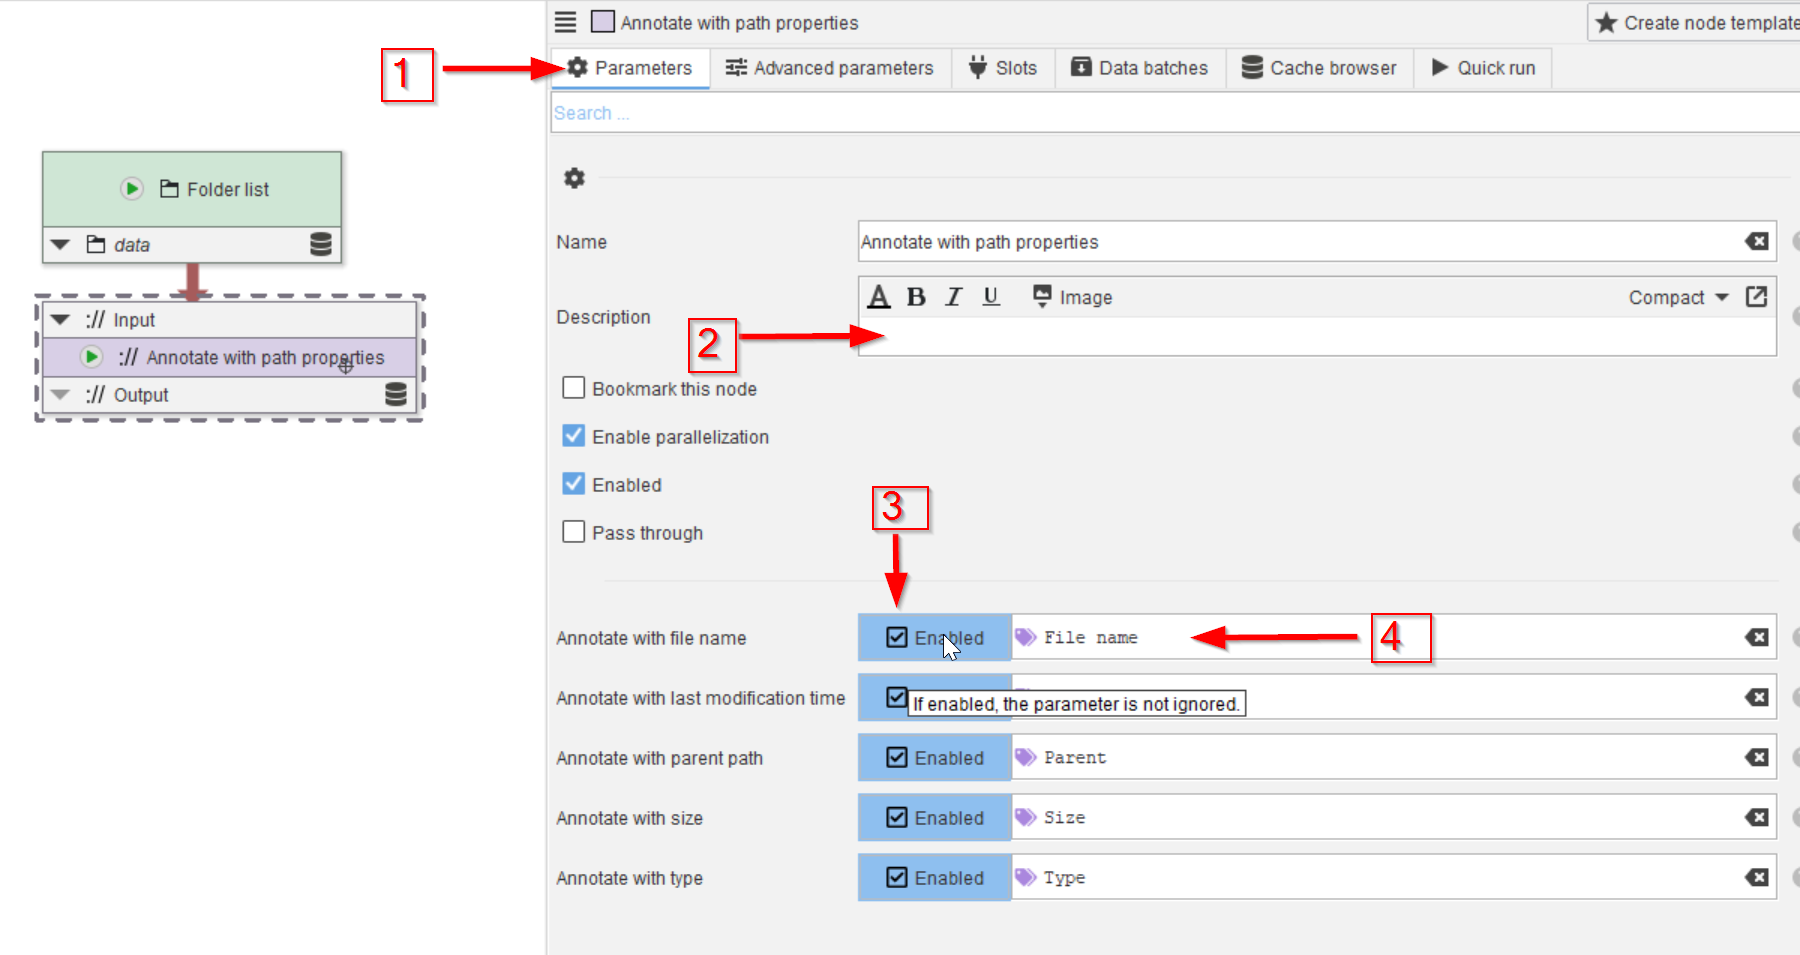
Step 4
In the Parameters tab (red arrow 1) a description can be added to clarify the role of the node (red arrow 2), and the path properties that need to be added to the annotations can be chosen (red arrow 3). The checkboxes are all set by default. The parameter names are listed as they can be referred to later in the processing, when we rely on the annotations (red arrow 4).
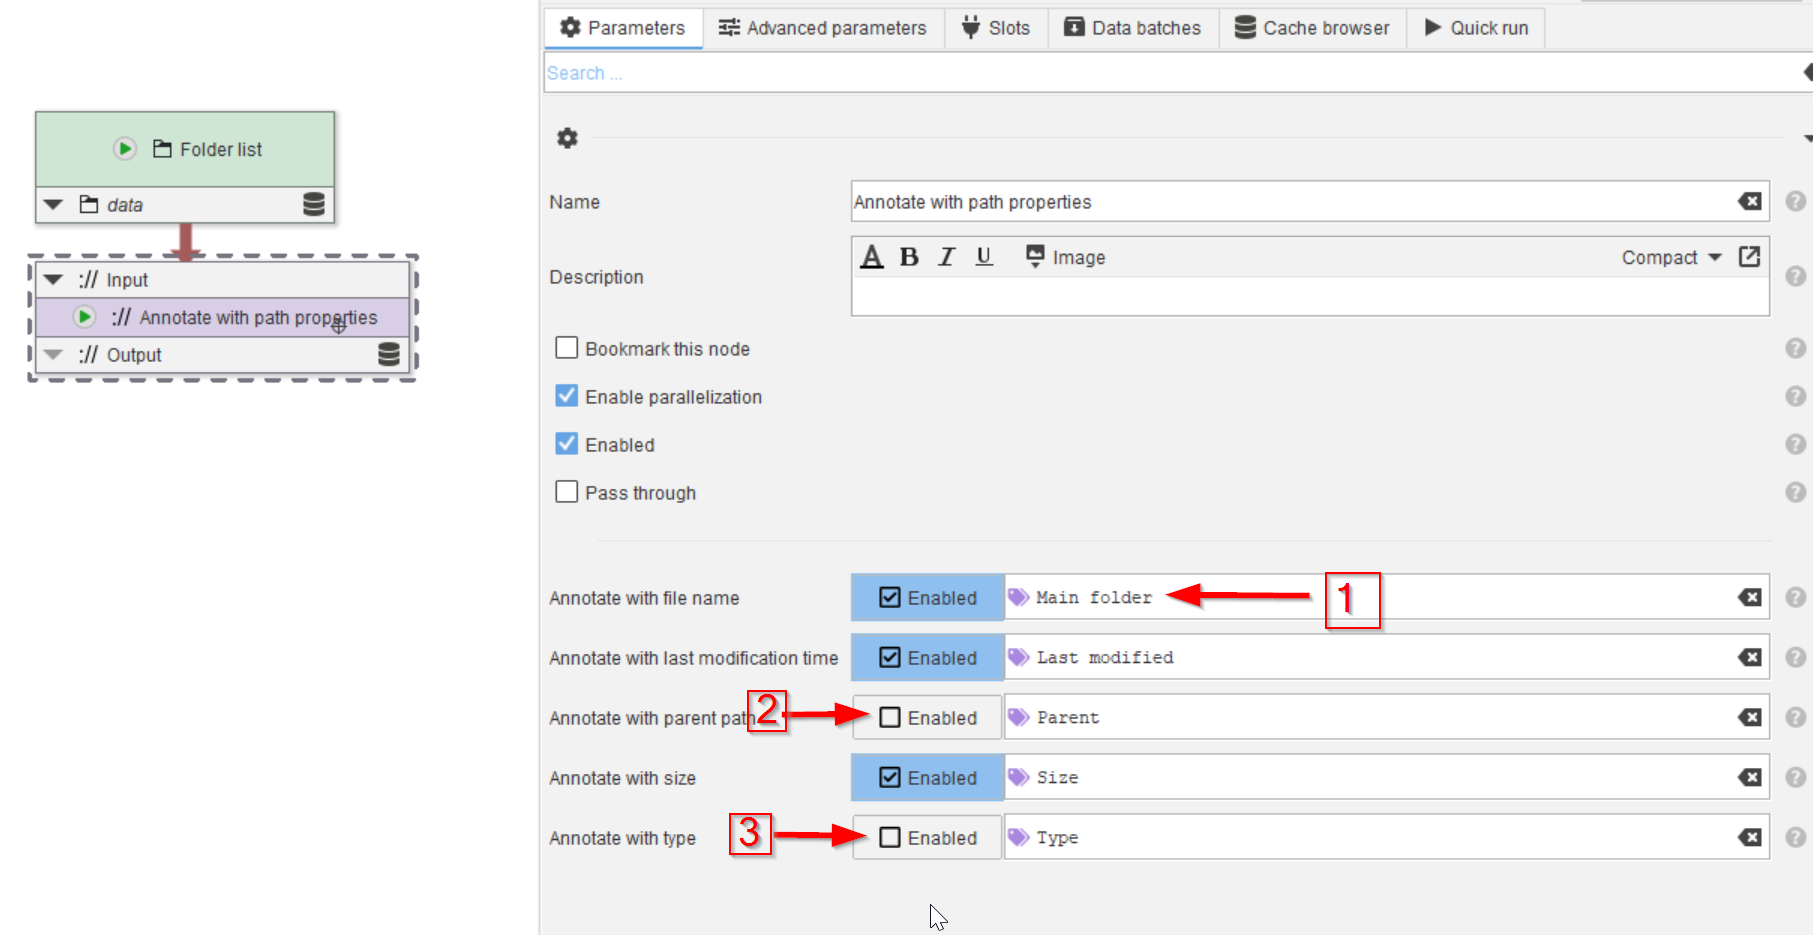
Step 5
These names can also be changed to something easier to remember, or more specific. In this case, we will call this the Main folder (red arrow 1), and we will turn off the Parent and Type annotations (red arrows 2, 3), as they are at this time unnecessary
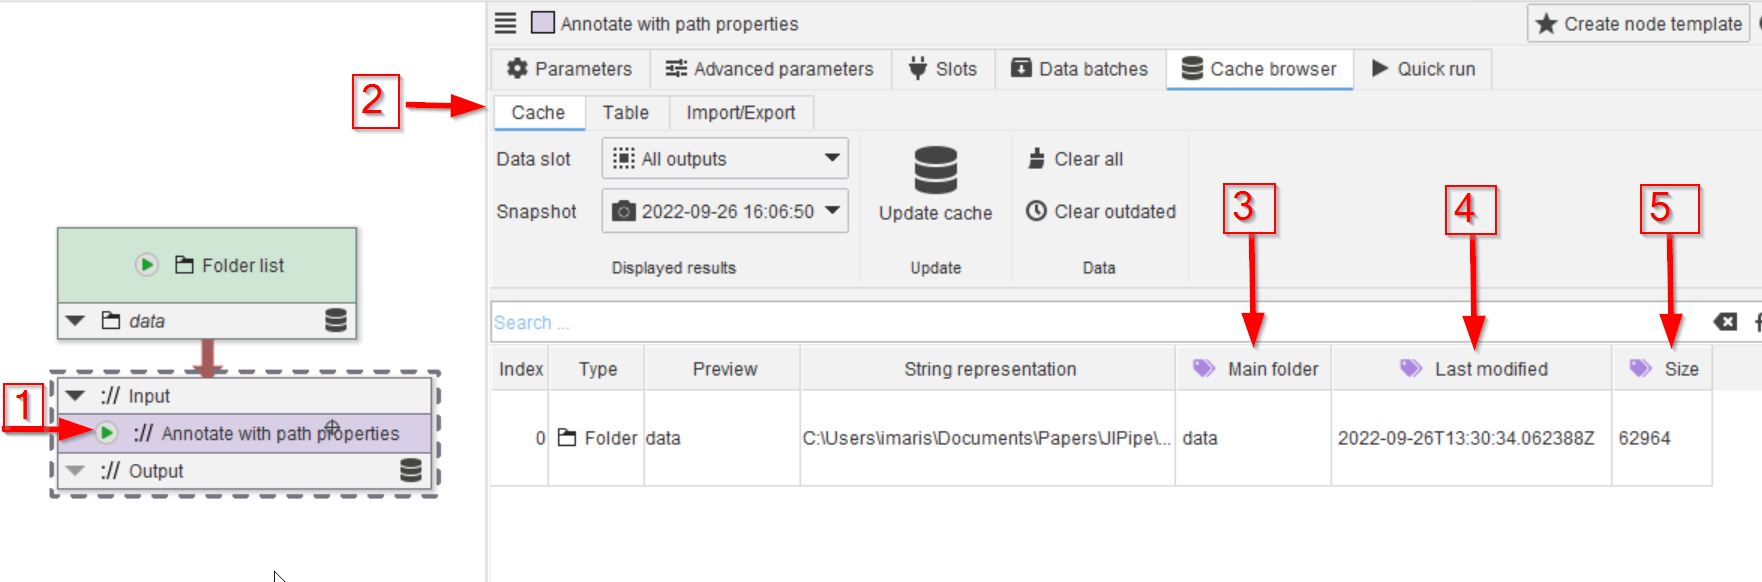
Step 6
Run the annotation node with the Cache intermediate results option (red arrow 1) and observe the cache (red arrow 2). The newly added annotations now appear in purple-labelled columns (red arrows 3, 4, 5).
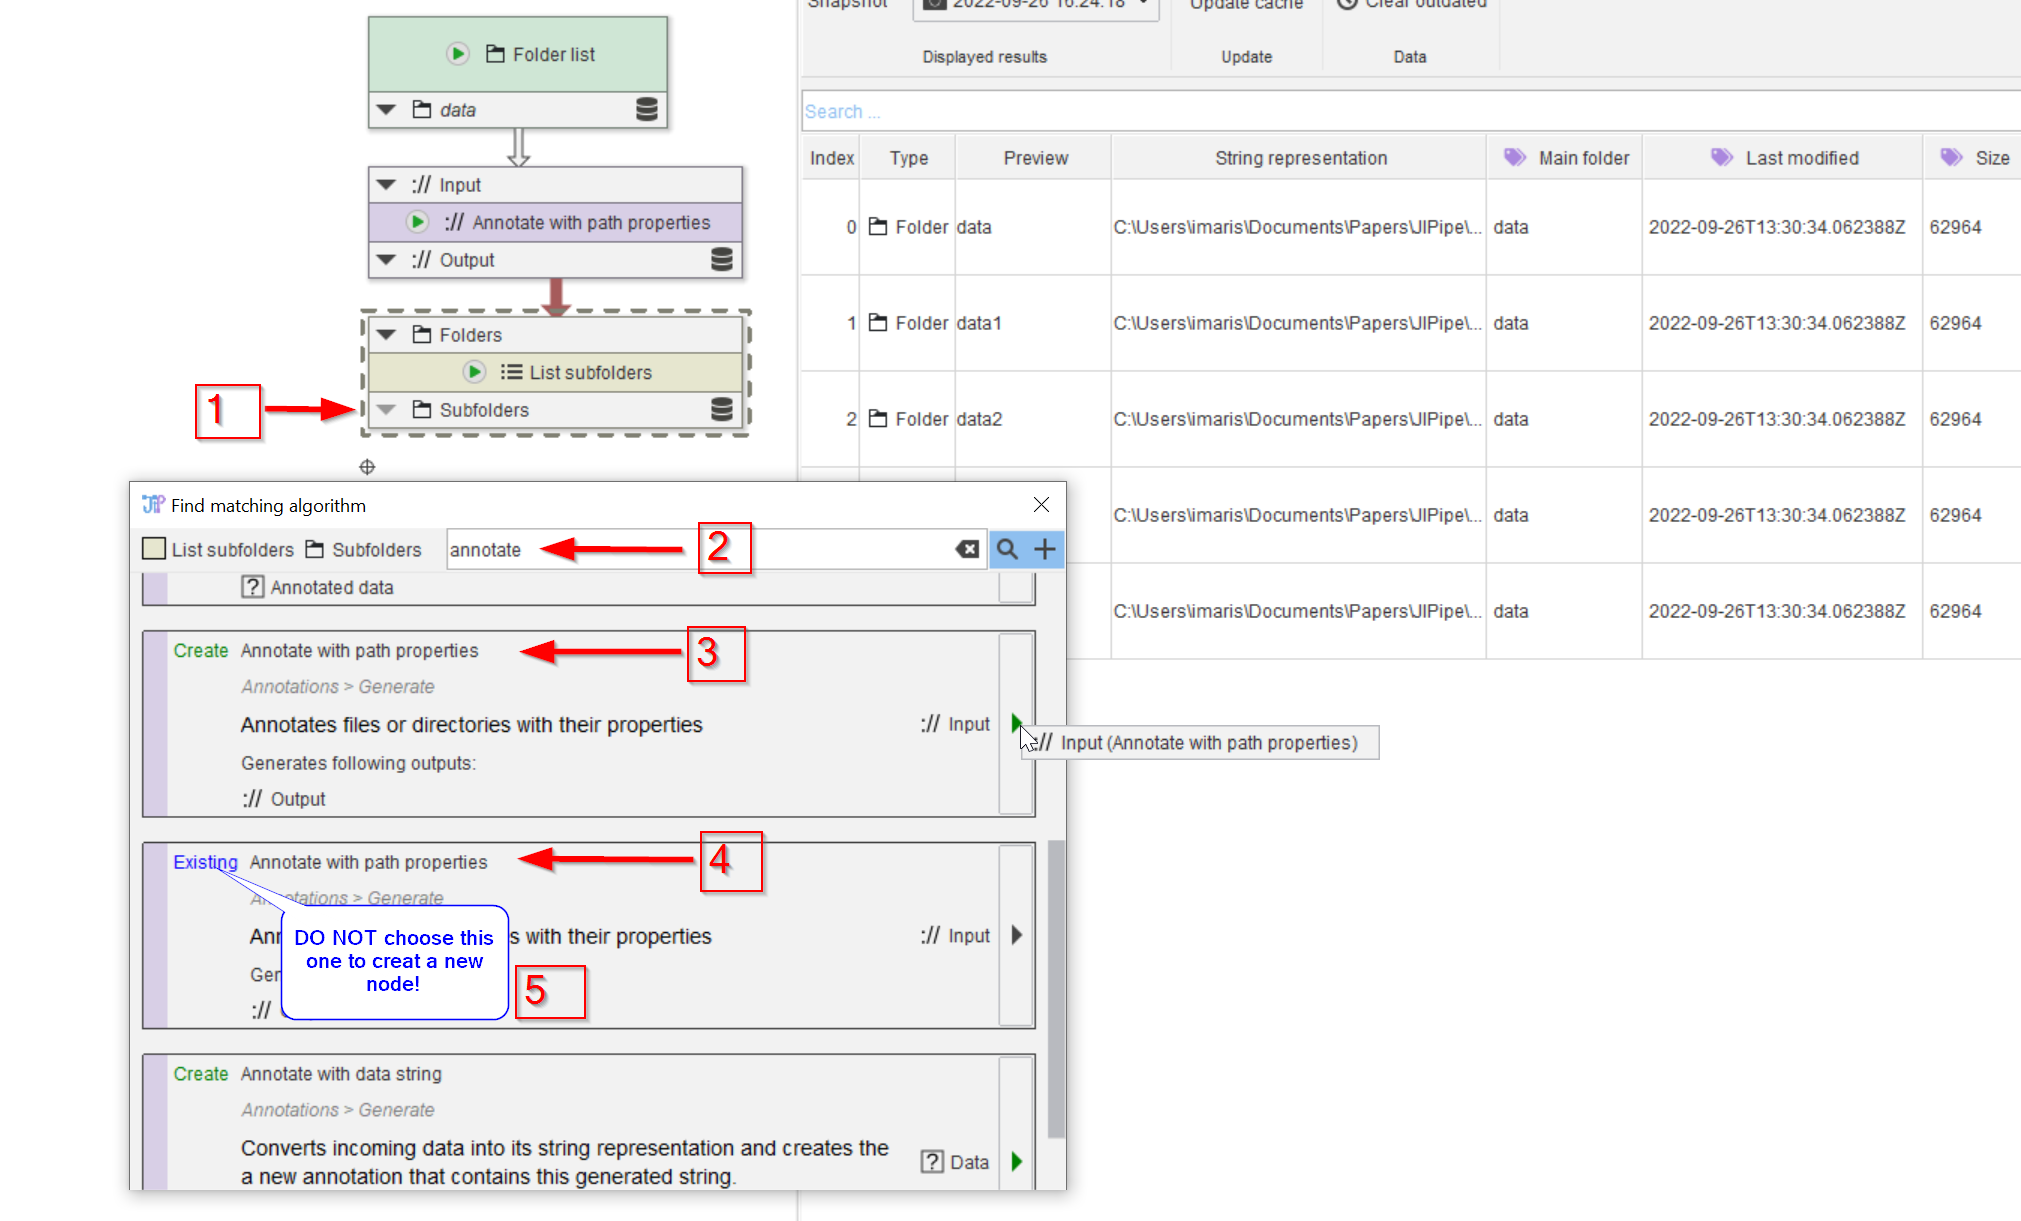
Step 7
Look for a node to now resolve the subfolder structure by utilizing the matching nodes search tool (red arrow 1), and use a search term for subfolders (red arrow 2).
The list will start with the node that we need (red arrow 3); observe that the node is a Create option (red arrow 4); if there were existing nodes of the same type in the pipeline, they would also show up in this search list.
Now click on the green arrowhead (red arrow 5) to add the new node.

Step 8
Run the new node (red arrow 1) and observe the cache (red arrow 2). Notice that the cache only indicates two subfolders (red arrows 3 and 4), whereas the data2 subfolder should have two of its own subfolders (check this in the downloaded data folder in the file system).
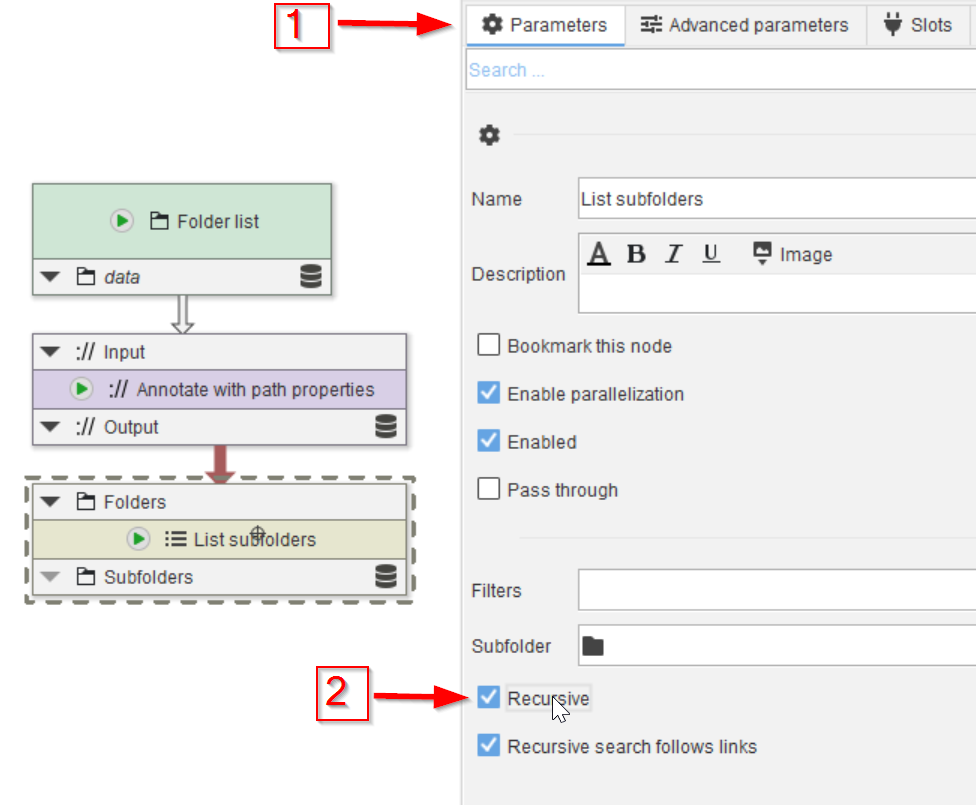
Step 9
To fix this issue, go back to the Parameters tab (red arrow 1) of the node and activate the checkbox Recursive (red arrow 2).
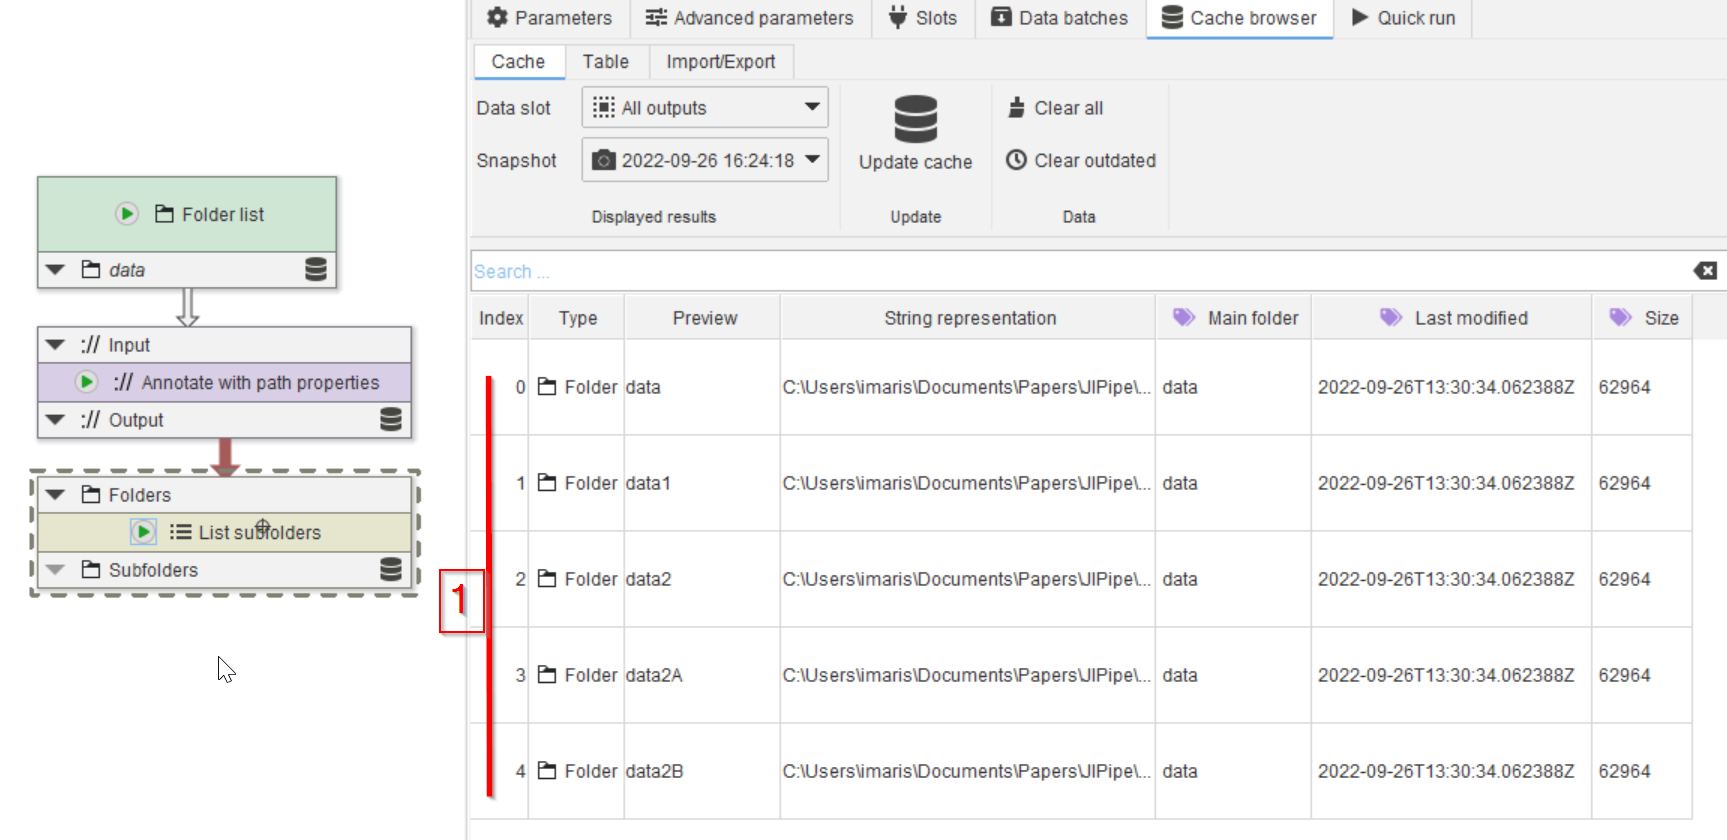
Step 10
Run the node and observe that now we have all 4 subfolders listed, together with the main folder (red line 1).

Step 11
Now we need to annotate the images with the subfolder names. Add a new annotation node by looking for compatible nodes (red arrow 1) using the annotate keyword (red arrow 2). Be careful to choose the Create node option (red arrow 3) from the list, rather than the navigate option (red arrow 4). The latter choice can be used to easily navigate to an already created node, which is especially useful when navigating a complex pipeline (note 5)

Step 12
Run the new node (red arrow 1) and observe the cache (red arrow 2). Note that now the subfolder names are also remembered (red arrow 3), and that the parent name (red arrow 4) reflects the folder directly above the current subfolder (red arrow 5).
For the subfolder name (red arrow 3), we changed the default name as shown above for the previous annotation node.