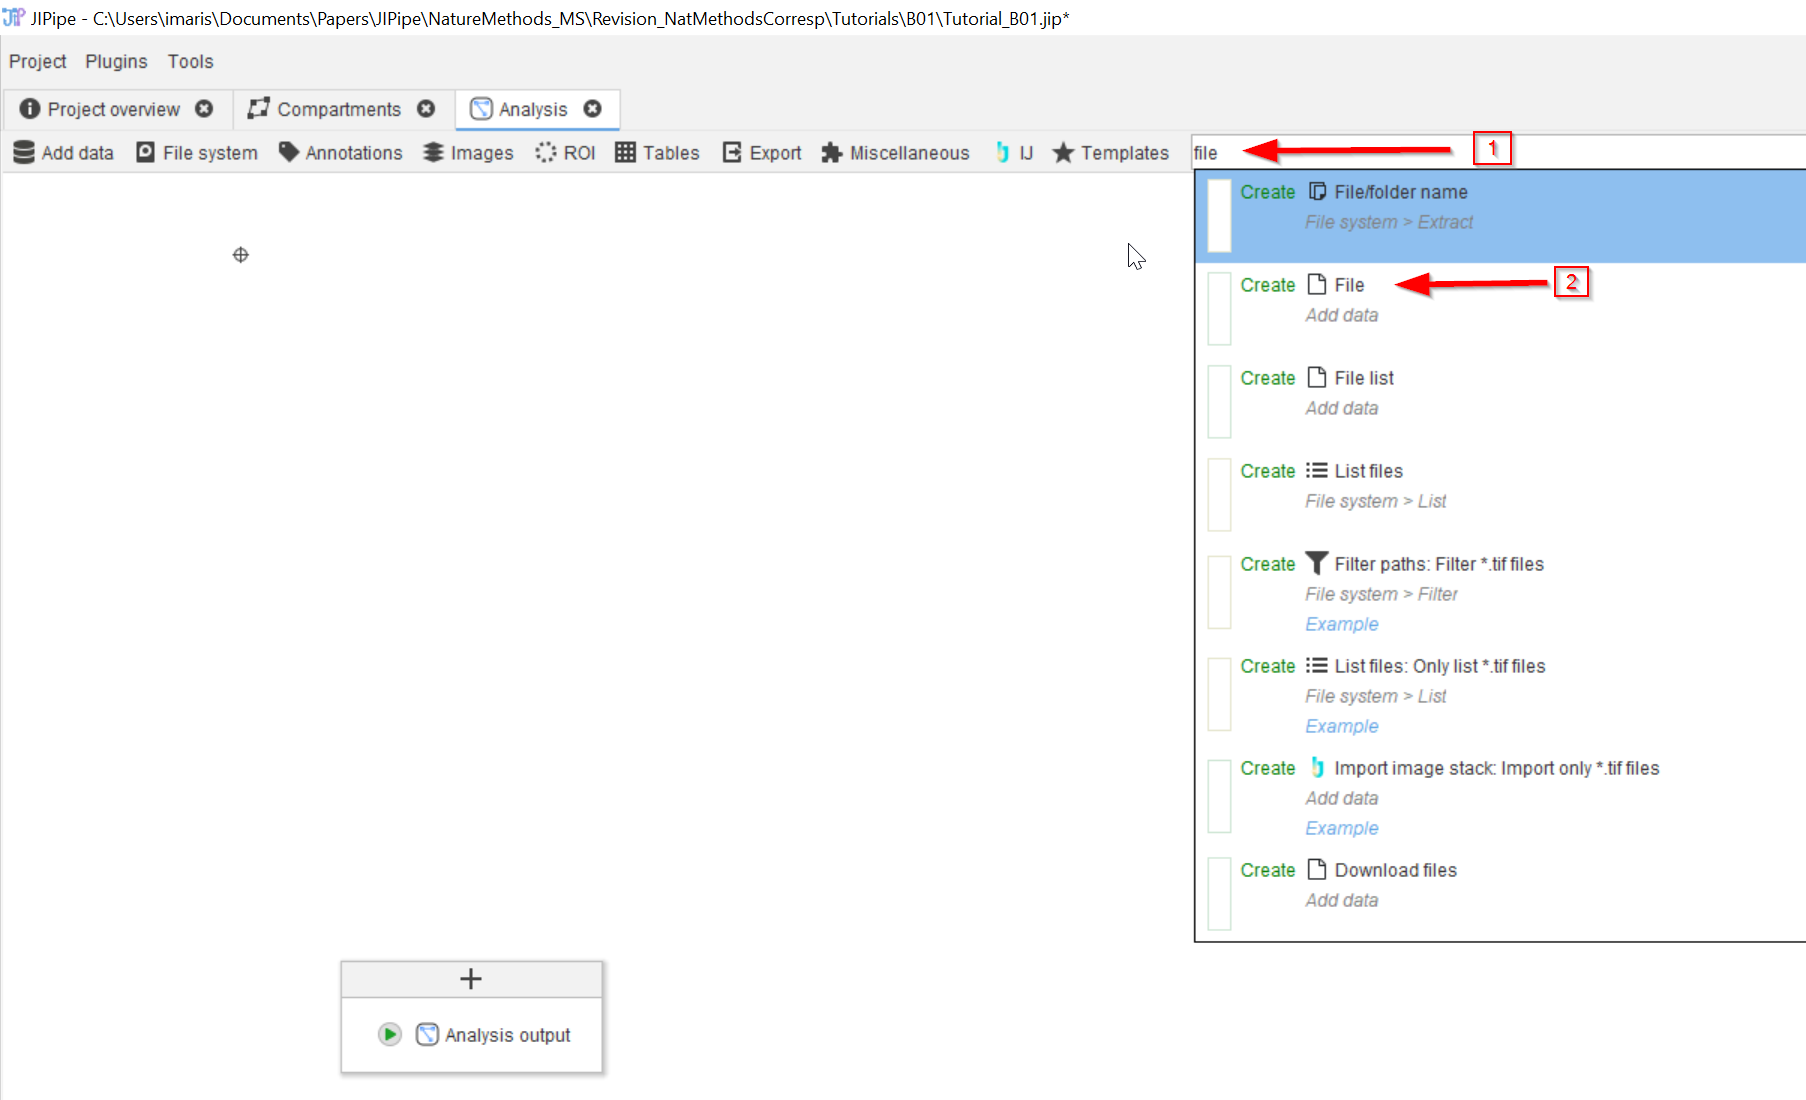
Step 1
From the main GUI. Type a keyword into the search bar (red arrow 1), e.g., looking for way to add a file to the pipeline at the beginning. Then choose the desired node, in this case we go for adding a file (red arrow 2).
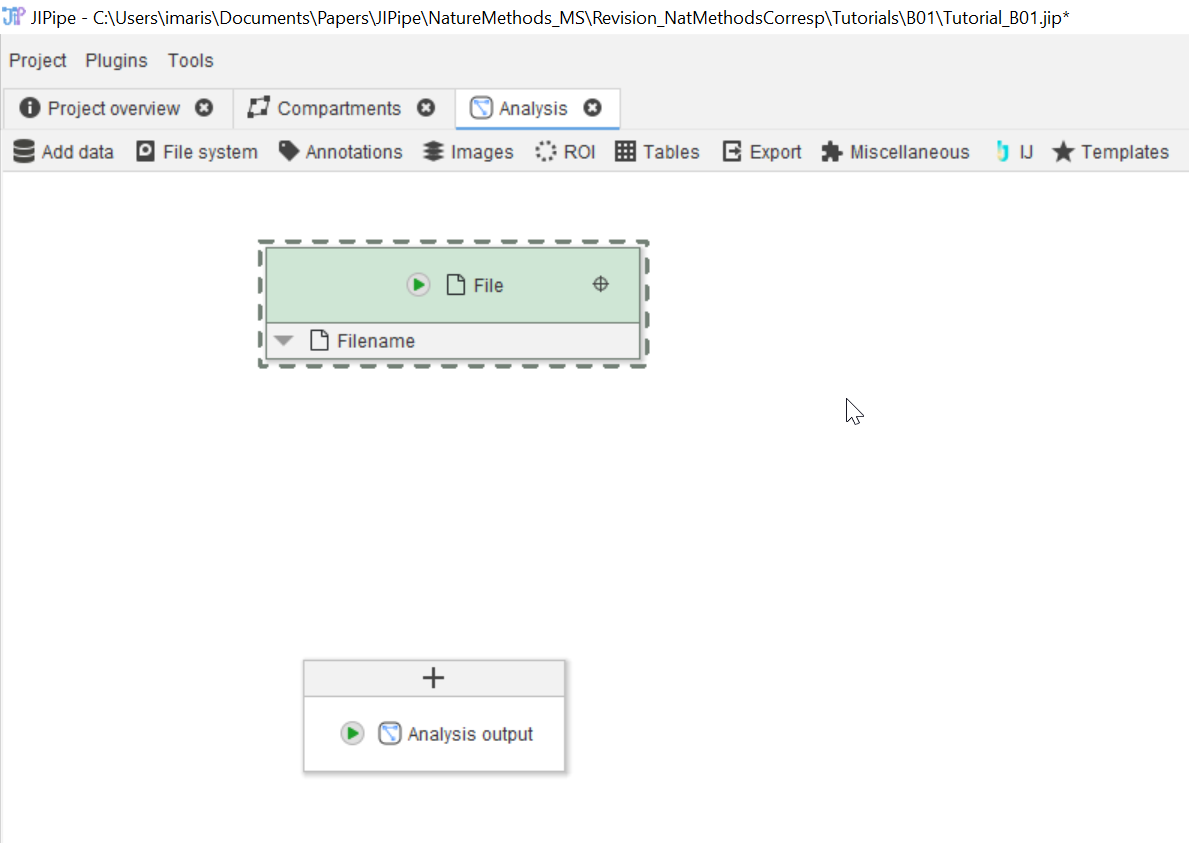
Step 2
Now the new File node will appear on the work area.
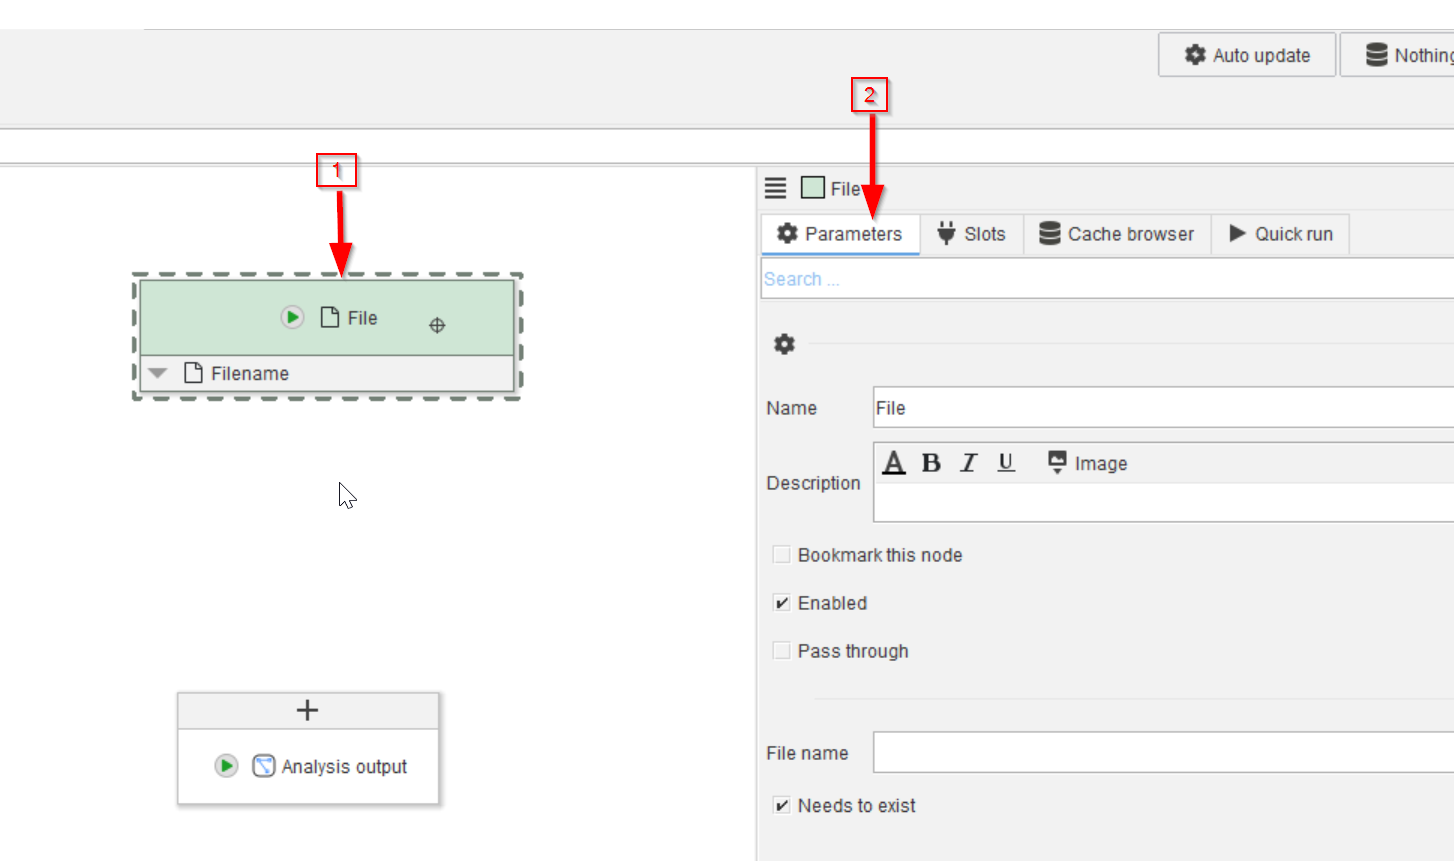
Step 3
When the new node is clicked on and activated, it will be surrounded by a dashed rectangle(red arrow 1). Make sure that the Parameters tab is active on the right side(red arrow 2).
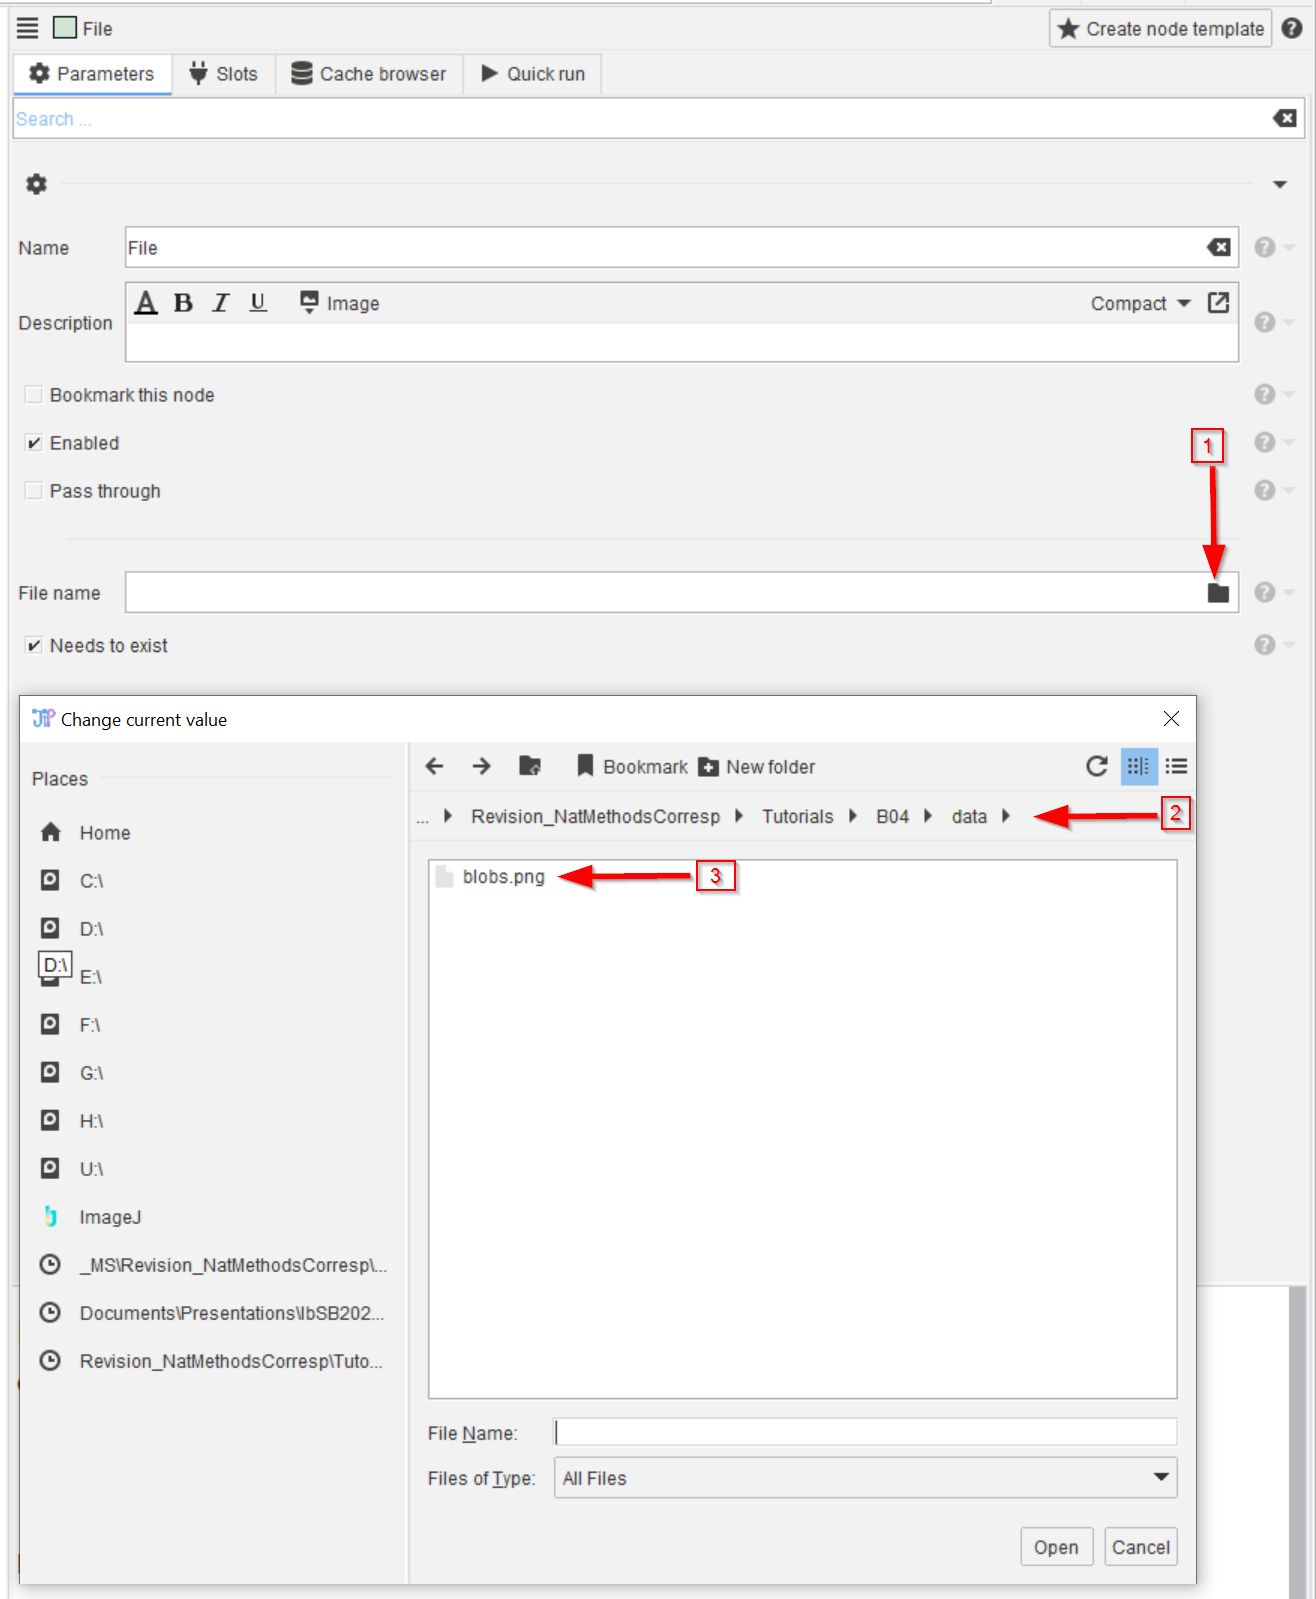
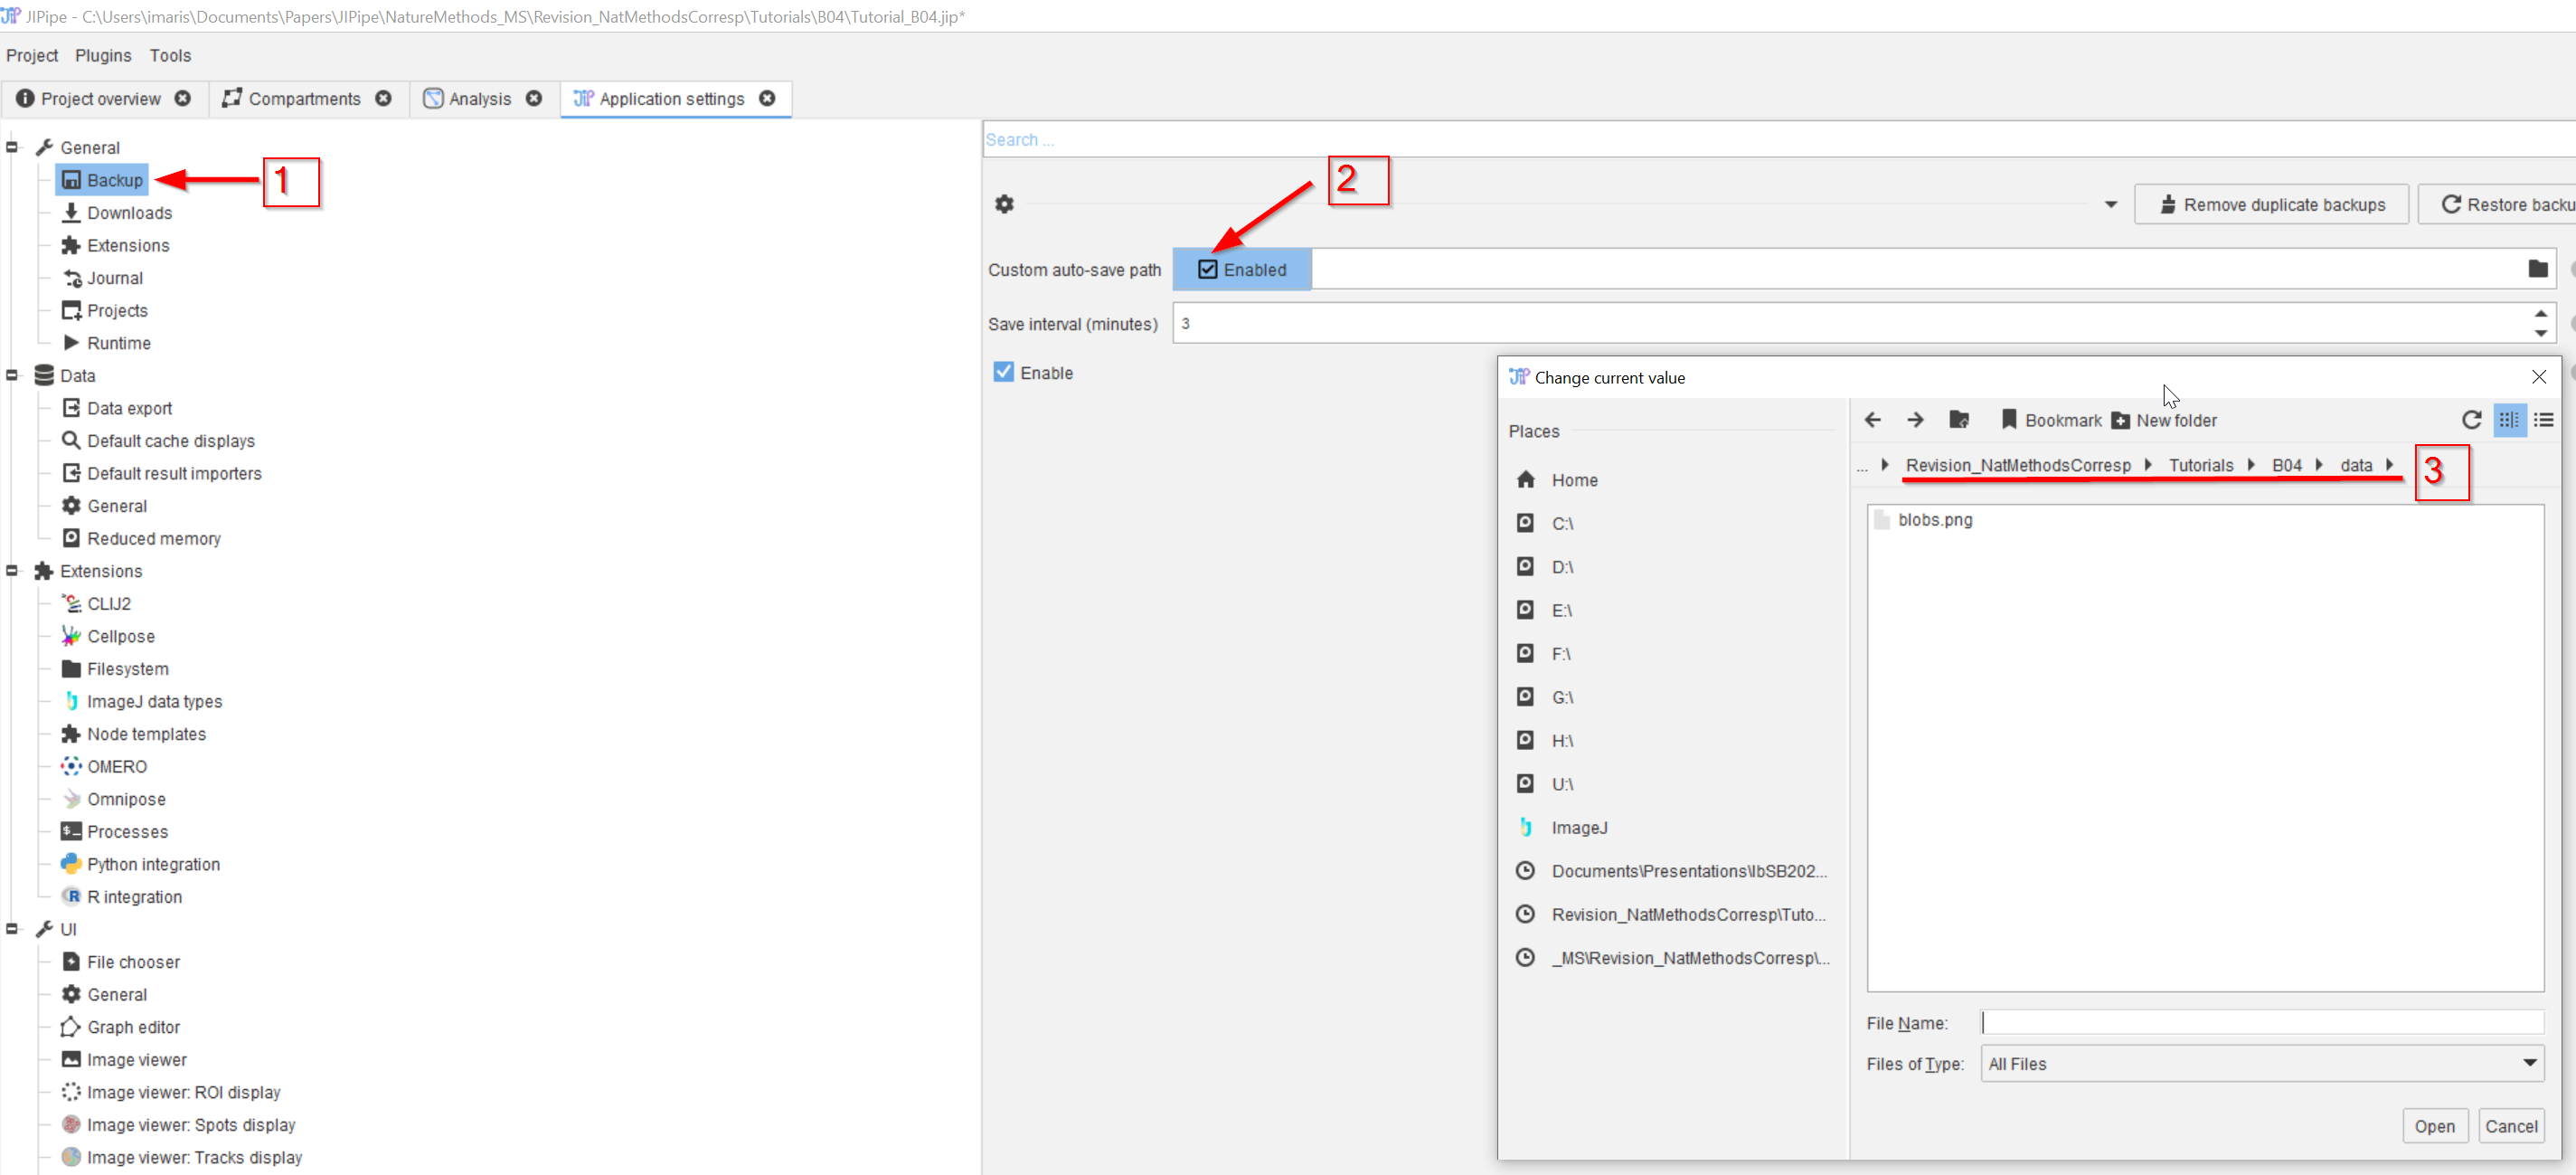
Step 4
To choose a concrete file, click on the navigation tab (red arrow 1), navigate to the folder where the image file is (red arrow 2), and choose the image to be loaded (red arrow 3).

Step 5
Run the node by clicking on the green arrowhead inside the node (red arrow), …
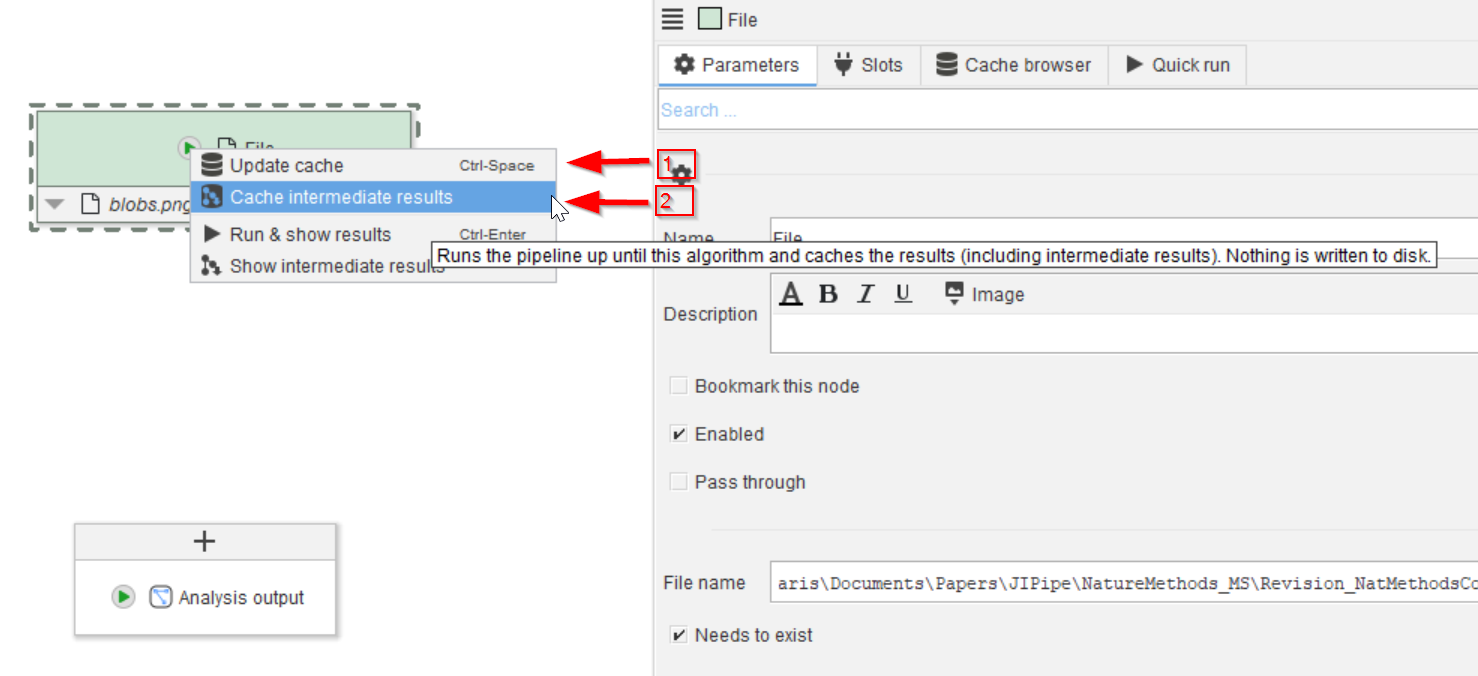
Step 6
… and then selecting one of the top two options Update cache or Cache intermediate results.
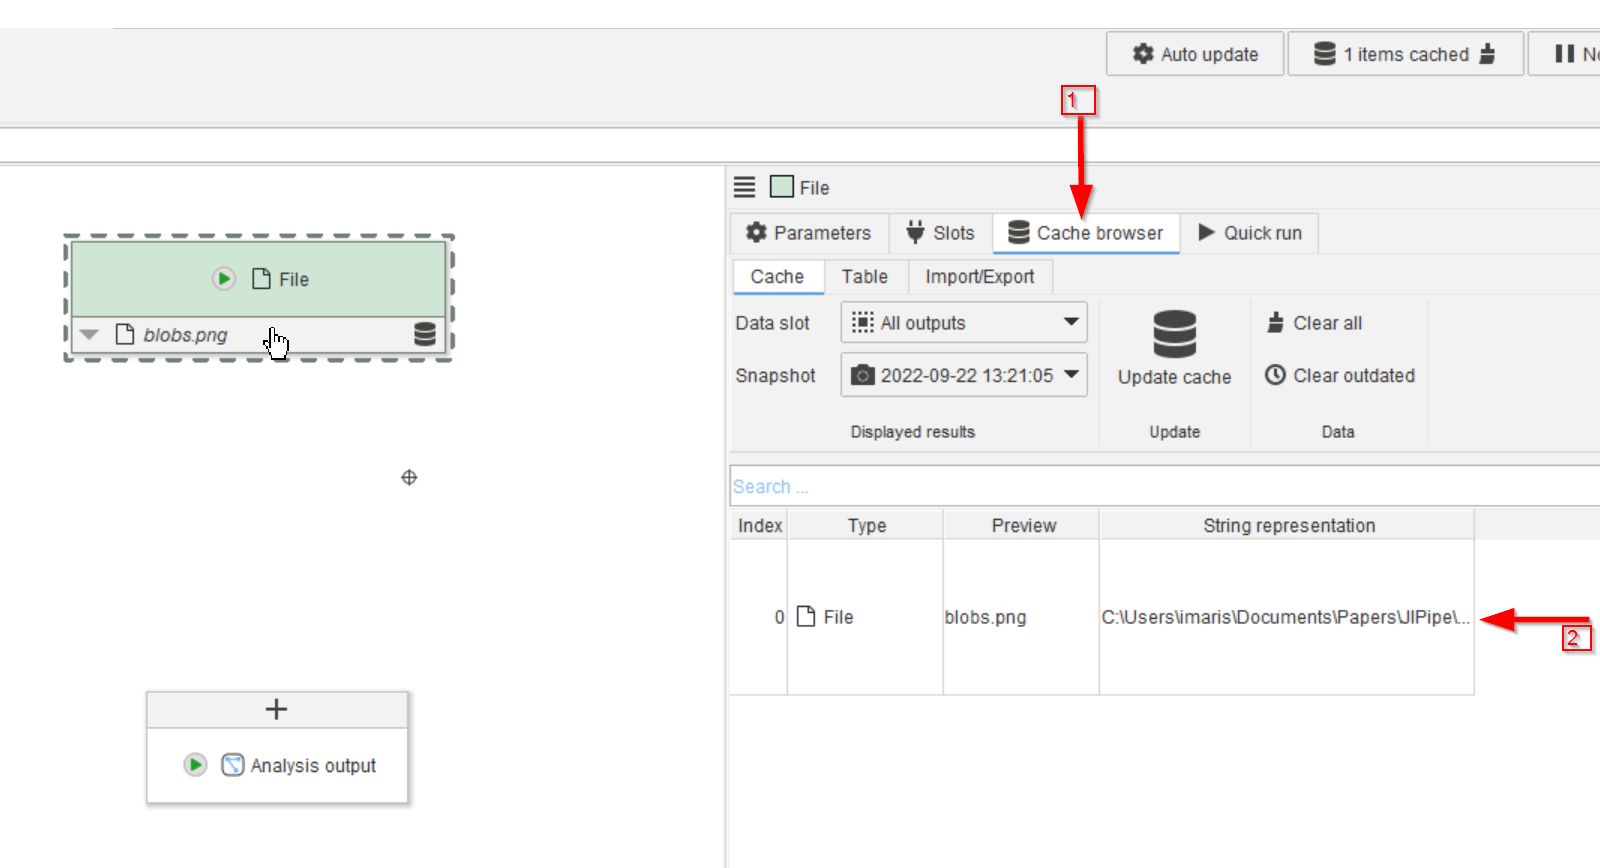
Step 7
The result will be shown on the right side, under the Cache browser tab (red arrow 1), where the newly loaded file name and full path will be listed (red arrow 2)
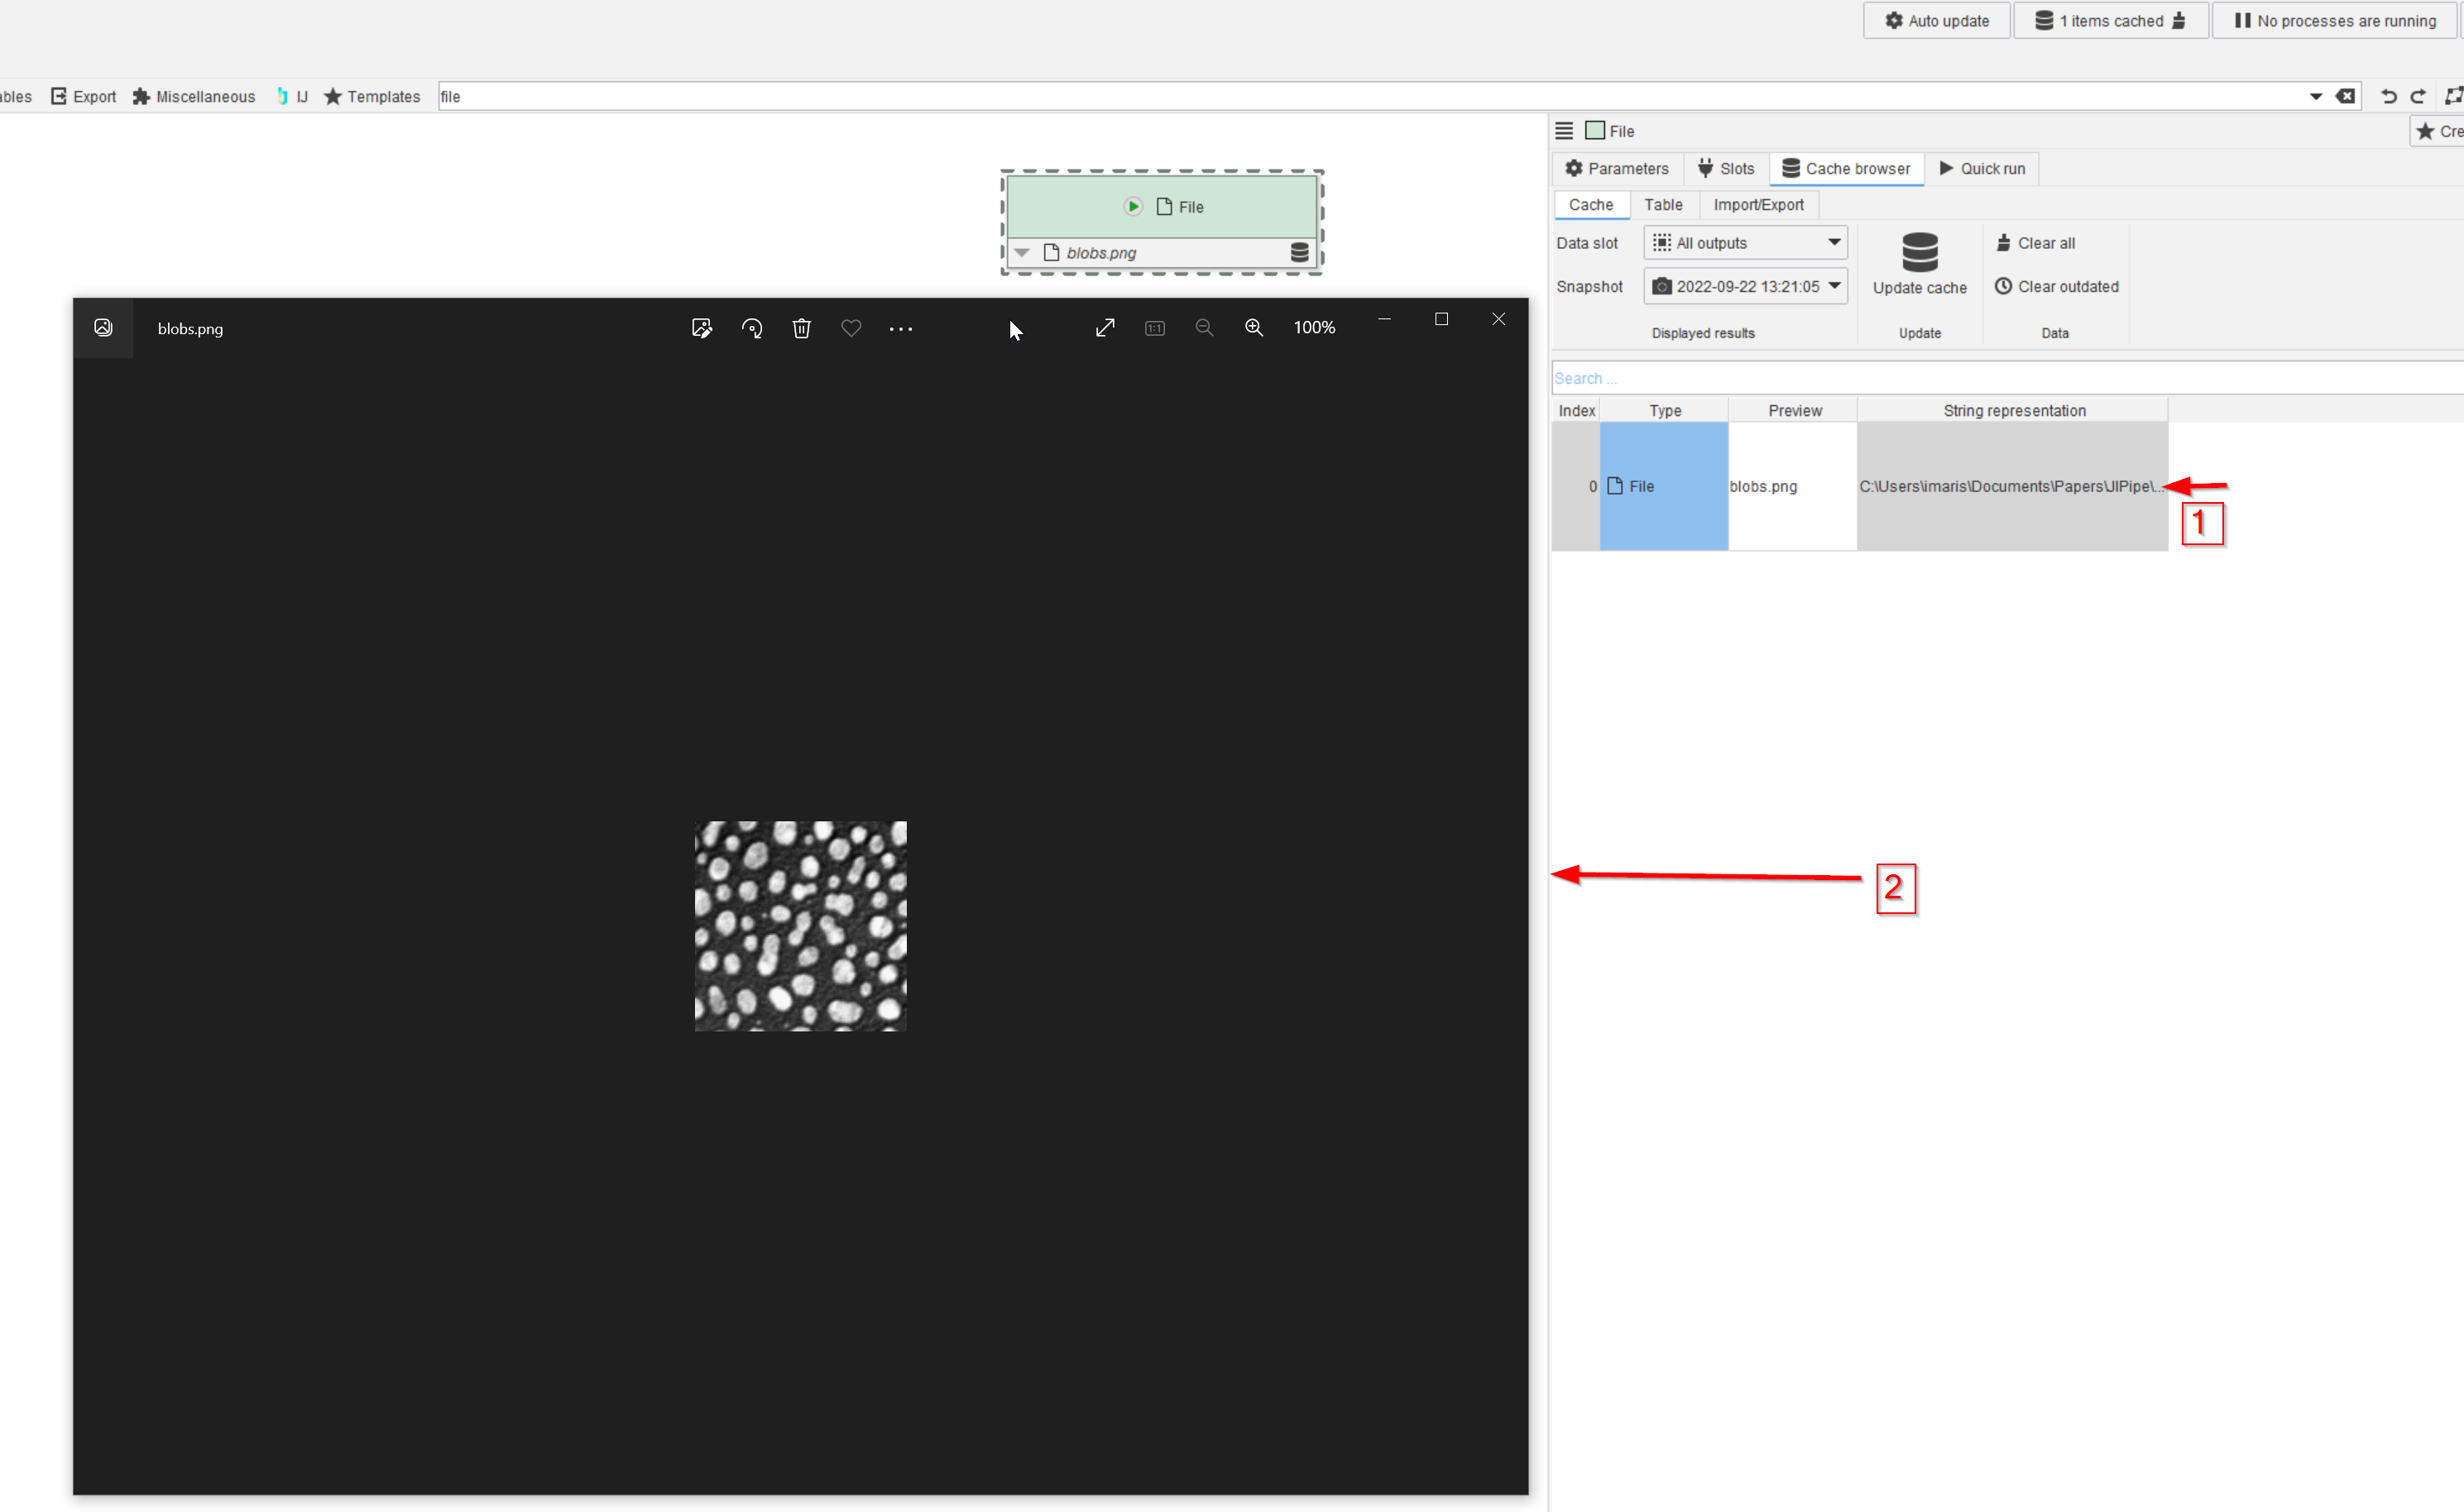
Step 8
By double-clicking on the cache entry row (red arrow 1), the newly loaded image will be opened in a dedicated viewer (red arrow 2)
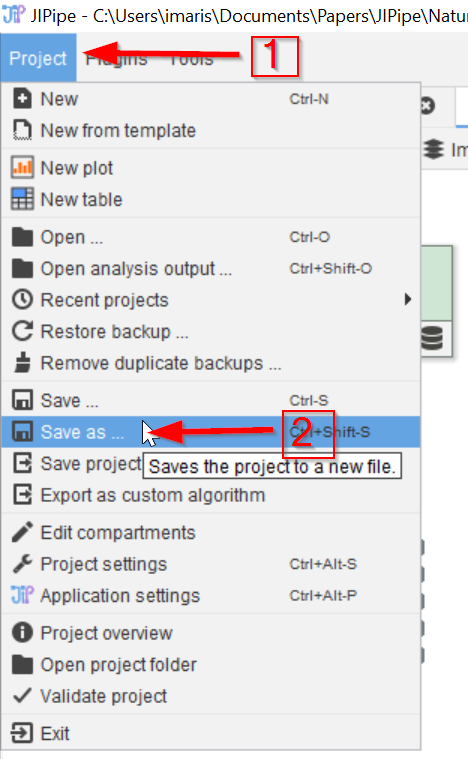
Step 9
To save the project, go to the Project tab (red arrow 1) and select the saving mode, e.g. Save As (red arrow 2)
Step 10
The navigate to the target folder (red arrow 1) and select or choose a file name (red arrow 2). The JIPipe project filenames end with the “.jip” extension.