Preliminary steps
Please follow the previous tutorial about importing a directory of images.
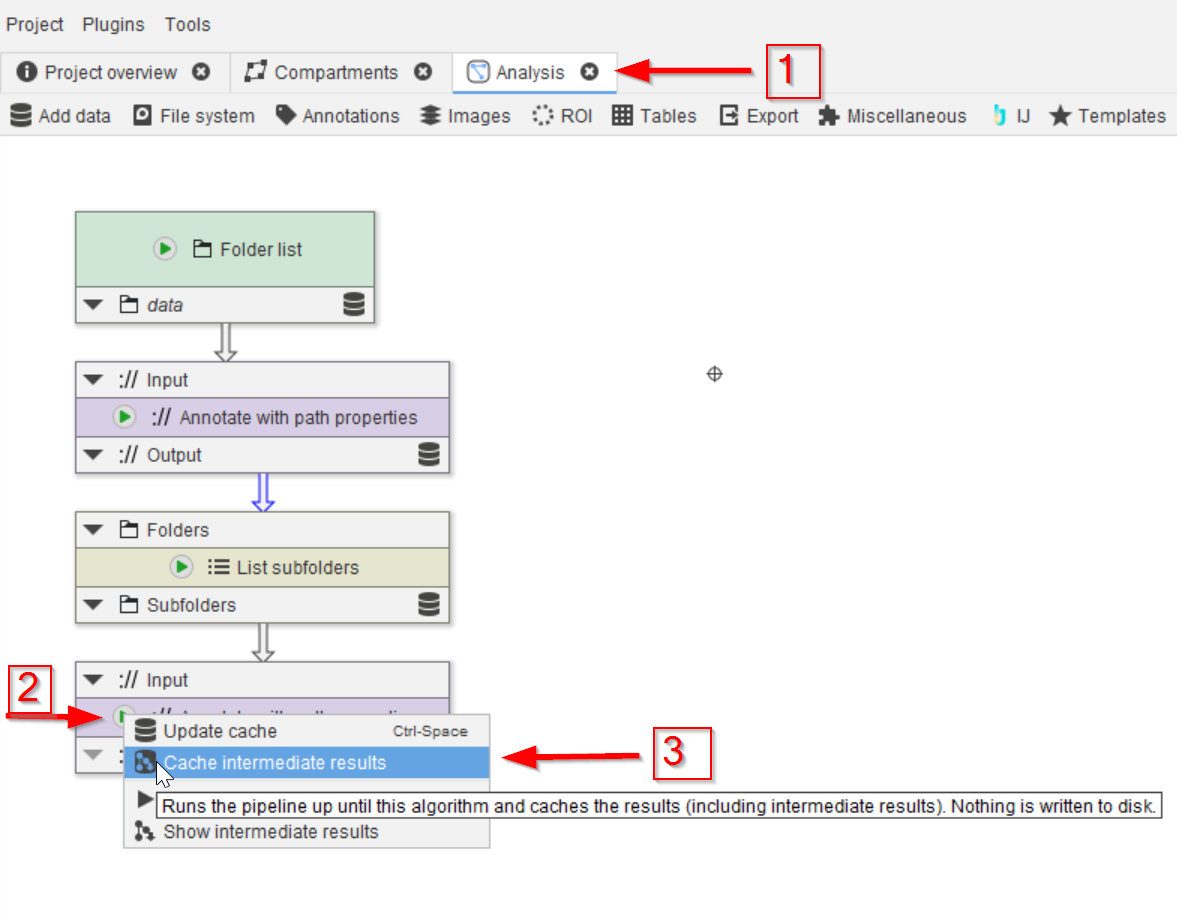
Step 1
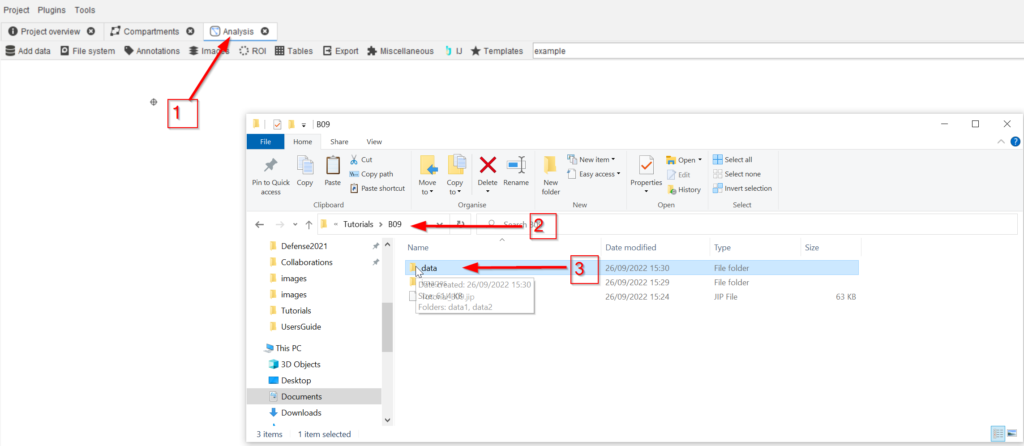
Open the project file from the previous tutorial and navigate to the Analysis compartment (red arrow 1). Run the last node (red arrow 2) with the Cache intermediate results option (red arrow 3).

Step 2
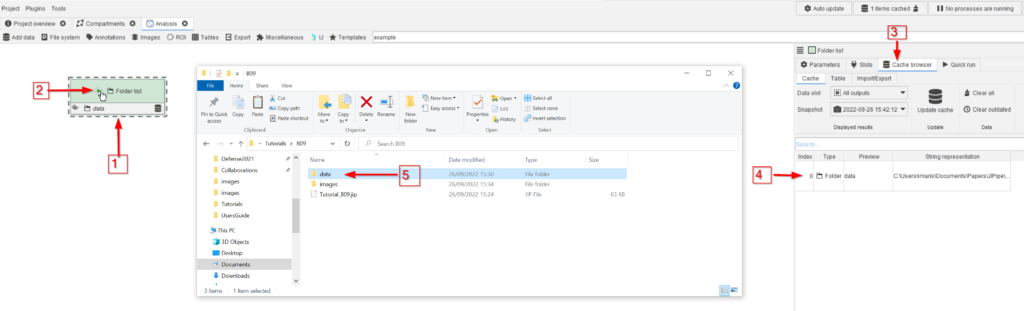
Now we need to get a list of the image files in all the (sub)folders. Use the node finder (red arrow 1) and check for list nodes (red arrow 2). Choose the List files node (red arrow 3), making sure that node will be created (red arrow 4). Add the new node (red arrow 5).

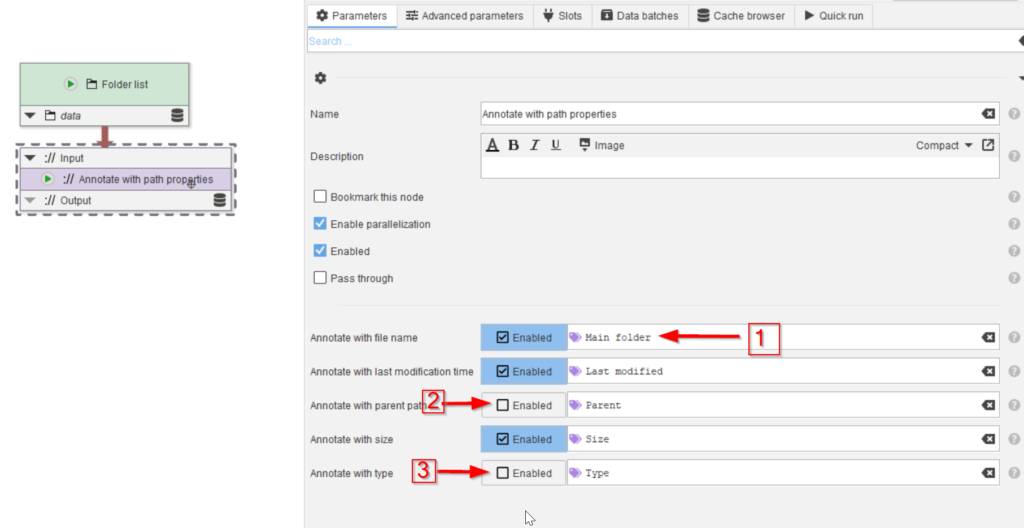
Step 3
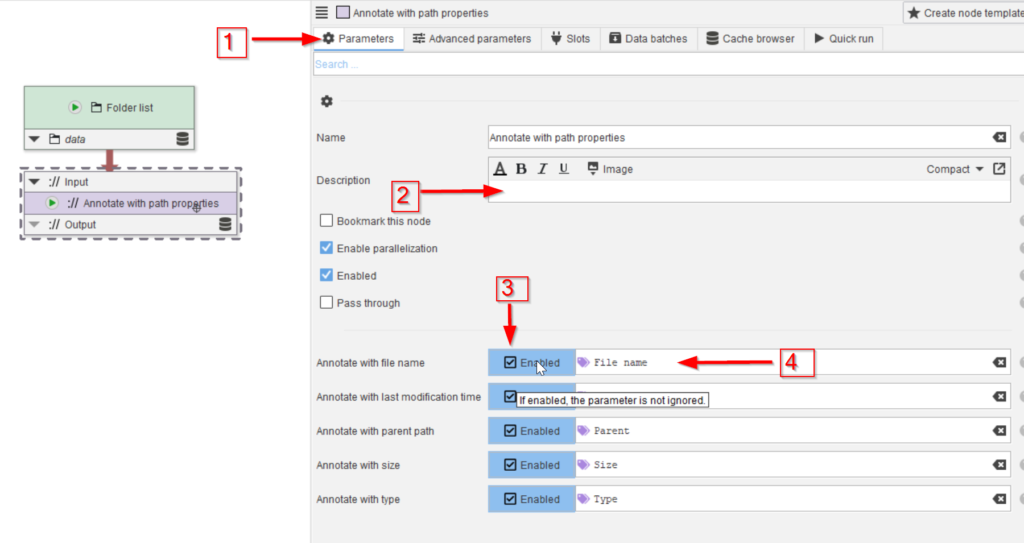
Go to Parameters of the new node (red arrow 1)and check Recursive (red arrow 2). Run the node (red arrow 3) with Update cache.
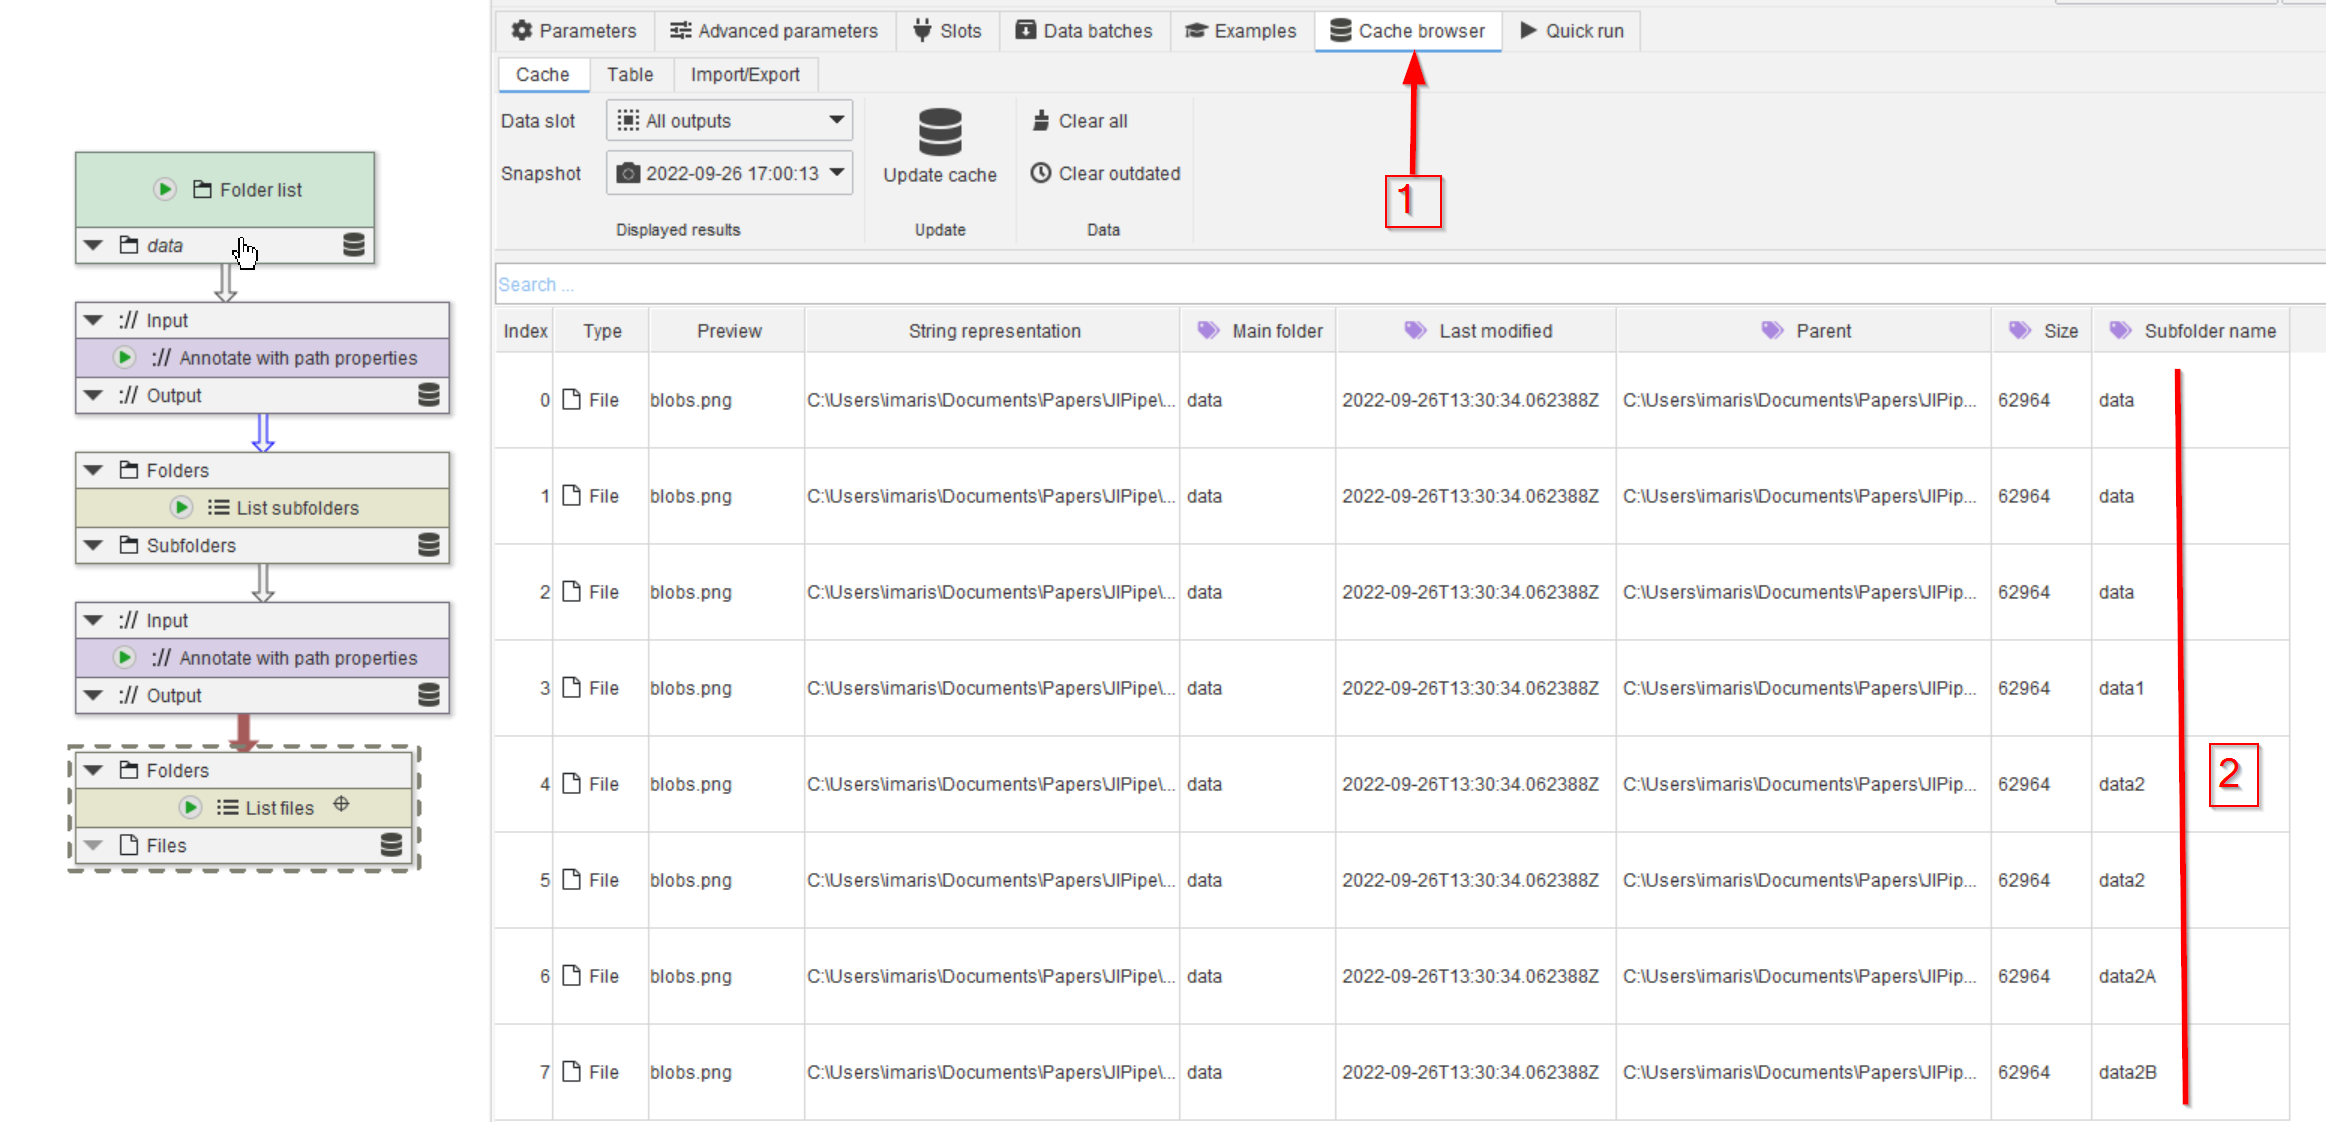
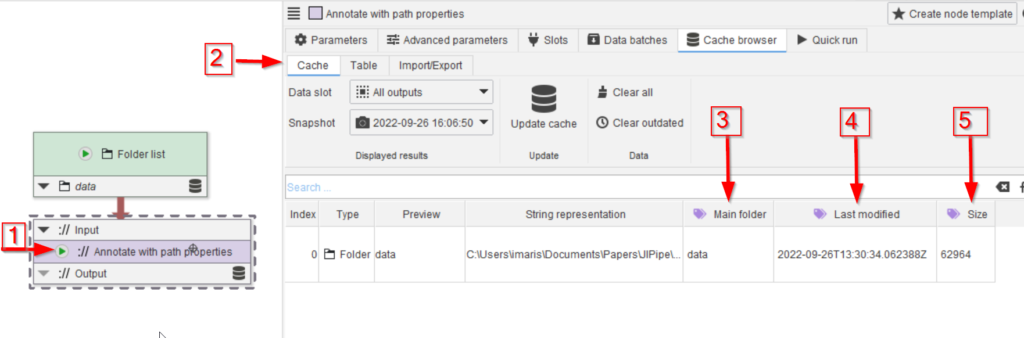
Step 4
Go to Cache (red arrow 1) and check that all file names are listed (red line 2); compare with the list of files on the hard drive.
Step 5
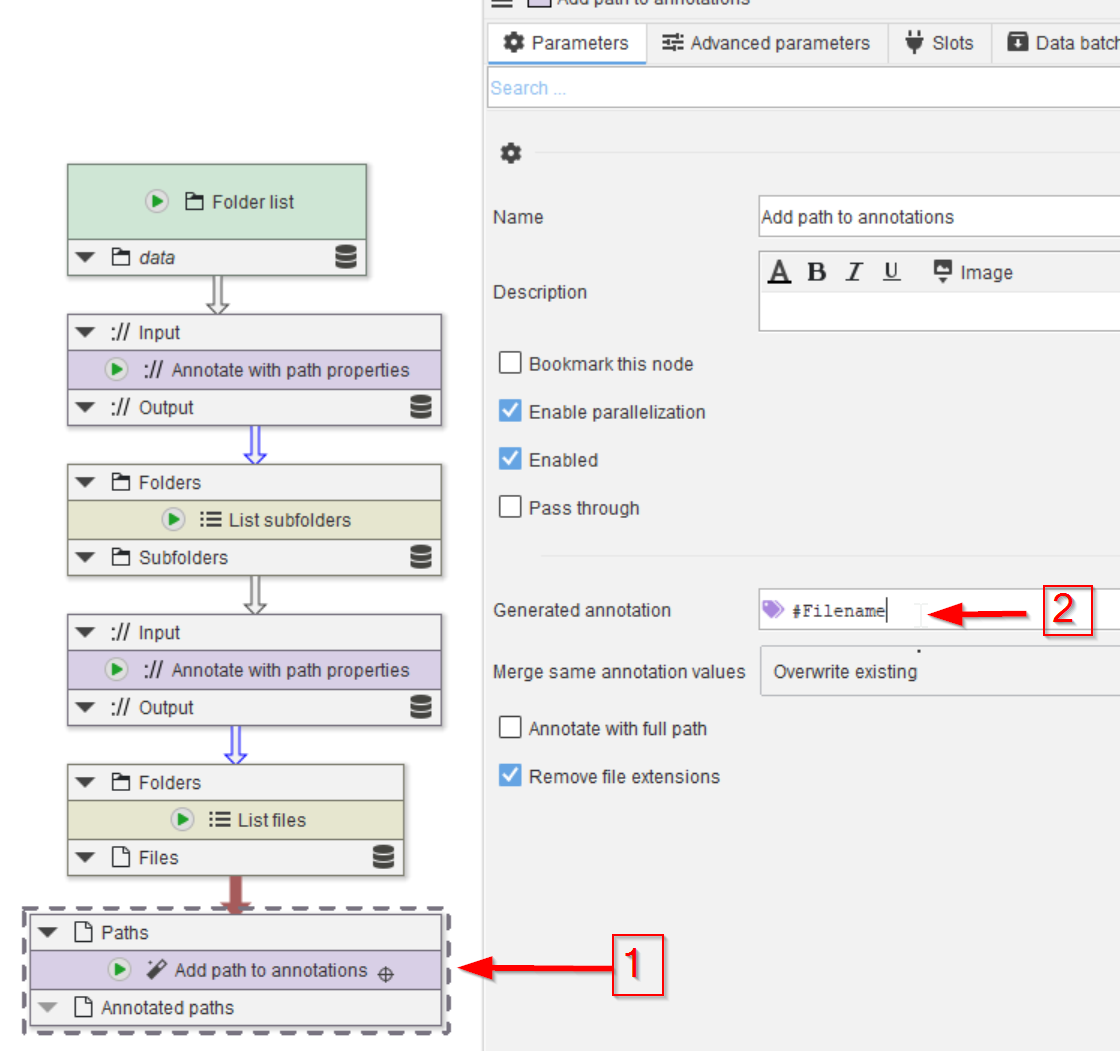
The file names also need to be annotated. Here we will use a simpler approach via the Add path to annotations node (red arrow 1); add this node via any of the ways we have seen before.
Rename the Generated annotations field to #Filename, to make it more specific (the default name of Dataset, which is very general). The # before the name indicates that this annotation is of primary importance, e.g., the results will be grouped based on annotations that are marked with # as especially important.

Step 6
Run the node (red arrow 1) and check the Cache (red arrow 2). Now the #Filename annotation (red arrow 3) is part of the image database.
Step 7
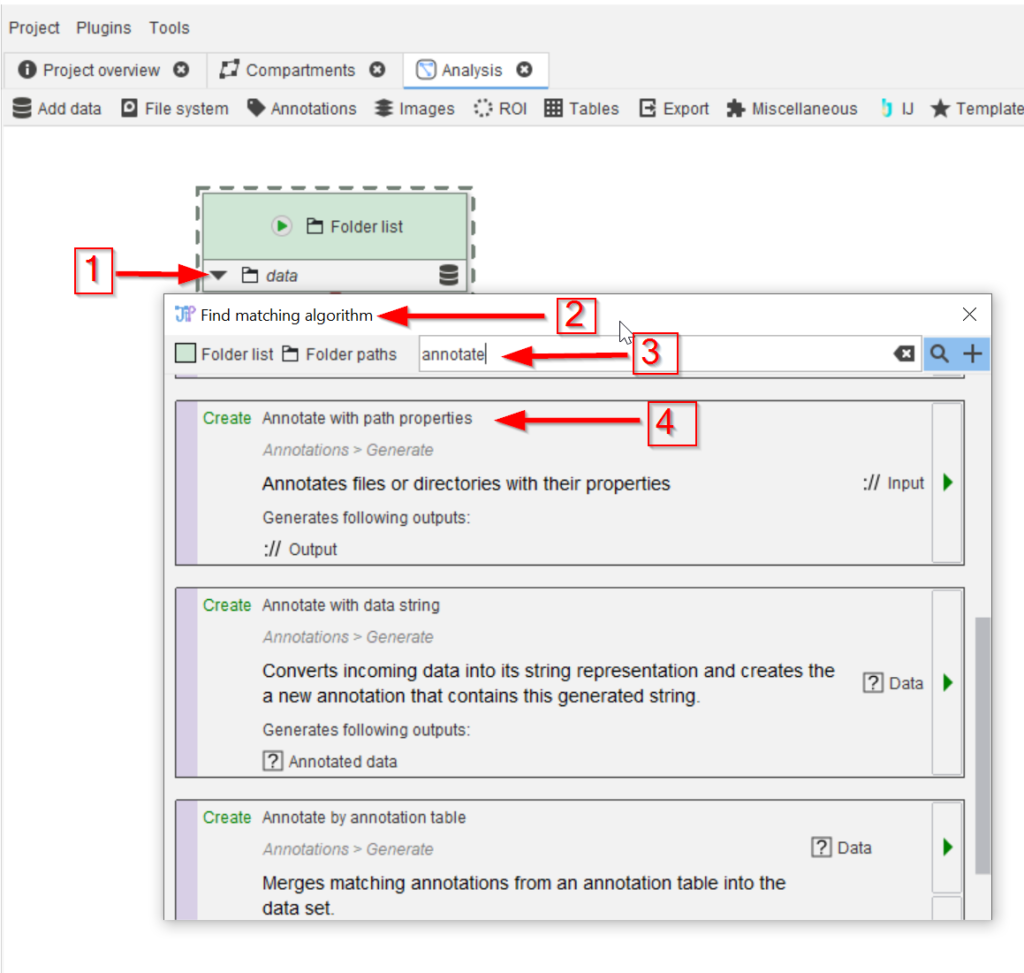
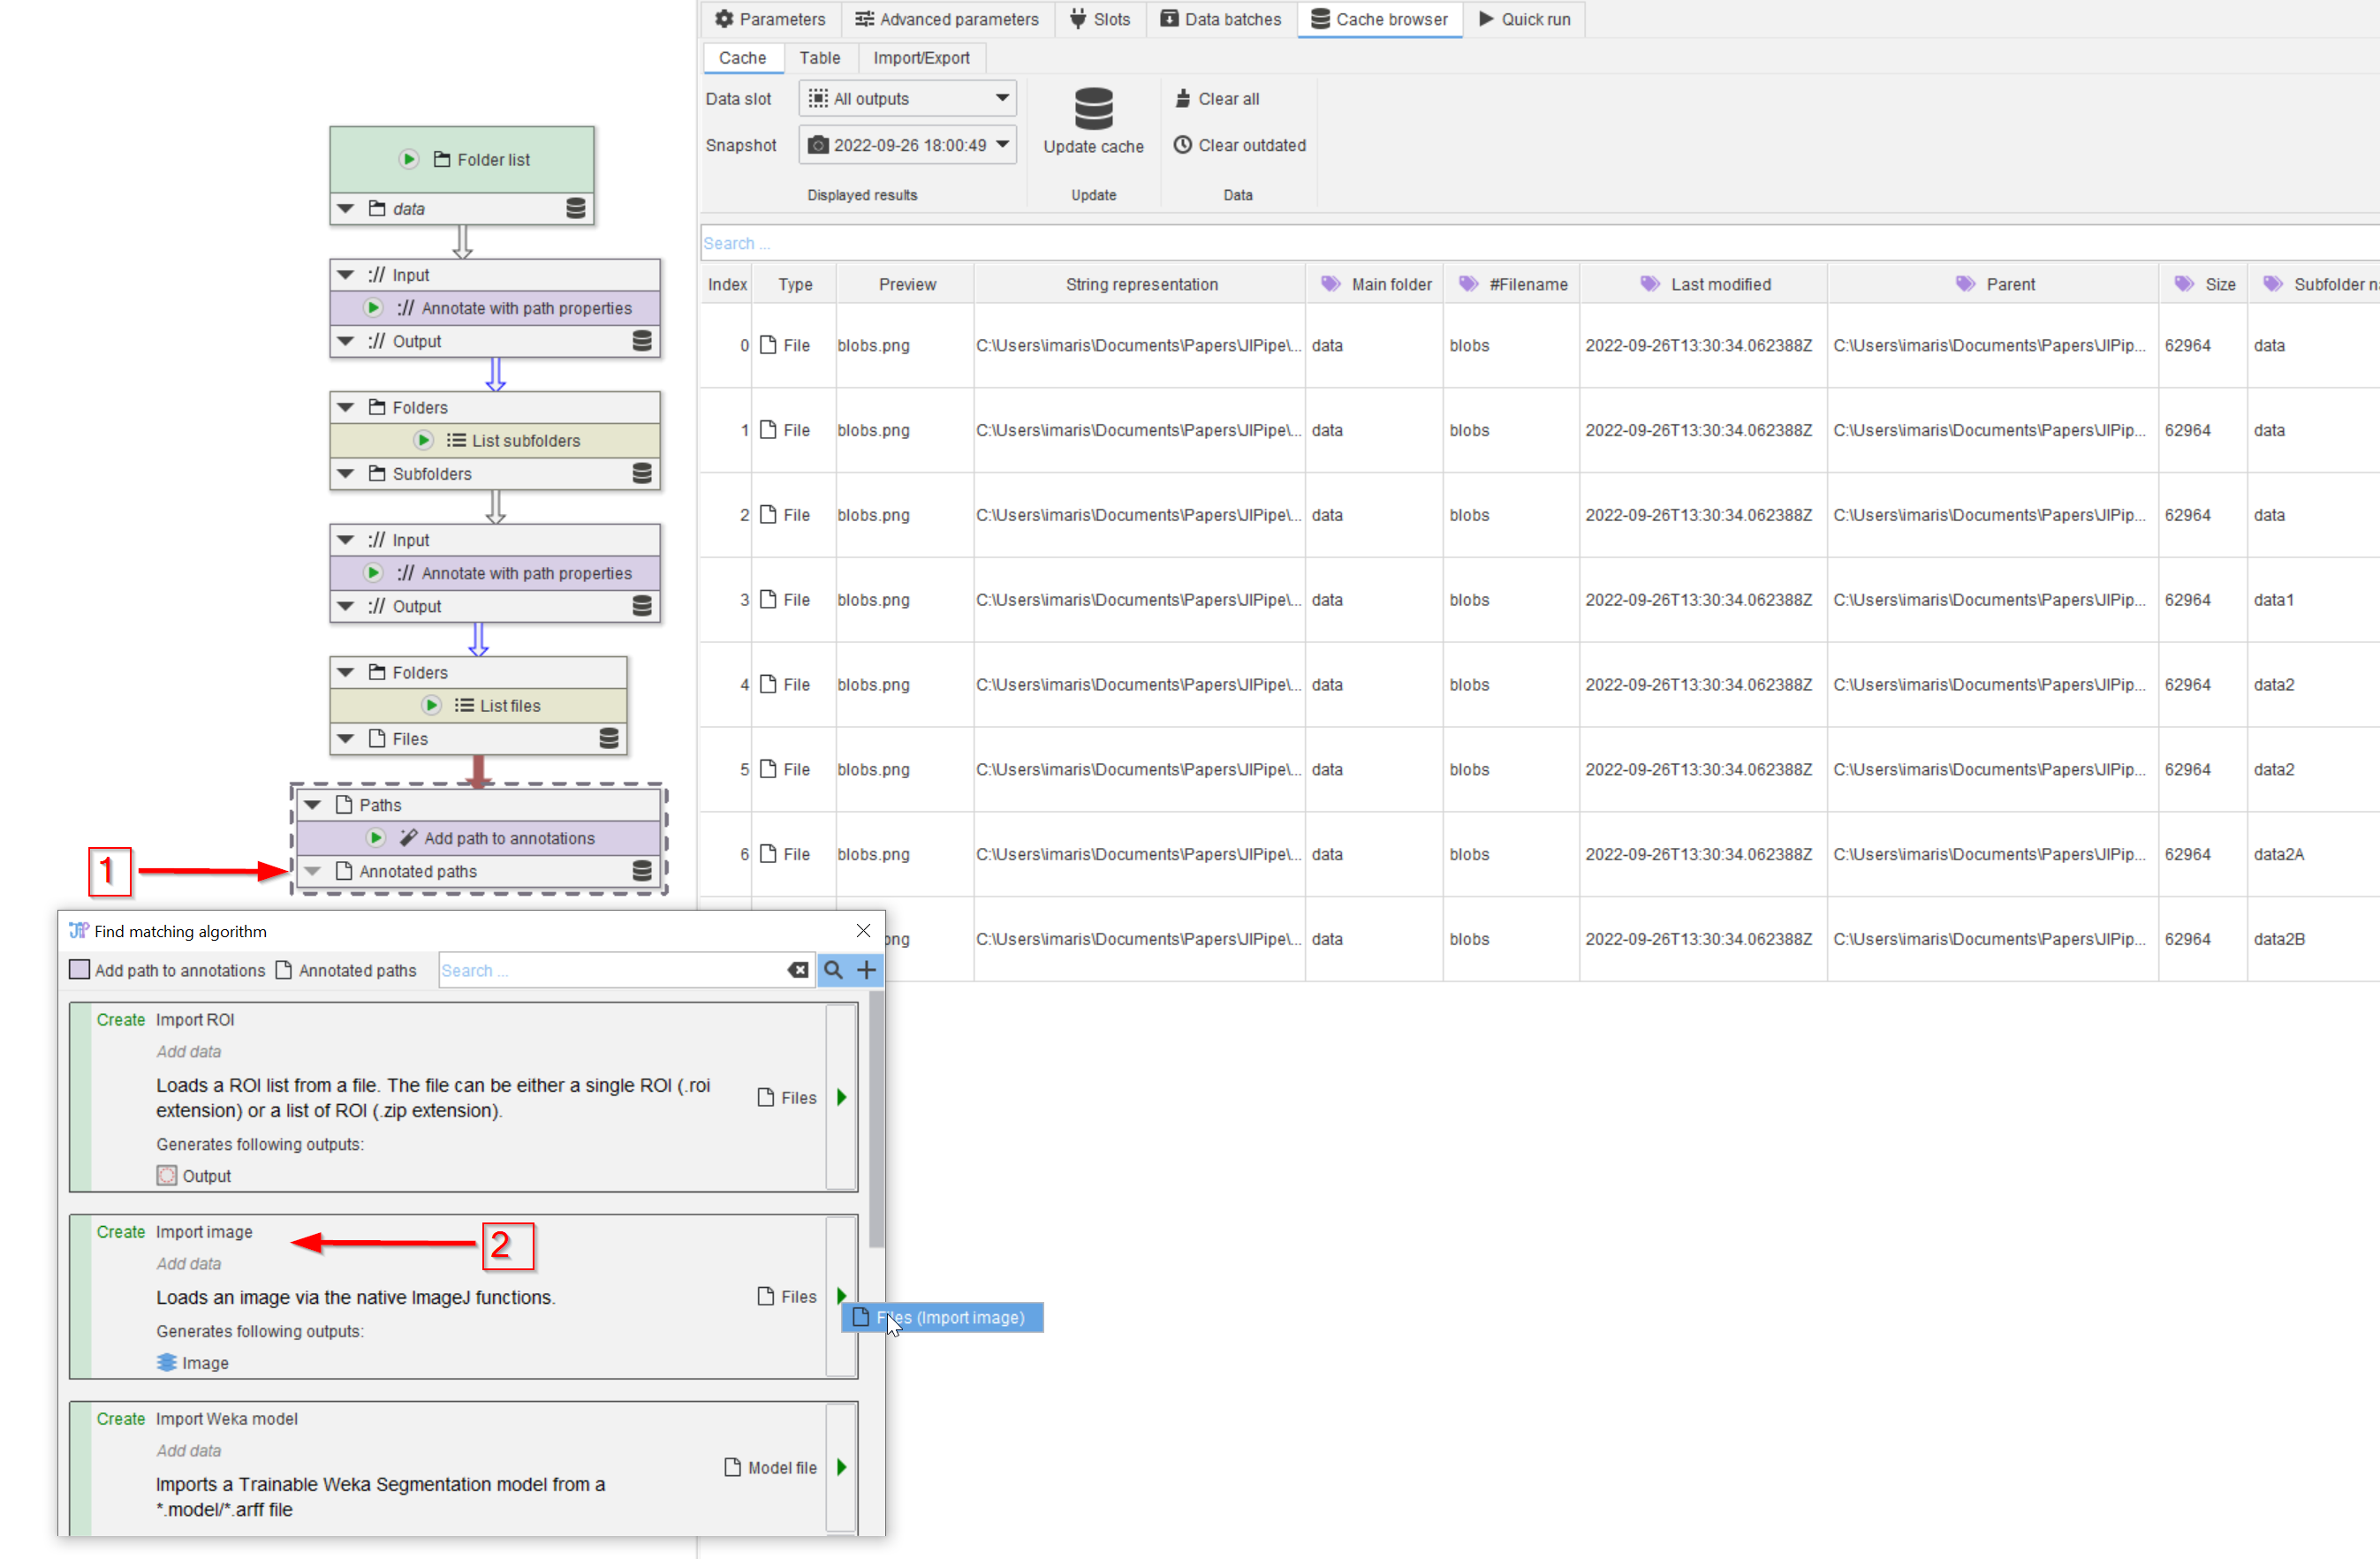
We can now read in the images. Look for compatible nodes to continue the pipeline (red arrow 1) and notice that the second hit is already what we need, even without searching with a keyword (red arrow 2).
Step 8
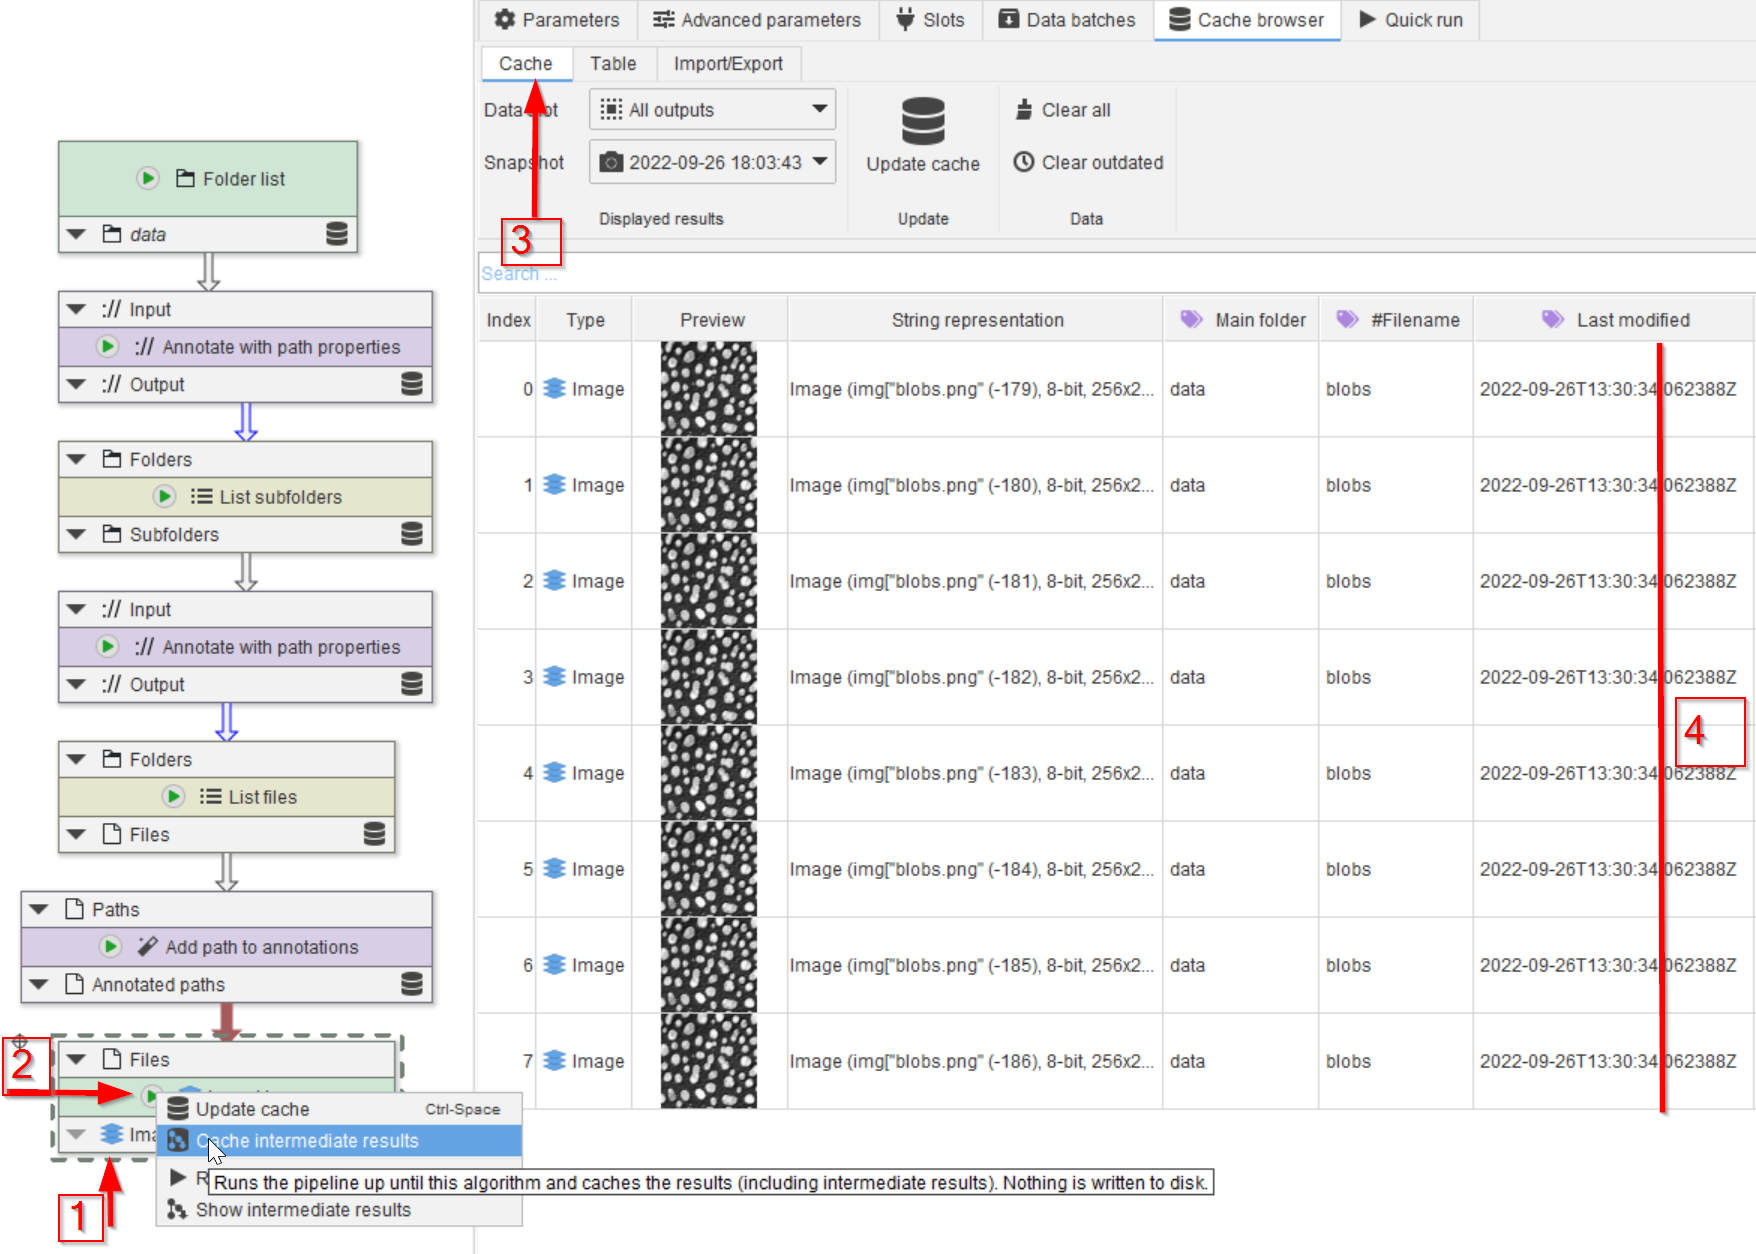
Add the node (red arrow 1) and run it (red arrow 2). In the cache (red arrow 3) we can now observe all the images (red line 4).
Step 9
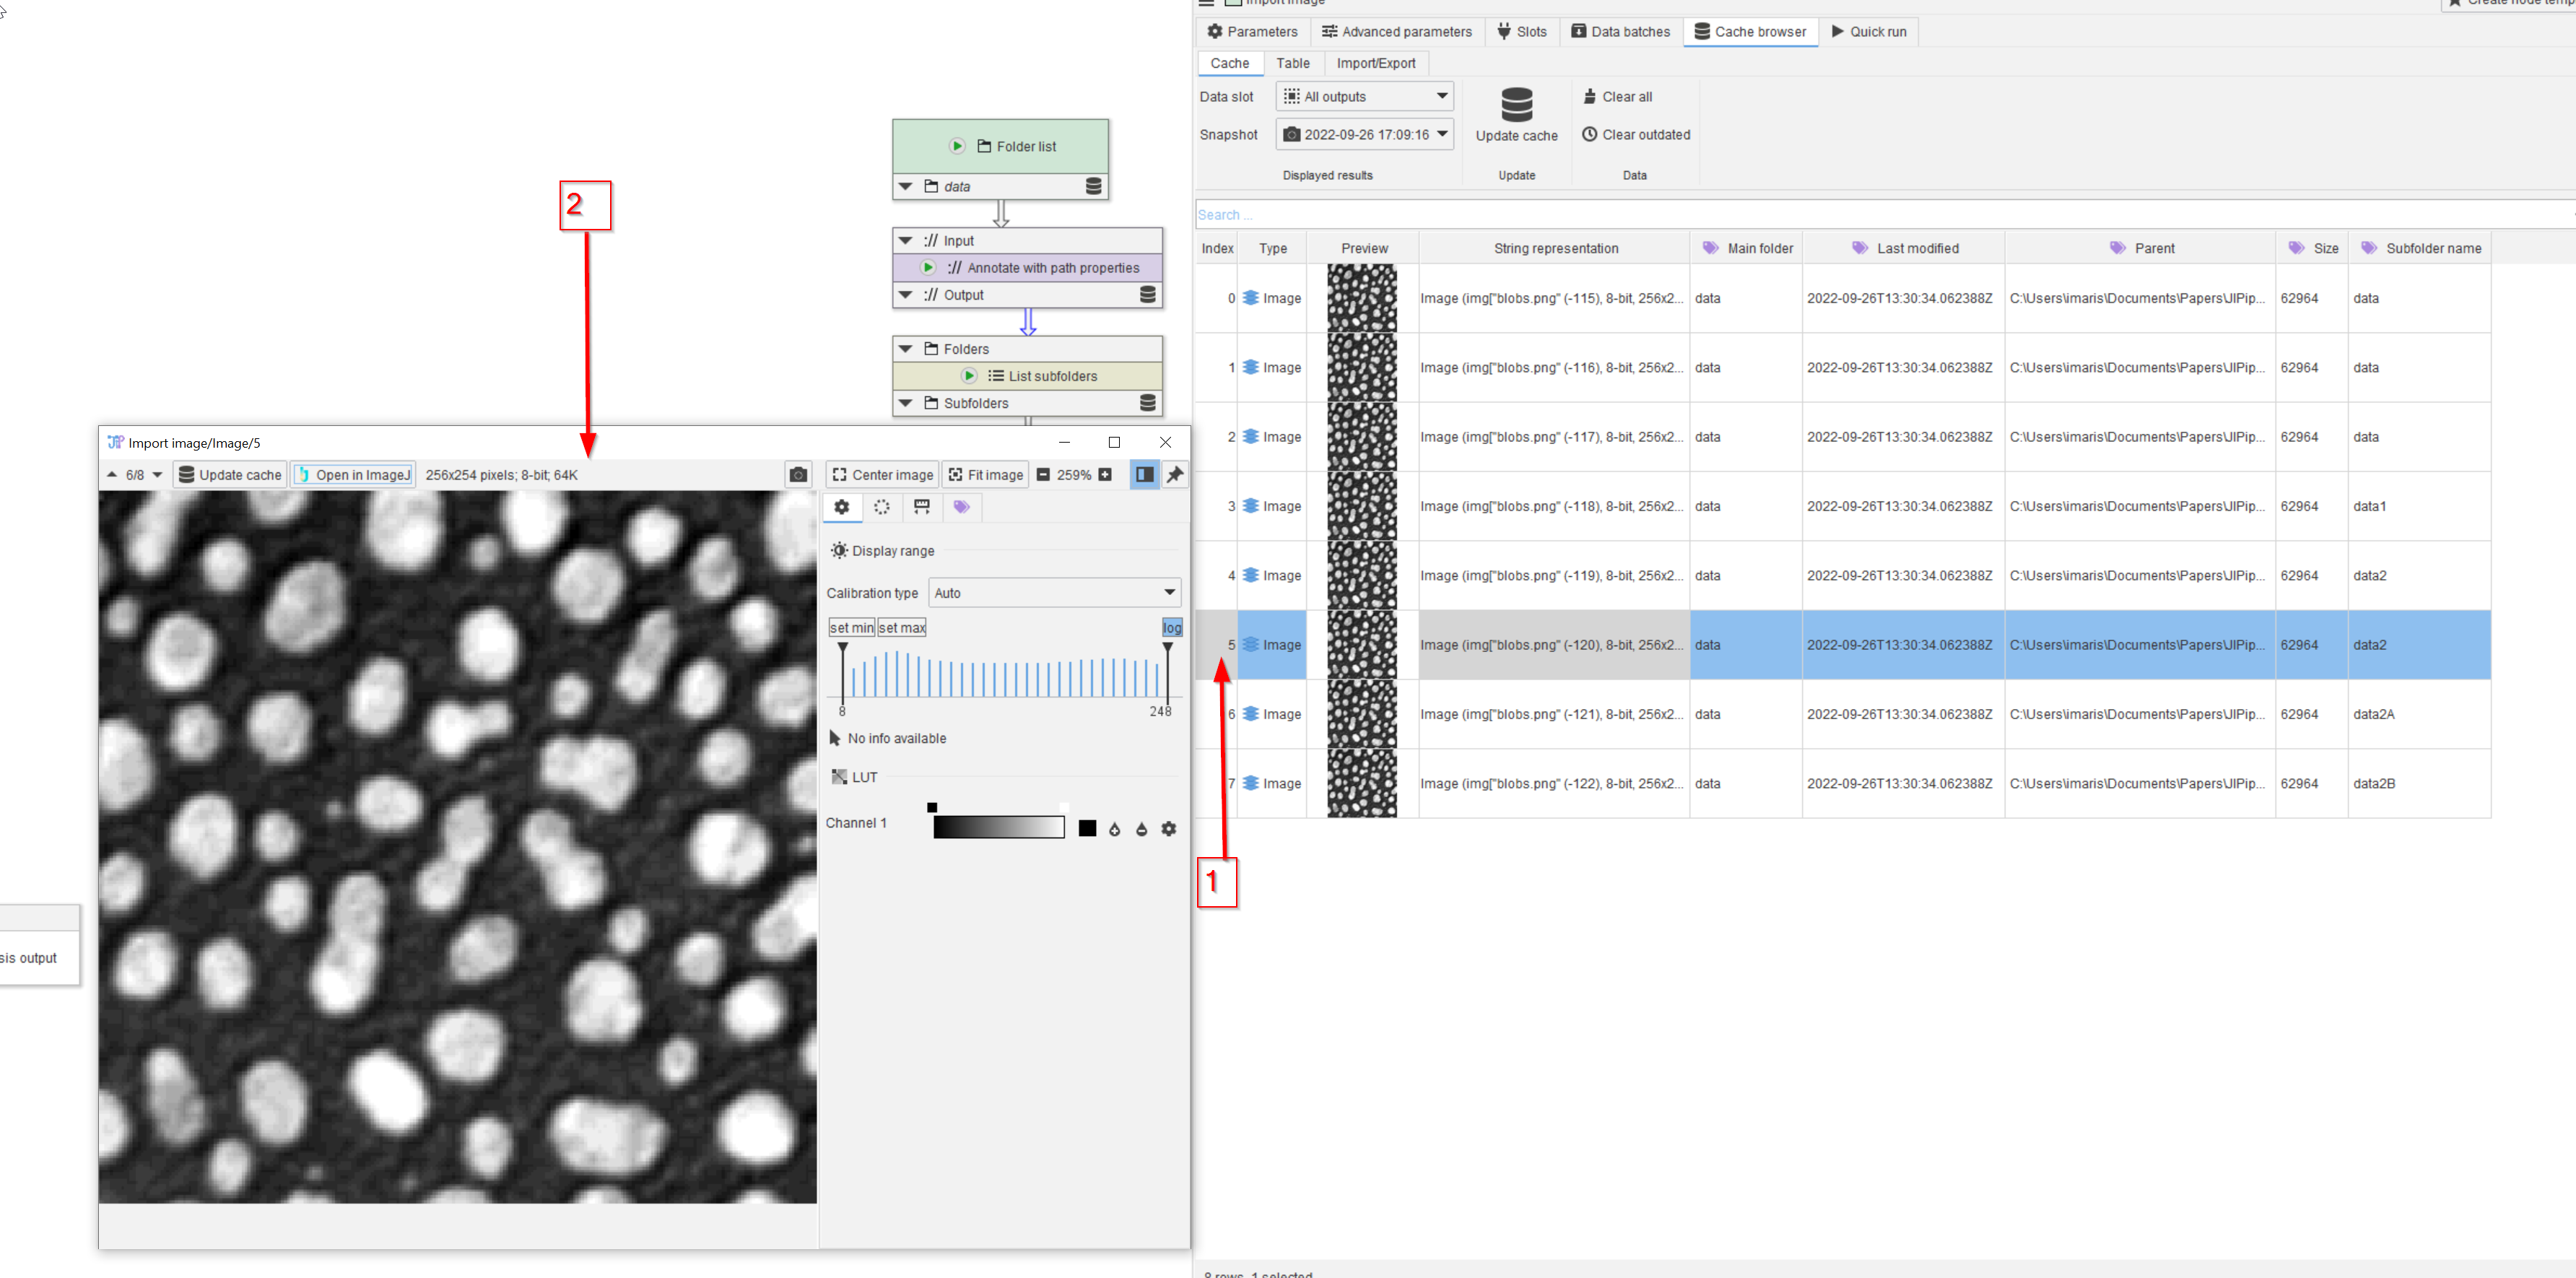
Double click on one of the images (red arrow 1) to observe it in a separate viewer window (red arrow 2)