Step 1
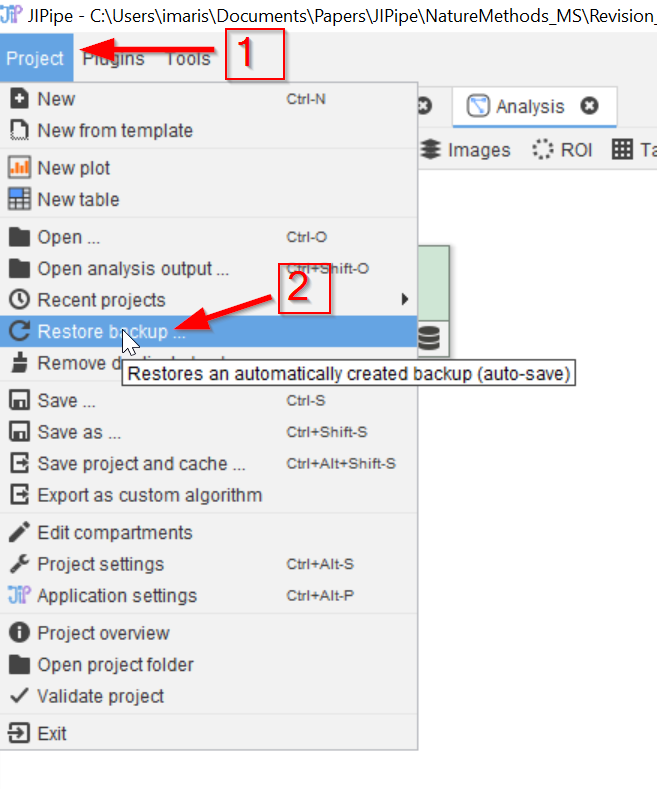
Projects are regularly saved automatically as a backup. These can be easily recovered by going to the Project tab (red arrow 1) and choosing Restore backup (red arrow 2) The location of the backups can be decided by the user.
Step 2
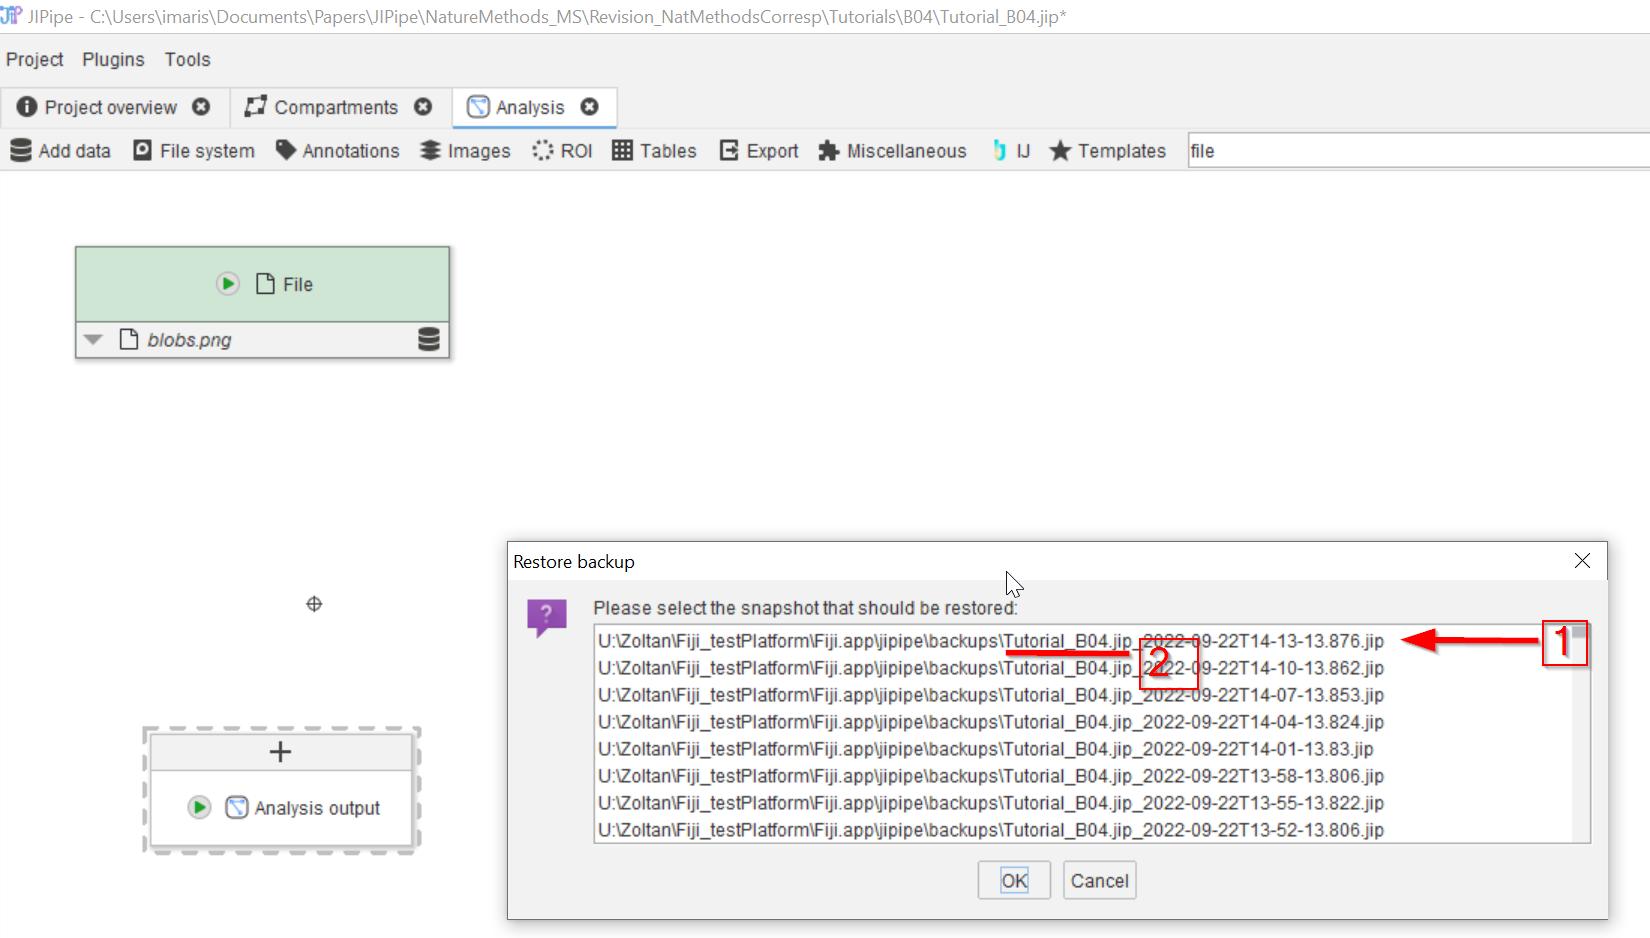
The list will show the available backup files, the top one being the most recent (red arrow 1). The backup filename contains the original name of the JIPipe project (red line 2) for easy orientation.
Step 3
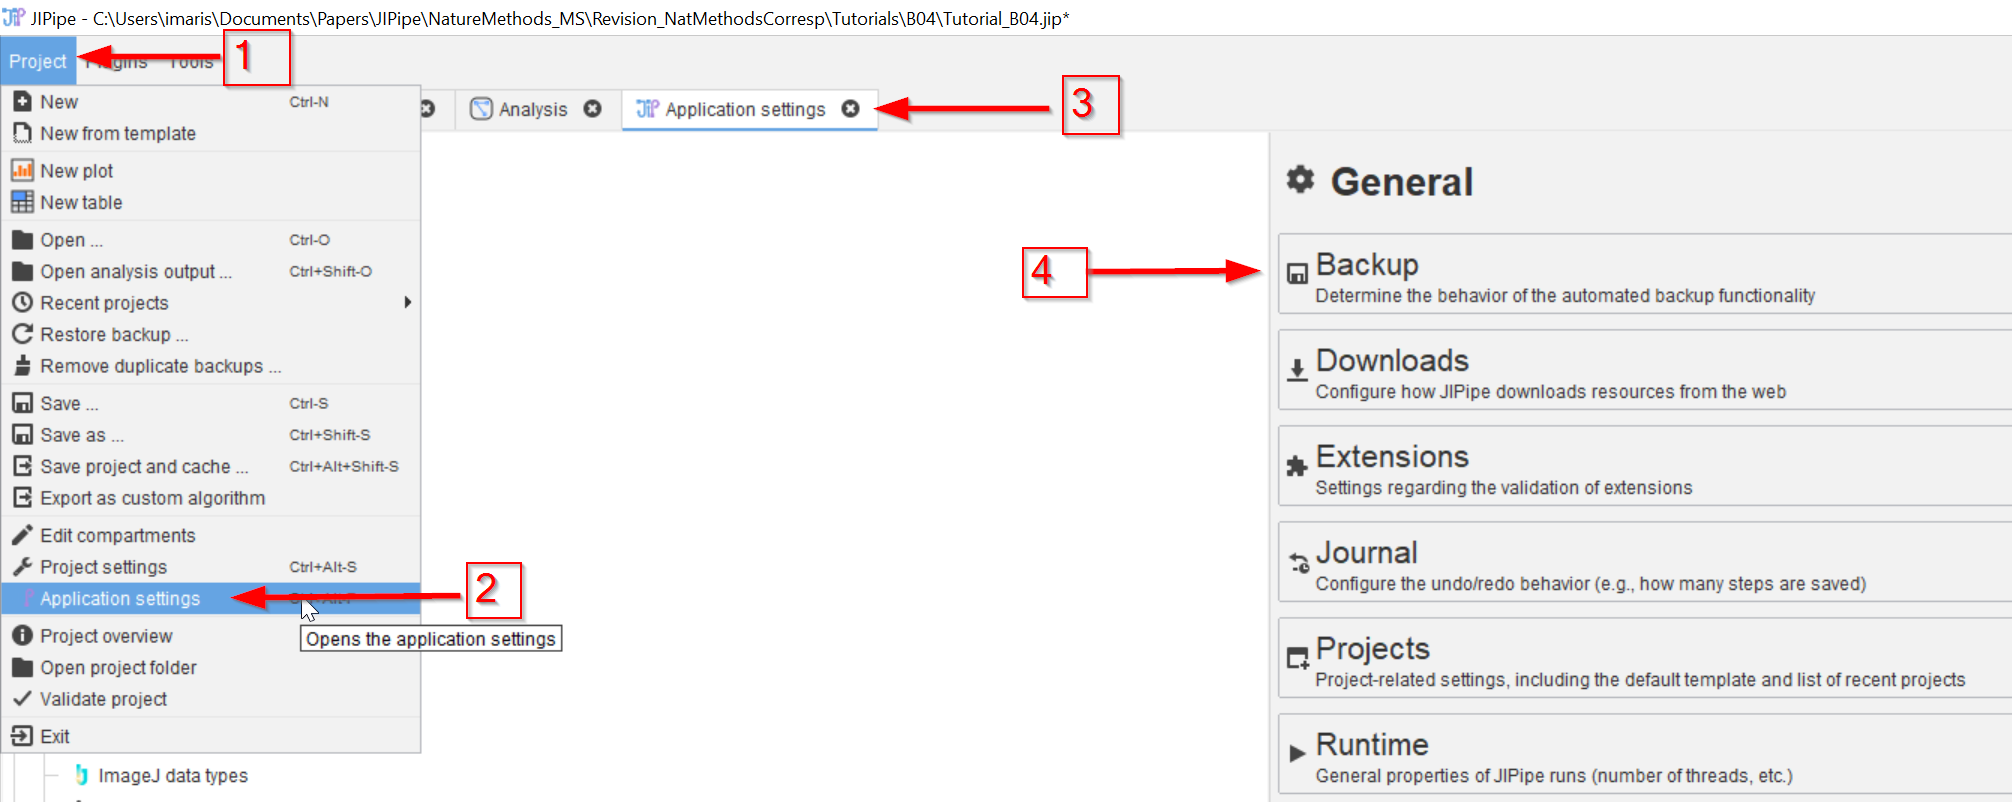
The location of the backup files can be customized via going to the Project tab (red arrow 1) and choosing the Application settings tab (red arrow 2). This will open a new tab in the JIPipe main GUI (red arrow 3). Choose the backup tab (red arrow 4) to set a custom folder for the backup projects.
Step 4
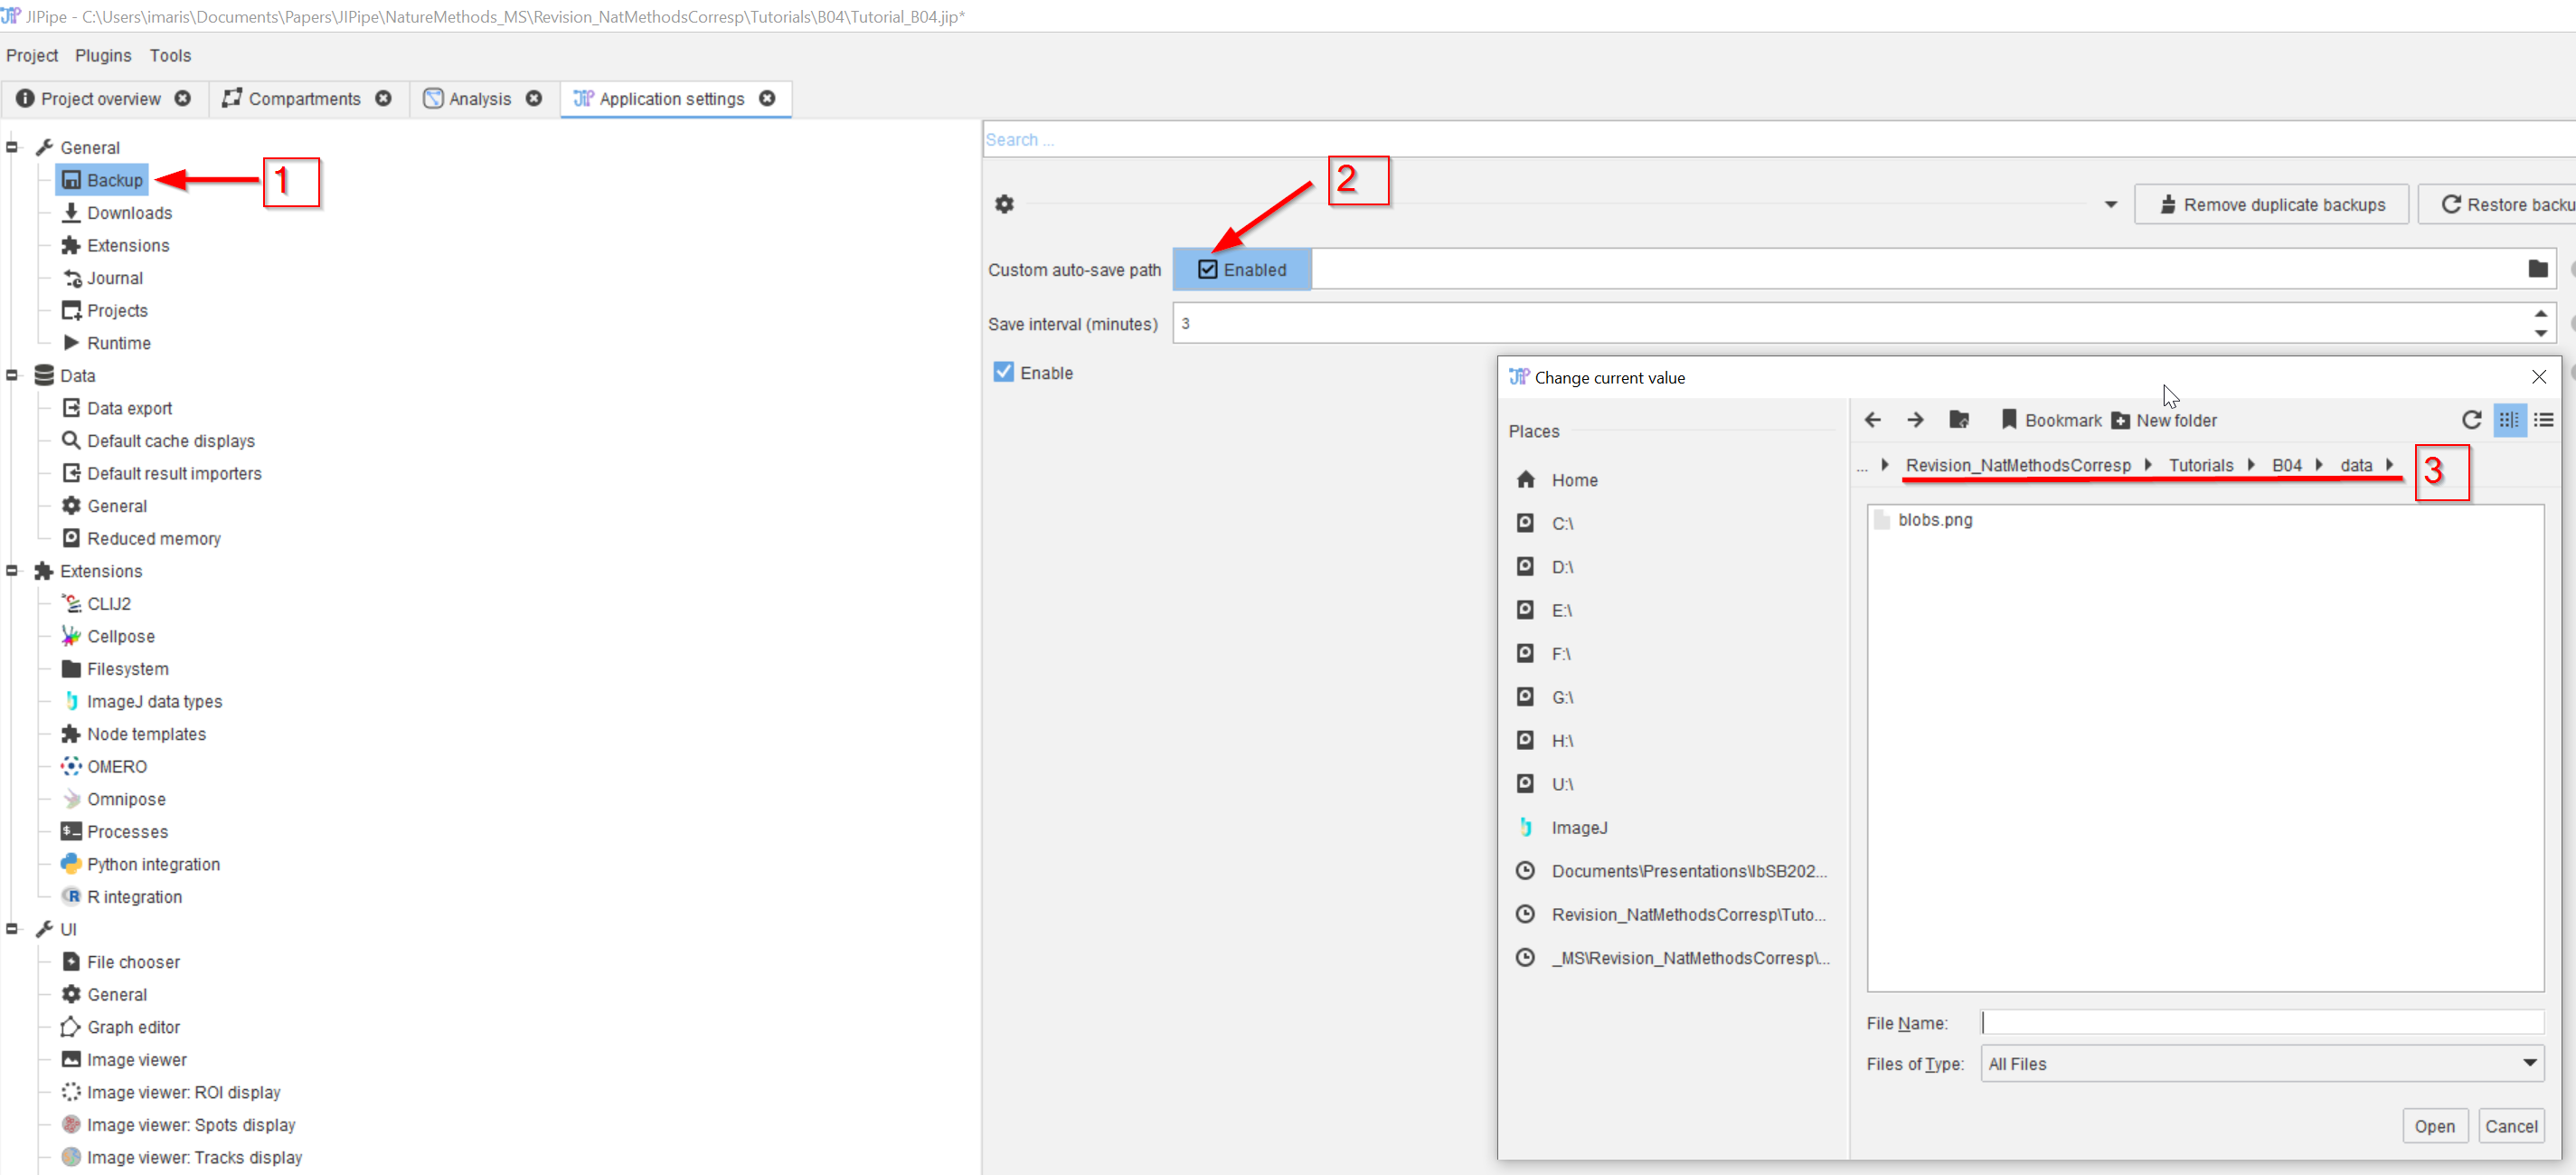
In the Backup tab (red arrow 1) activate the Custom path option on the right side (red arrow 2) and navigate to the new backup folder (red line 3)