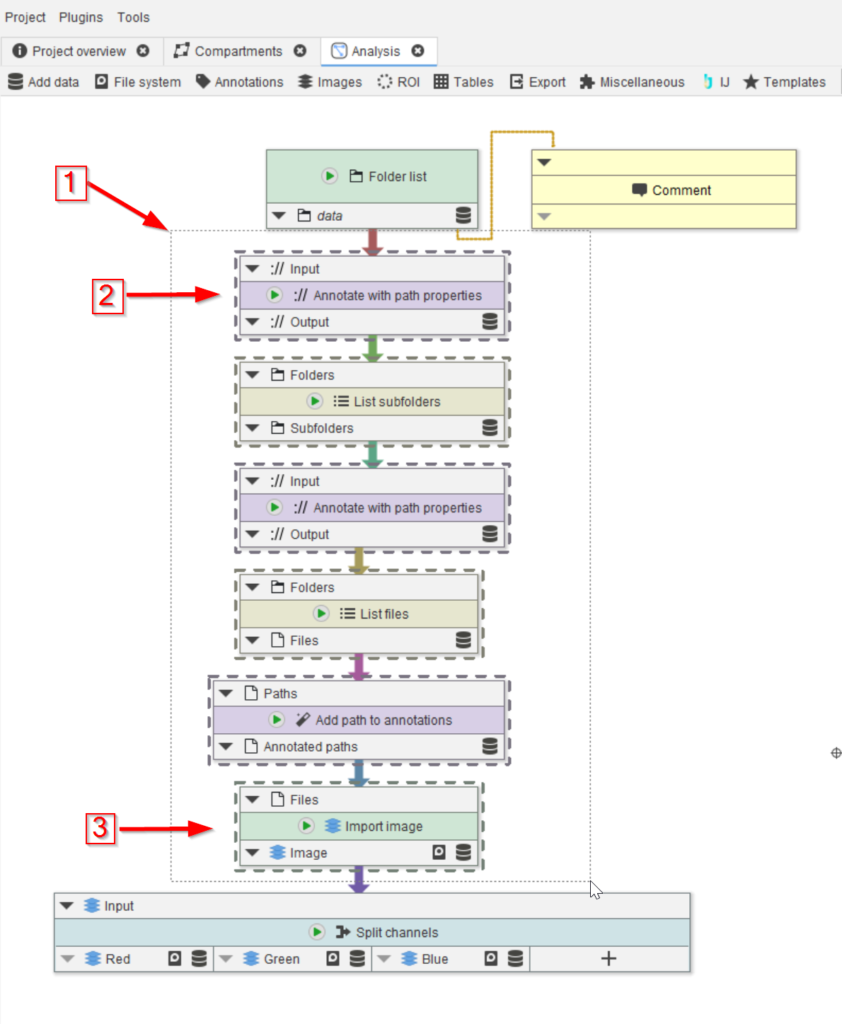

Step 1
In order to see the content of the group node, double-click on the node (red arrow 1), which will open the content of the group in a new tab (red arrow 2).
Step 1
Alternatively, select the group node (red arrow 1), go to Parameters (red arrow 2) and select Edit graph (red arrow 3).
The new tab will contain the content of the group, similarly to the previous viewing method.
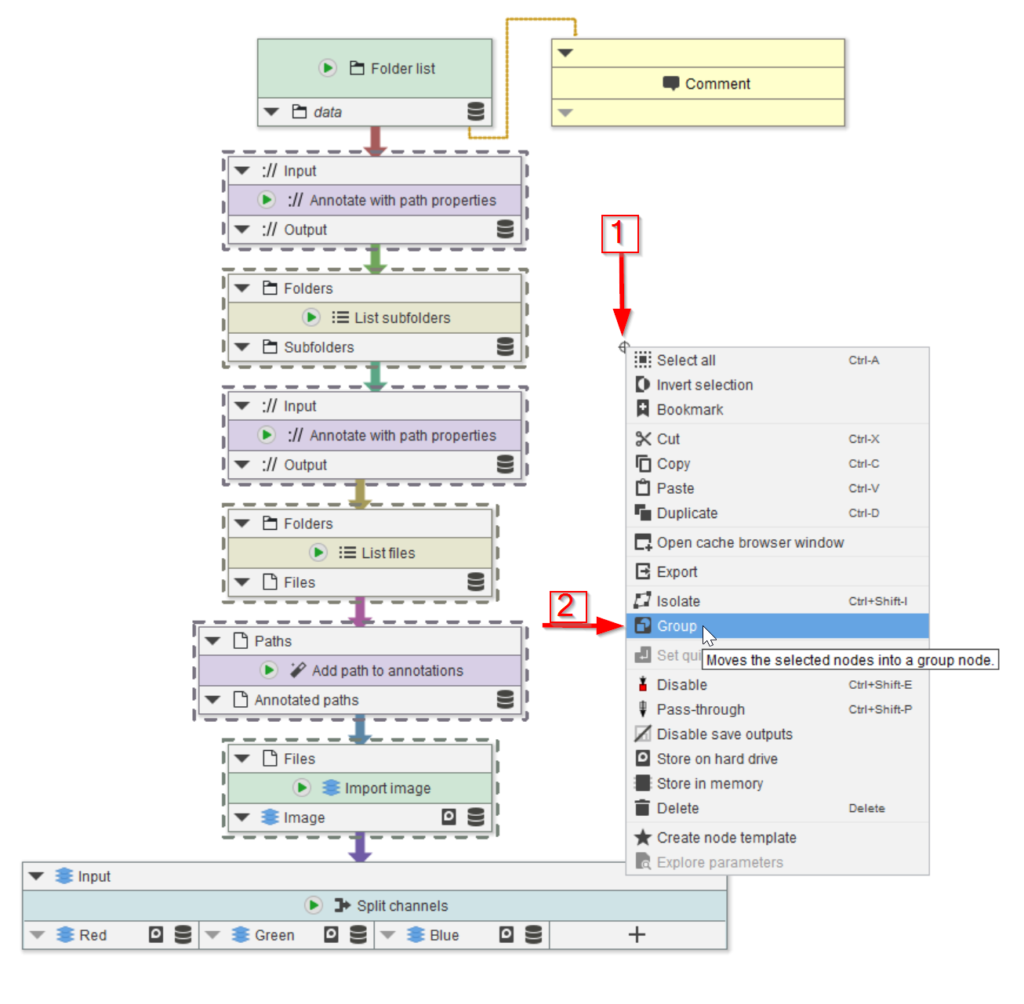
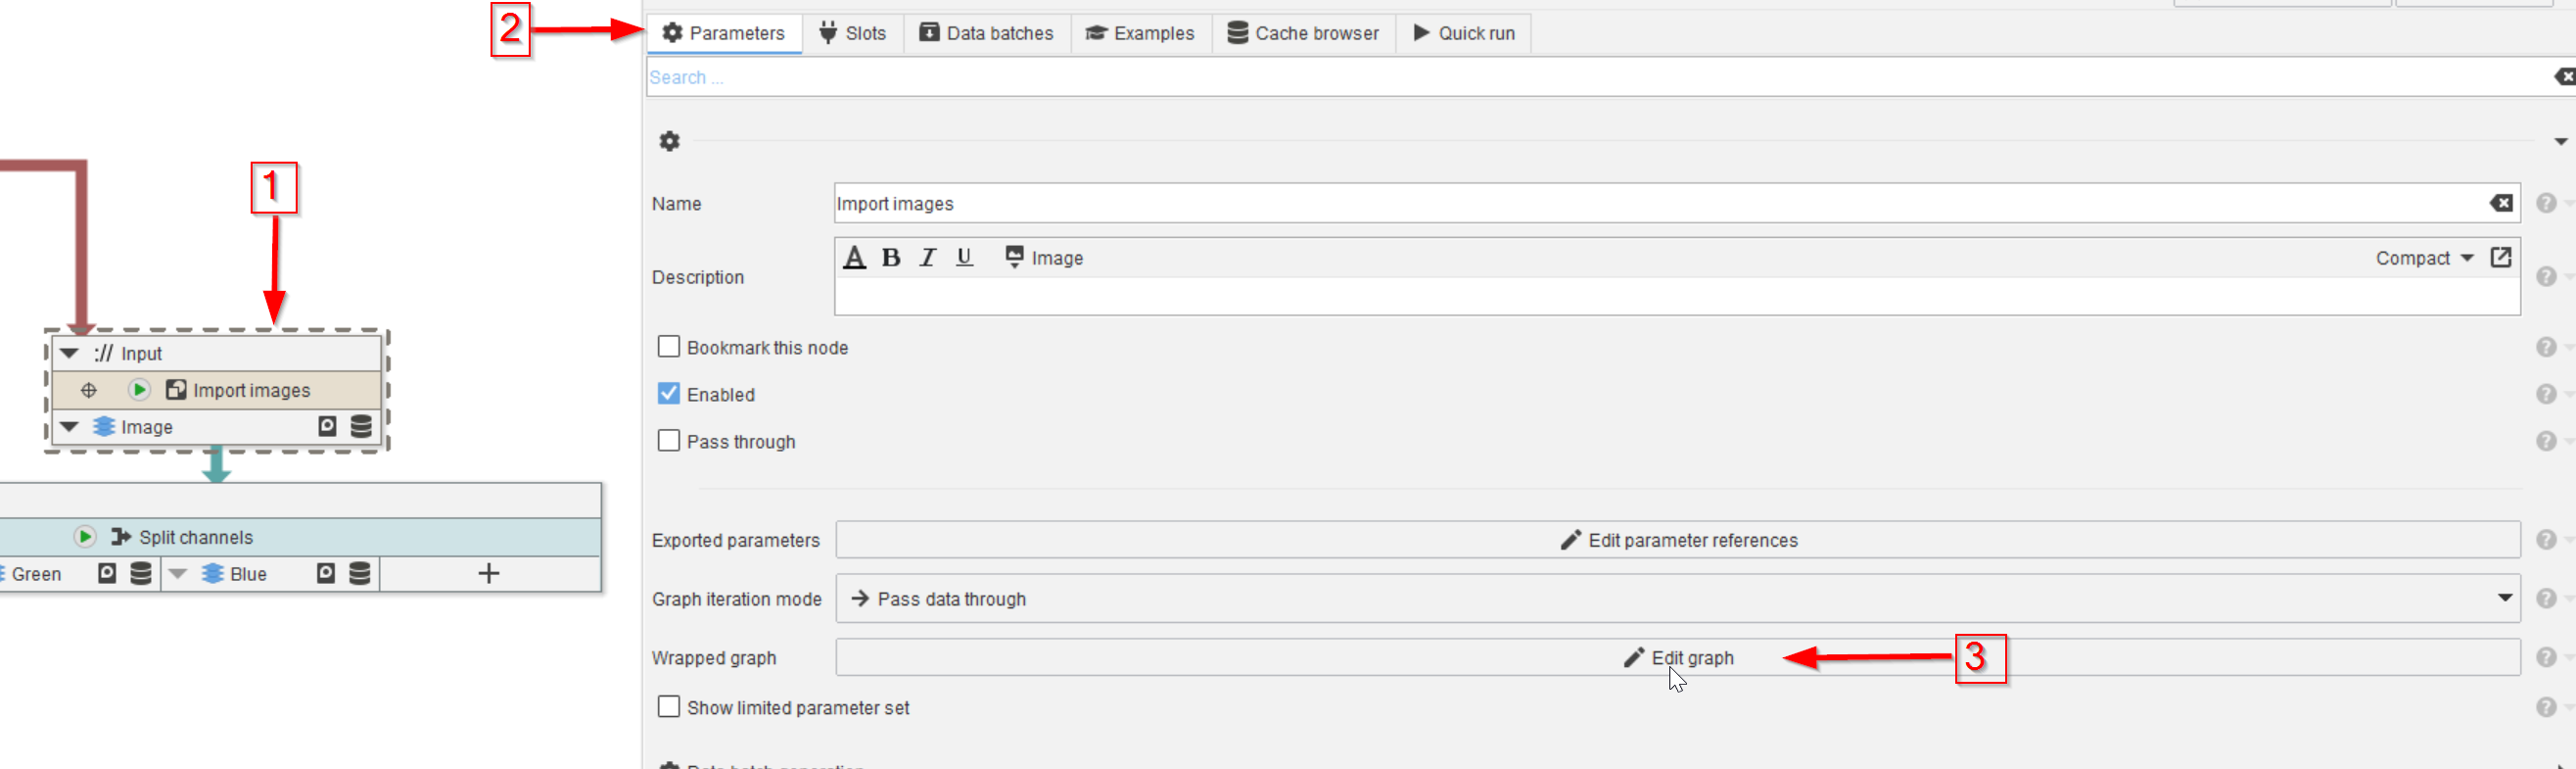
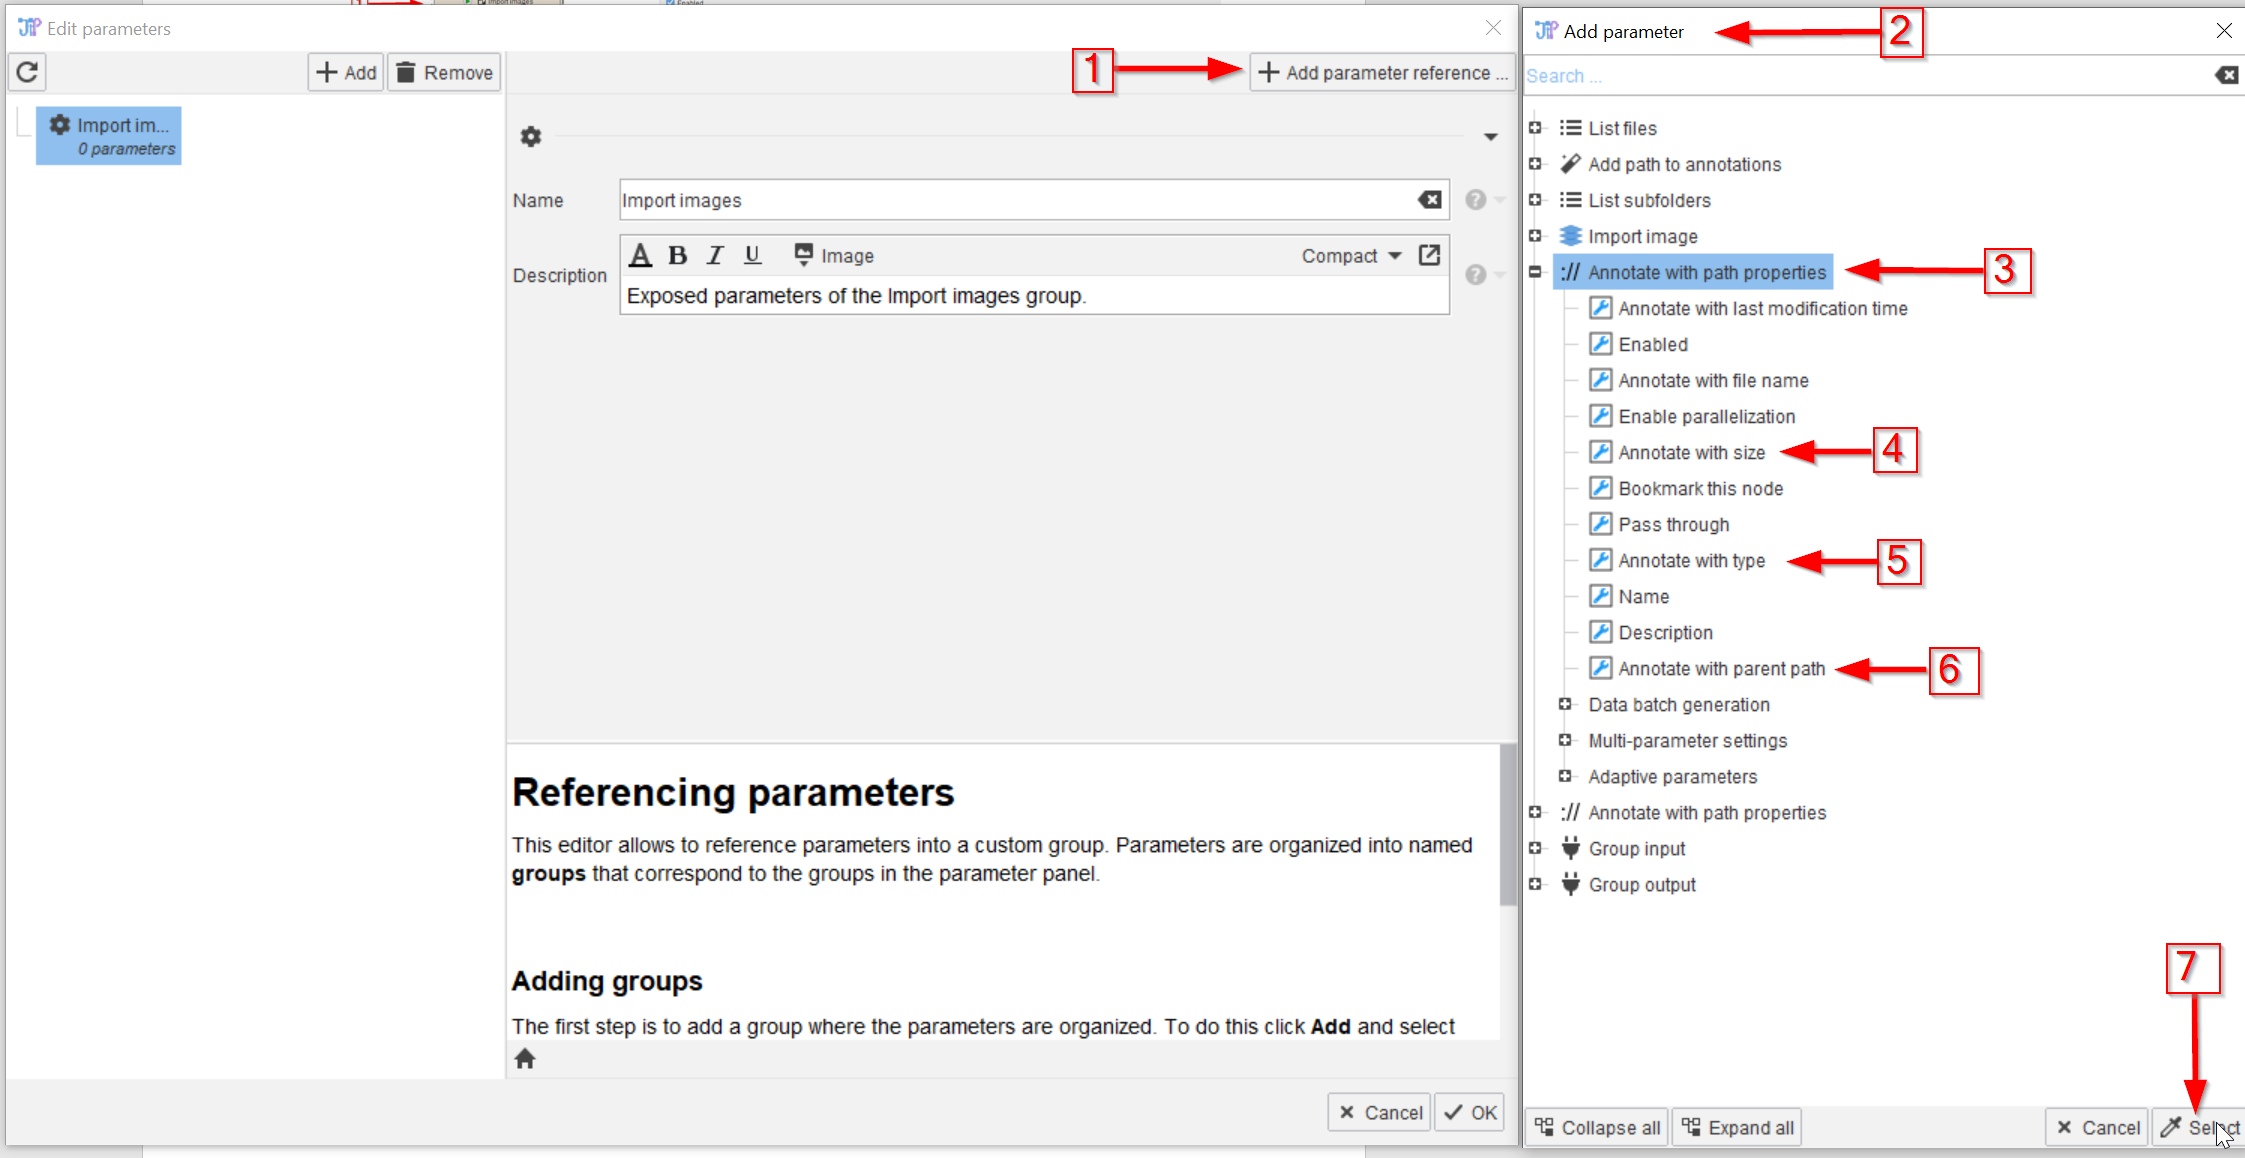
Step 2
Parameters that belong to the member nodes of the group can be made accessible directly.
Activate the group node (red arrow 1), go to Parameters (red arrow 2) and select Edit parameter references (red arrow 3).
In the new Edit parameters window (red arrow 4) select Add (red arrow 5 and choose Empty group (red arrow 6).

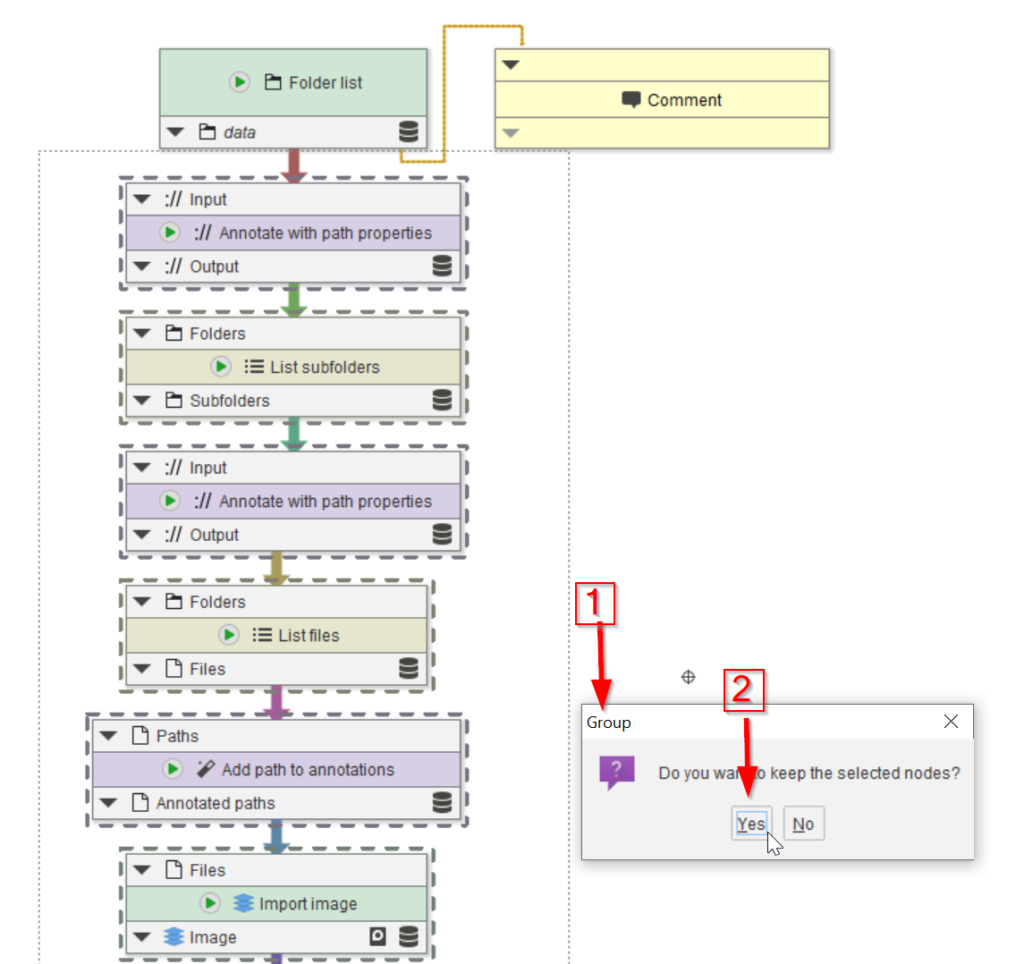
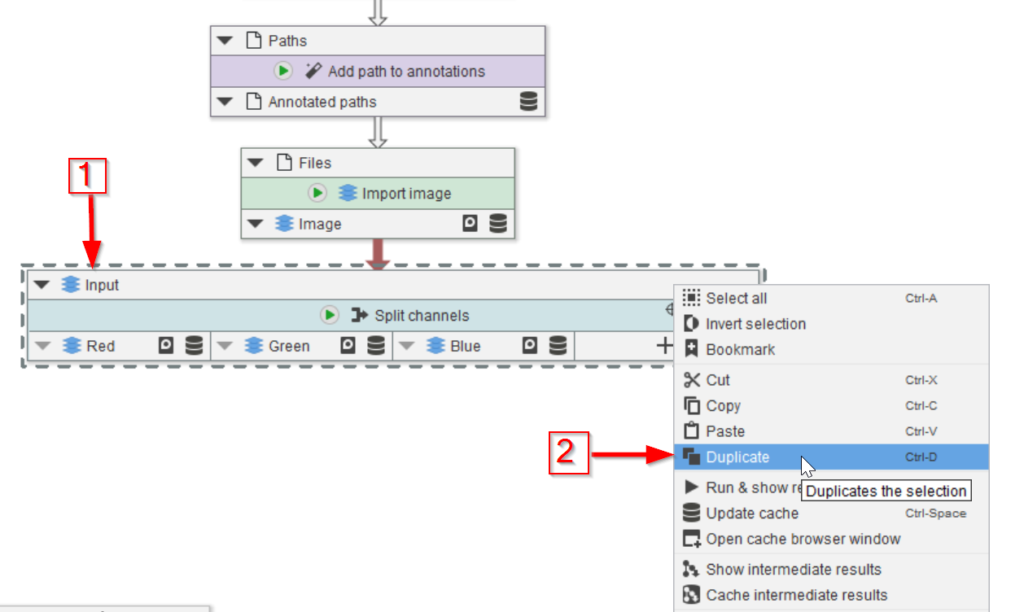
Step 3
The new group parameters window (red arrow 1) can be (re)named (red arrow 2), and provided with a description (red arrow 3).
The description editor can be in compact, full or HTML mode (red arrow 4).
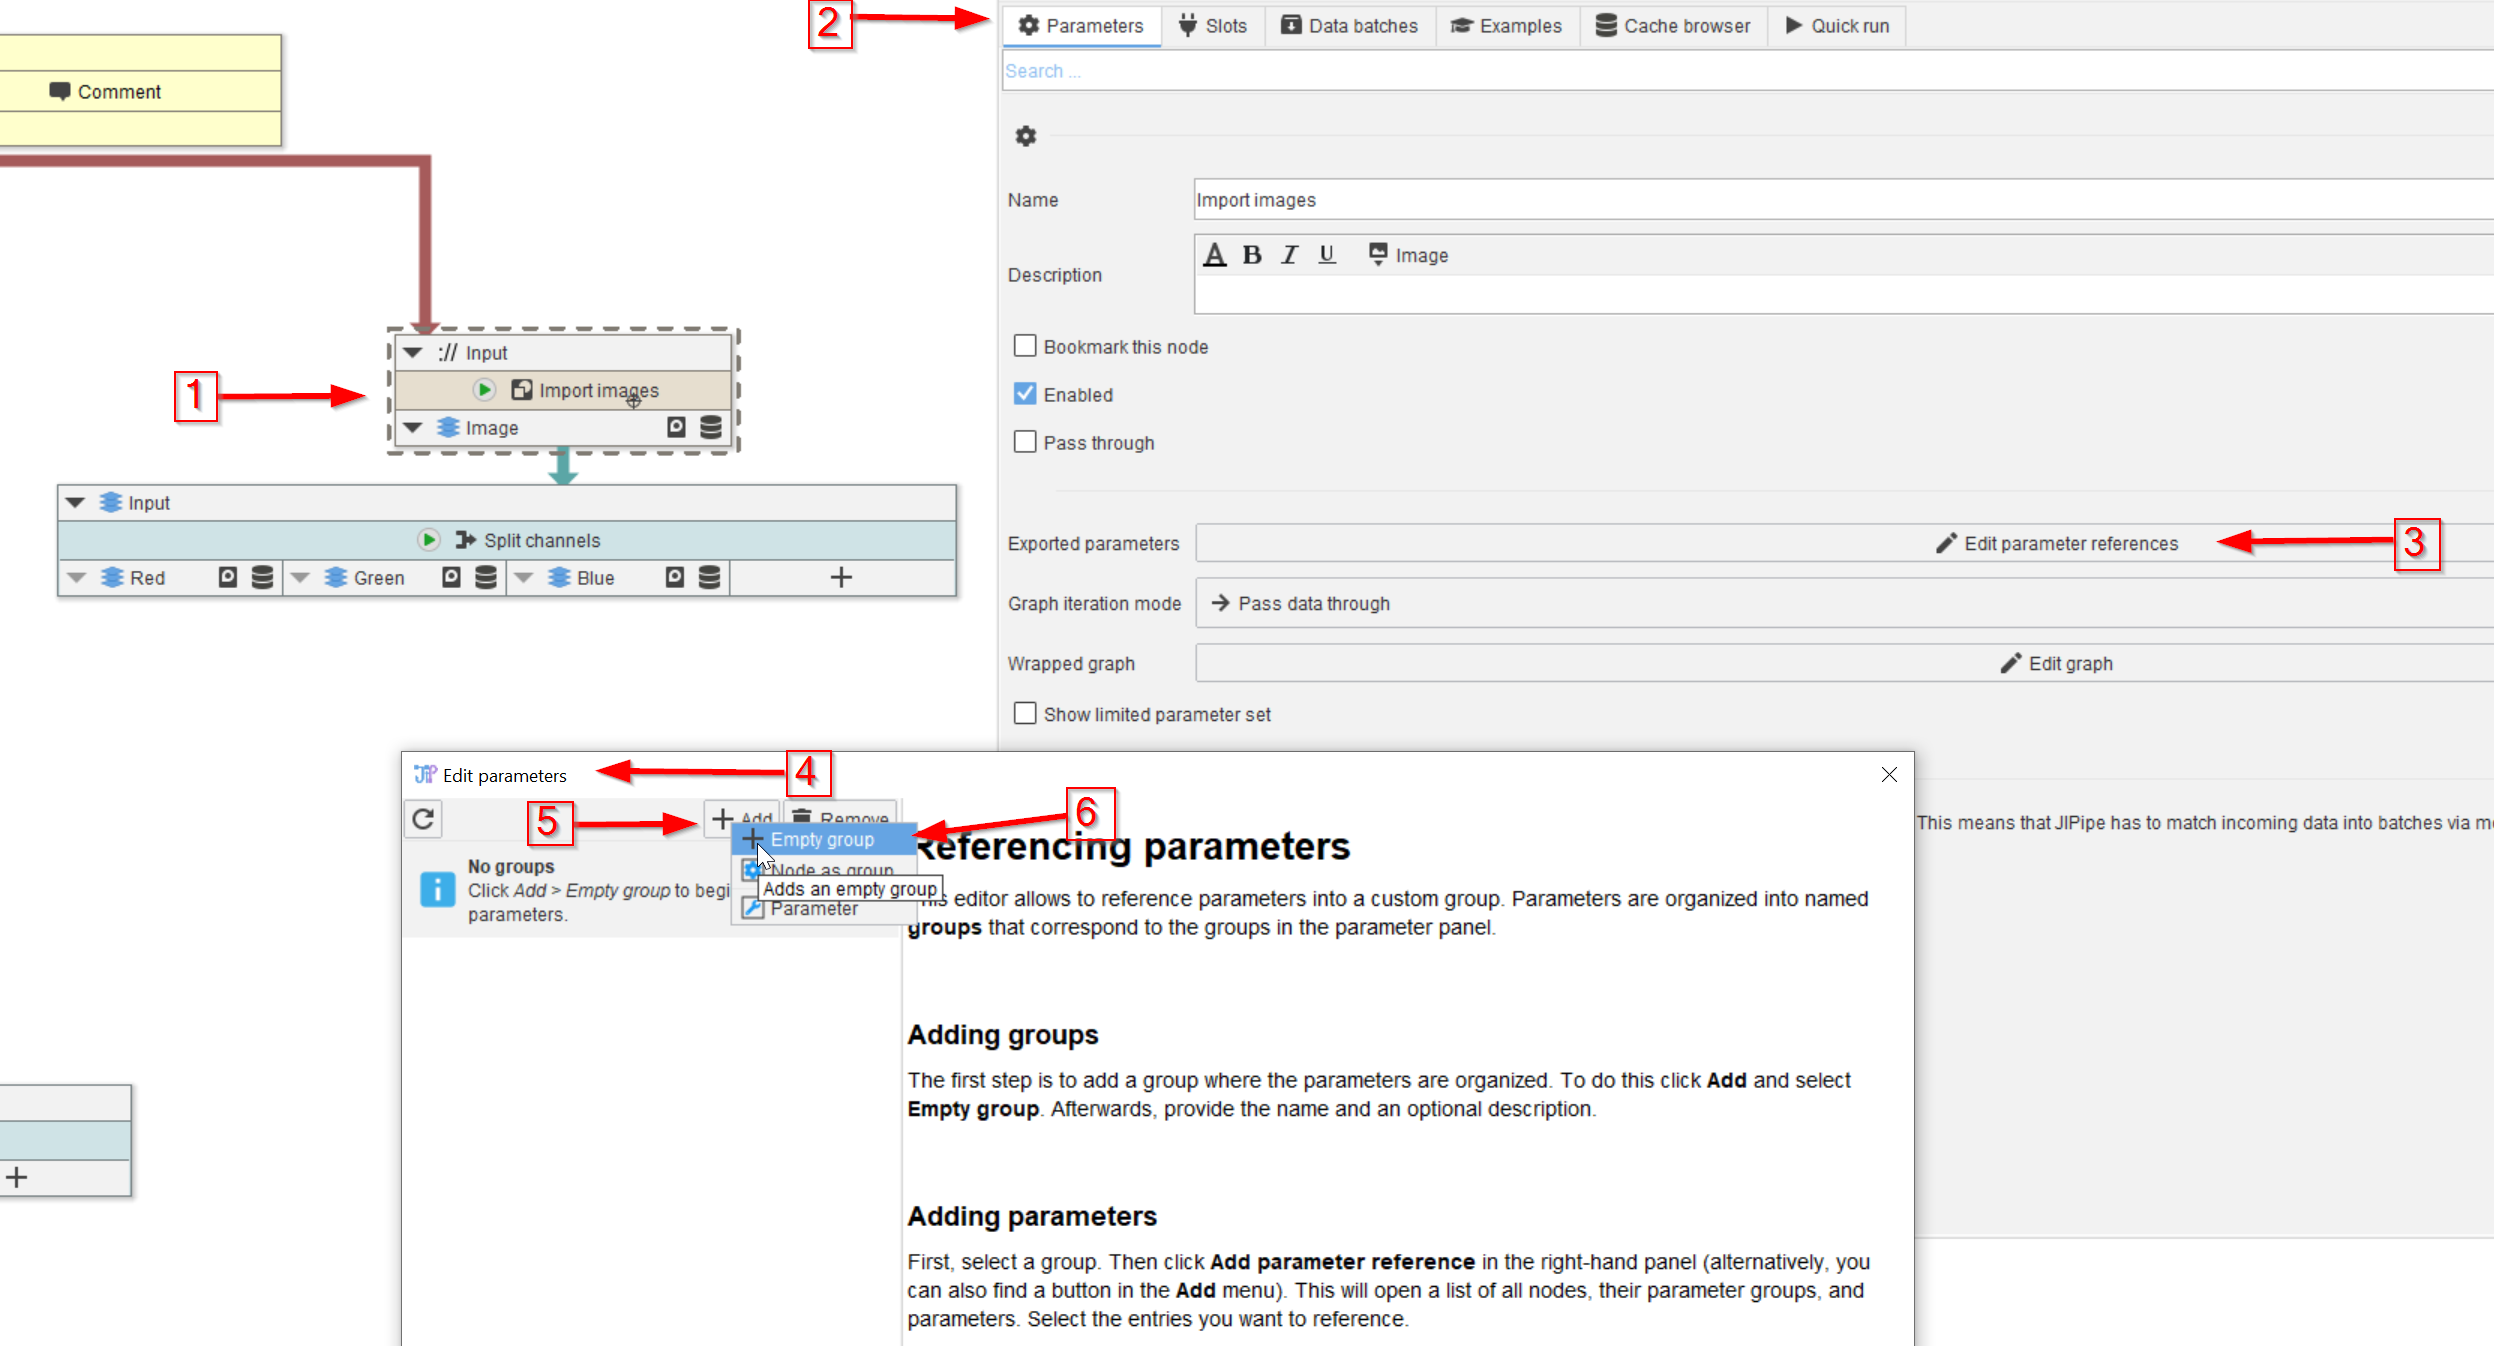
Step 4
In order to now add parameters to the group, click on Add parameter reference (red arrow 1) and browse the new Add parameter window (red arrow 2).
Chose e.g. Annotate with path properties (red arrow 3) and select Annotate with size (red arrow 4), Annotate with type (red arrow 5) and Annotate with parent path (red arrow 6), and accept the selection (red arrow 7).
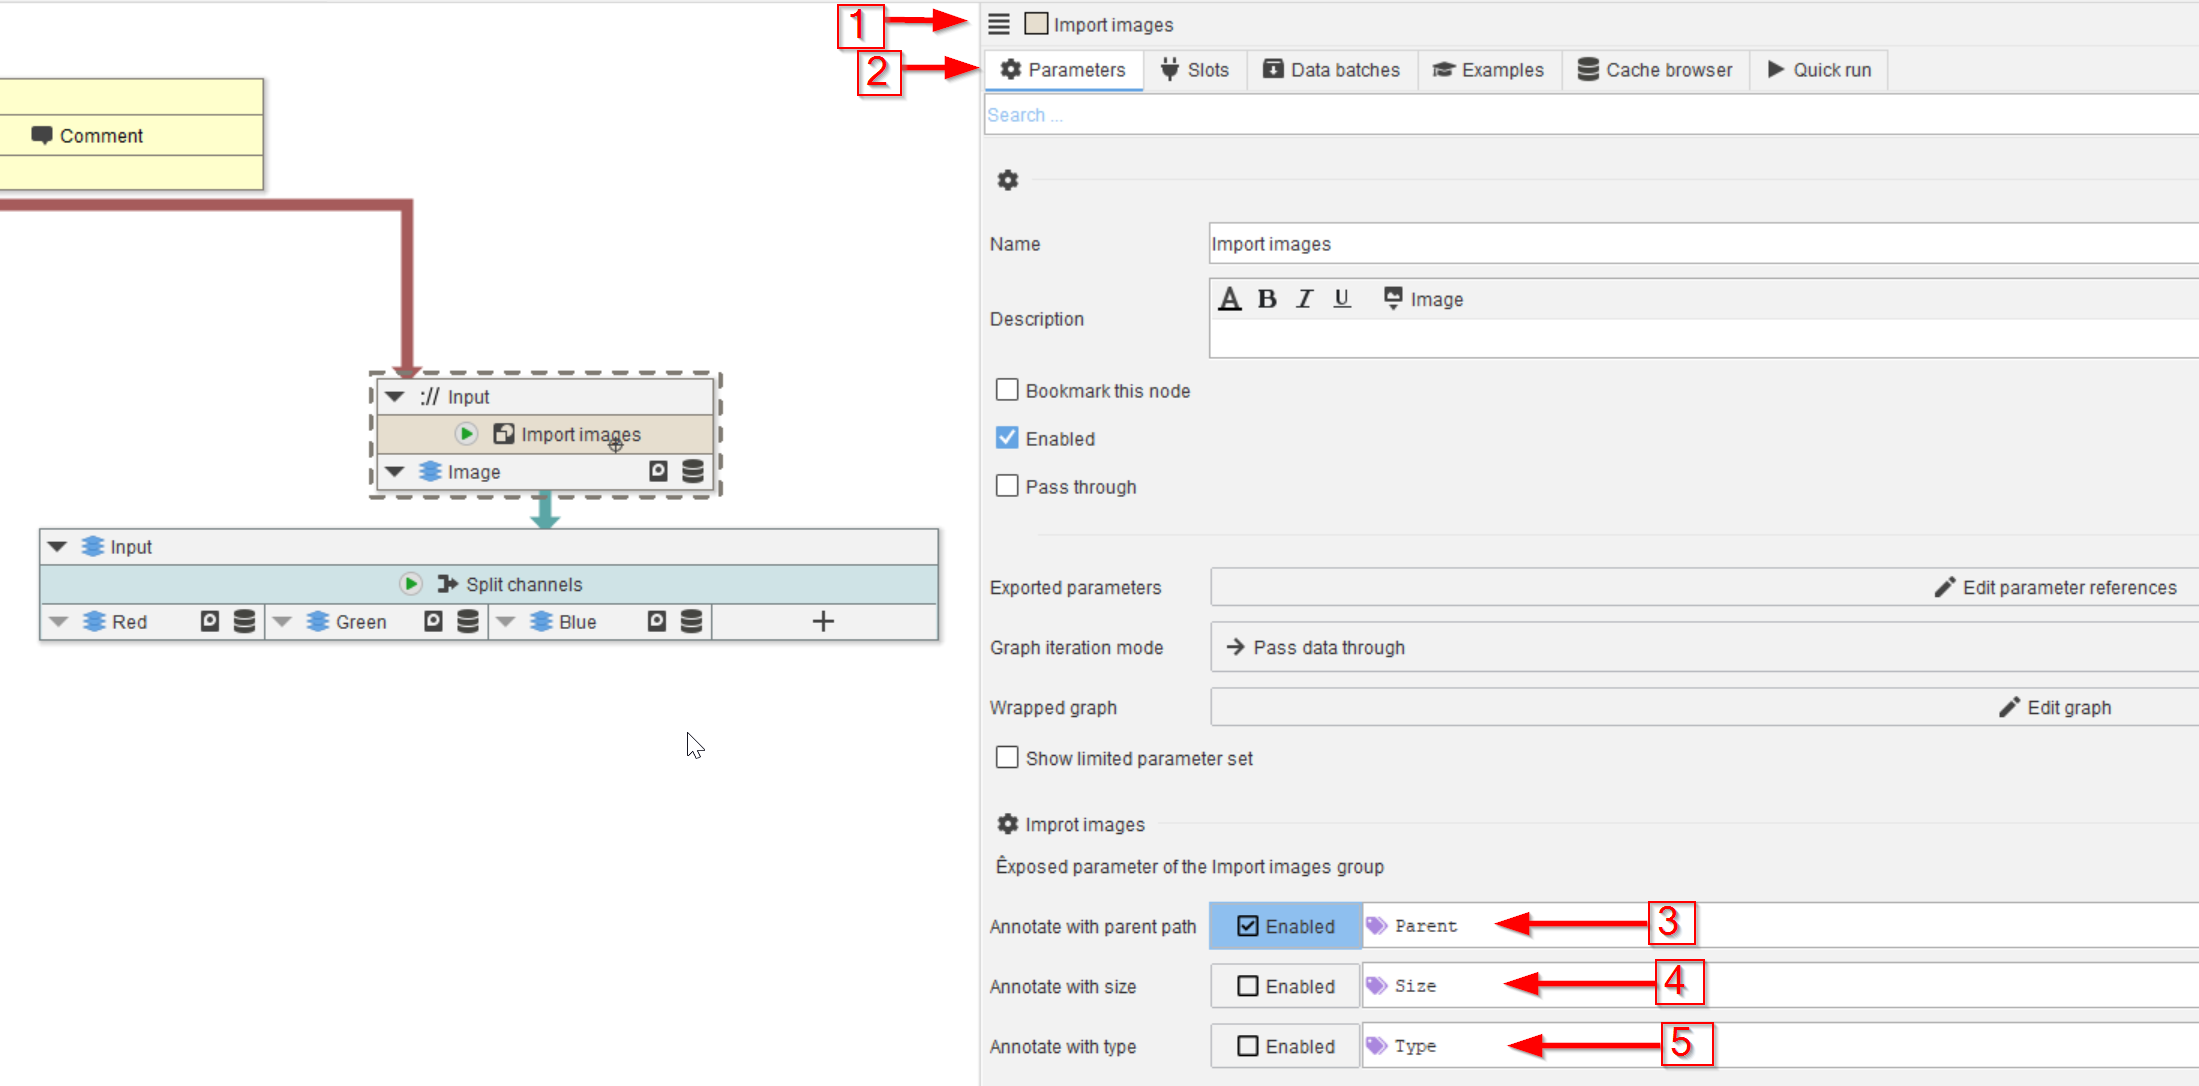
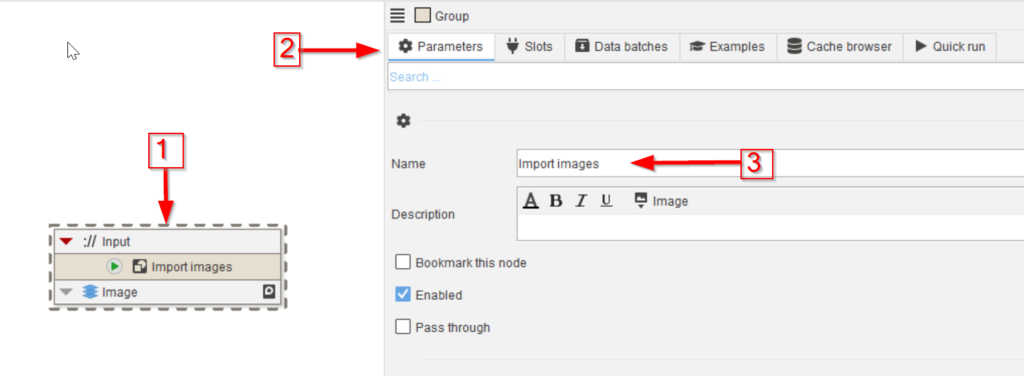
Step 5
The newly added exposed parameters are now visible in the Import image node (red arrow 1) Parameters menu (red arrow 2), where all three exposed parameters (red arrows 3, 4, 5) are now adjustable, without having to open the group graph. Direct editing of the nodes inside the group is still possible via opening the content in a new tab, as show before.

Step 6
Observer the cache (red arrow 1). The outcome is the same as it was after executing the individual nodes (red line 2).
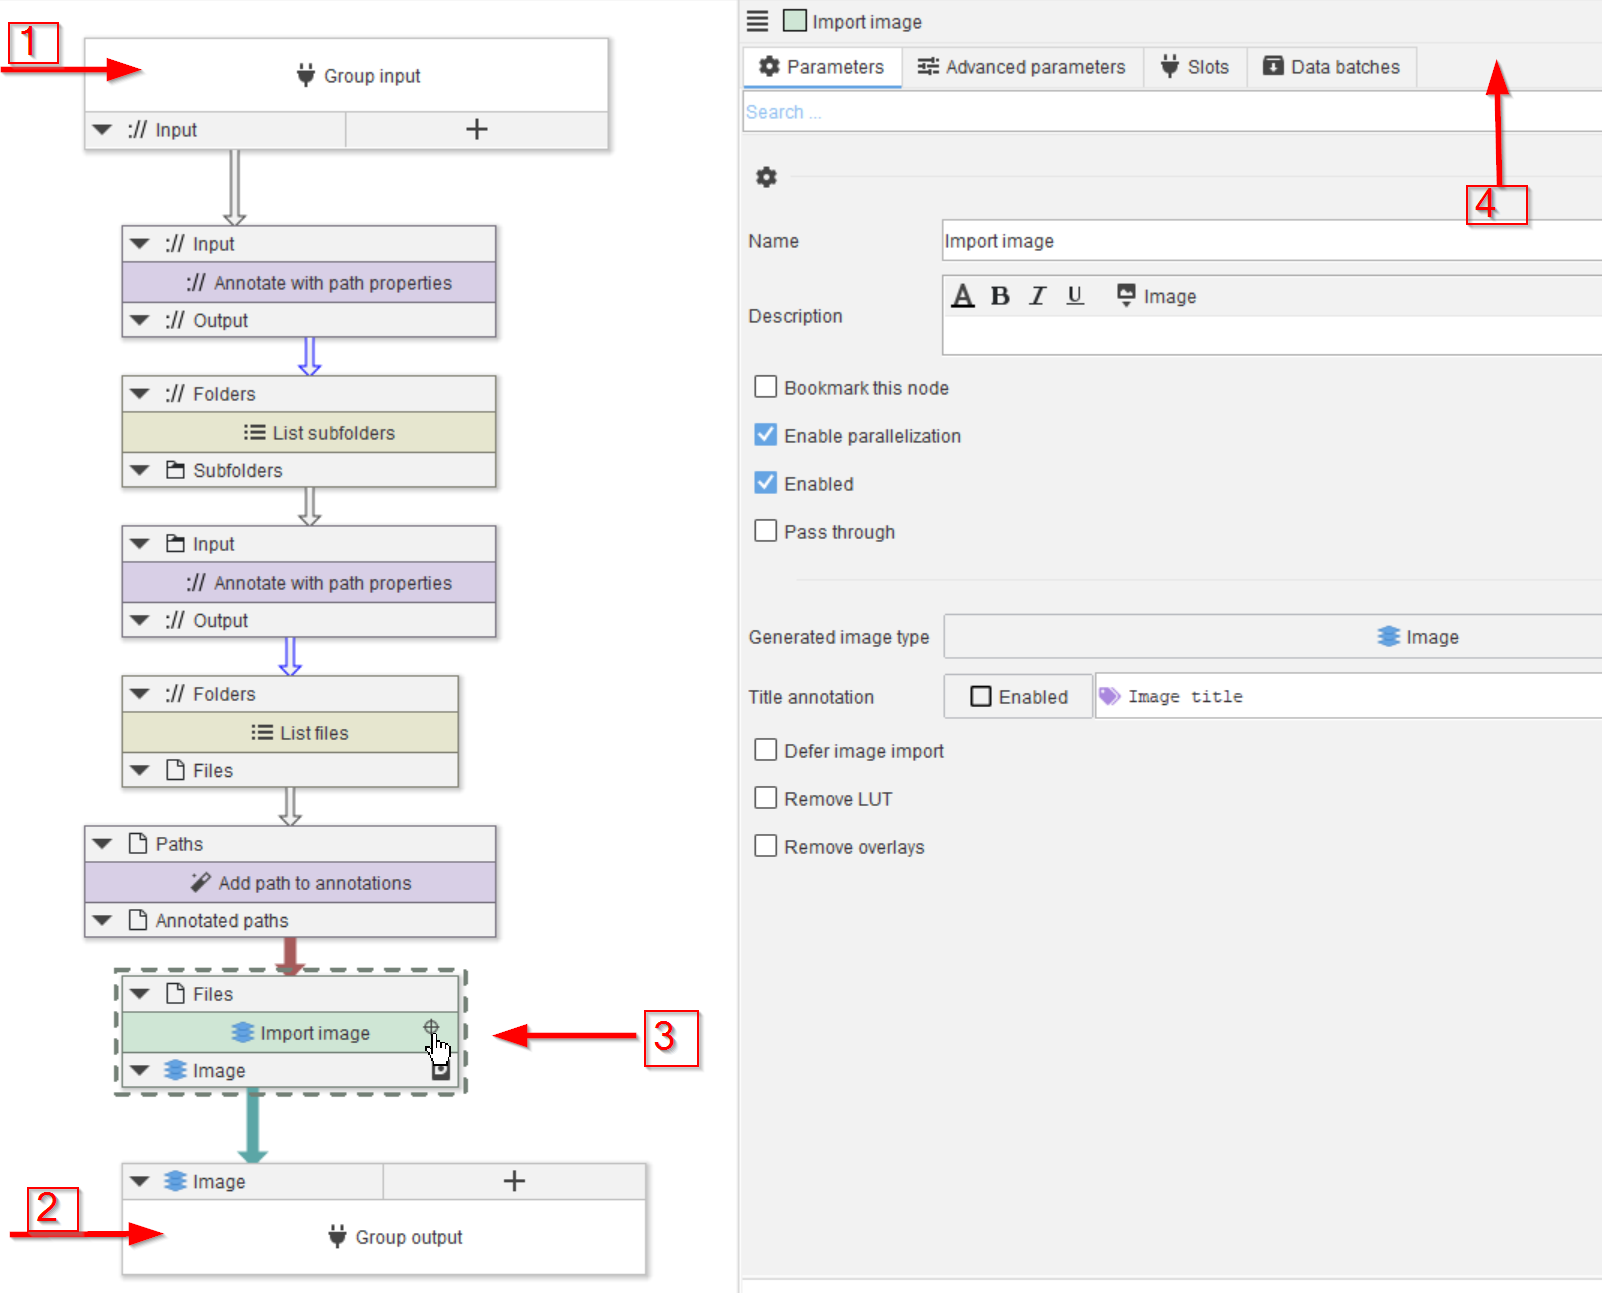
Step 7
However, the nodes inside the group do not have their cache saved! When examining the group tab, the content reveals a node for the group input (red arrow 1), the group output (red arrow 2), but selecting the Import image node, e.g., (red arrow 3) will not find a Cache tab (red arrow 4).
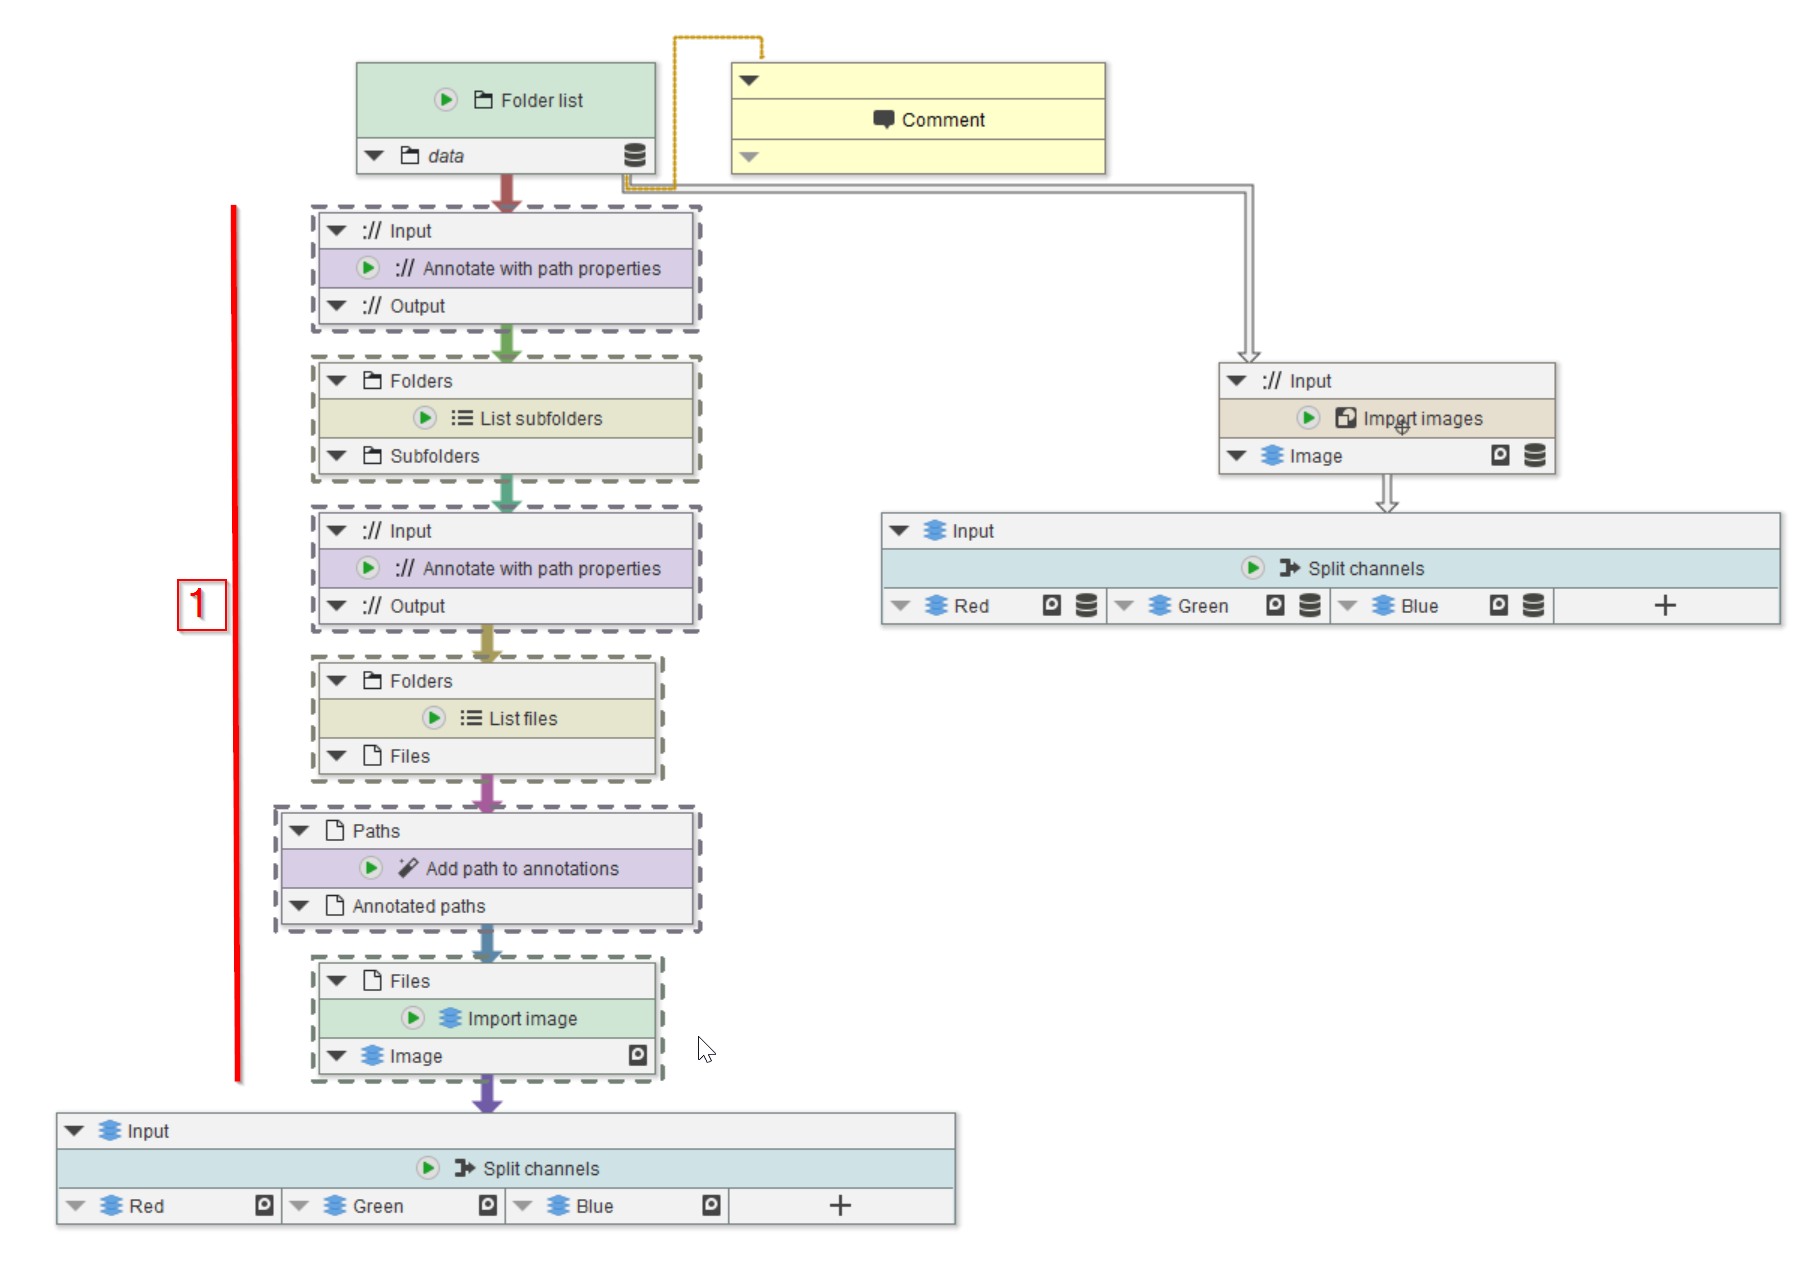
Step 8
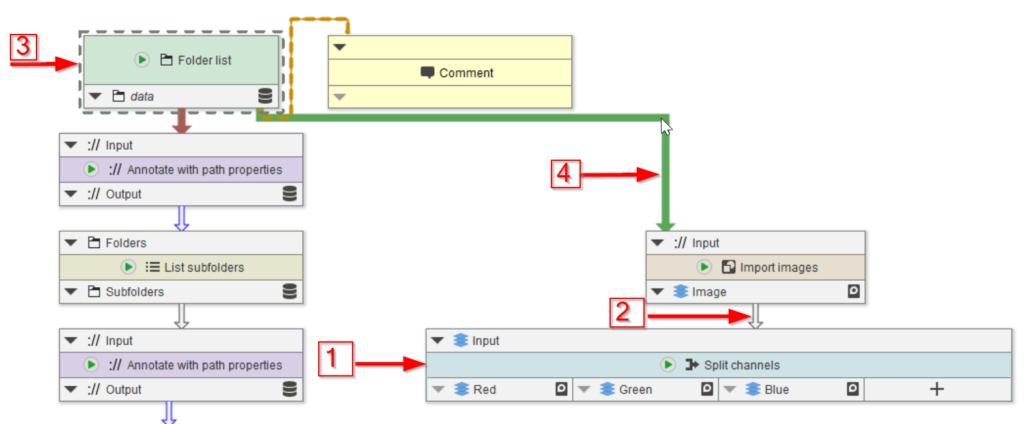
Should changing and testing the individual nodes of a group become necessary, the member nodes of the group have to be copied into the main pipeline (red line 1) and tested there the traditional way.