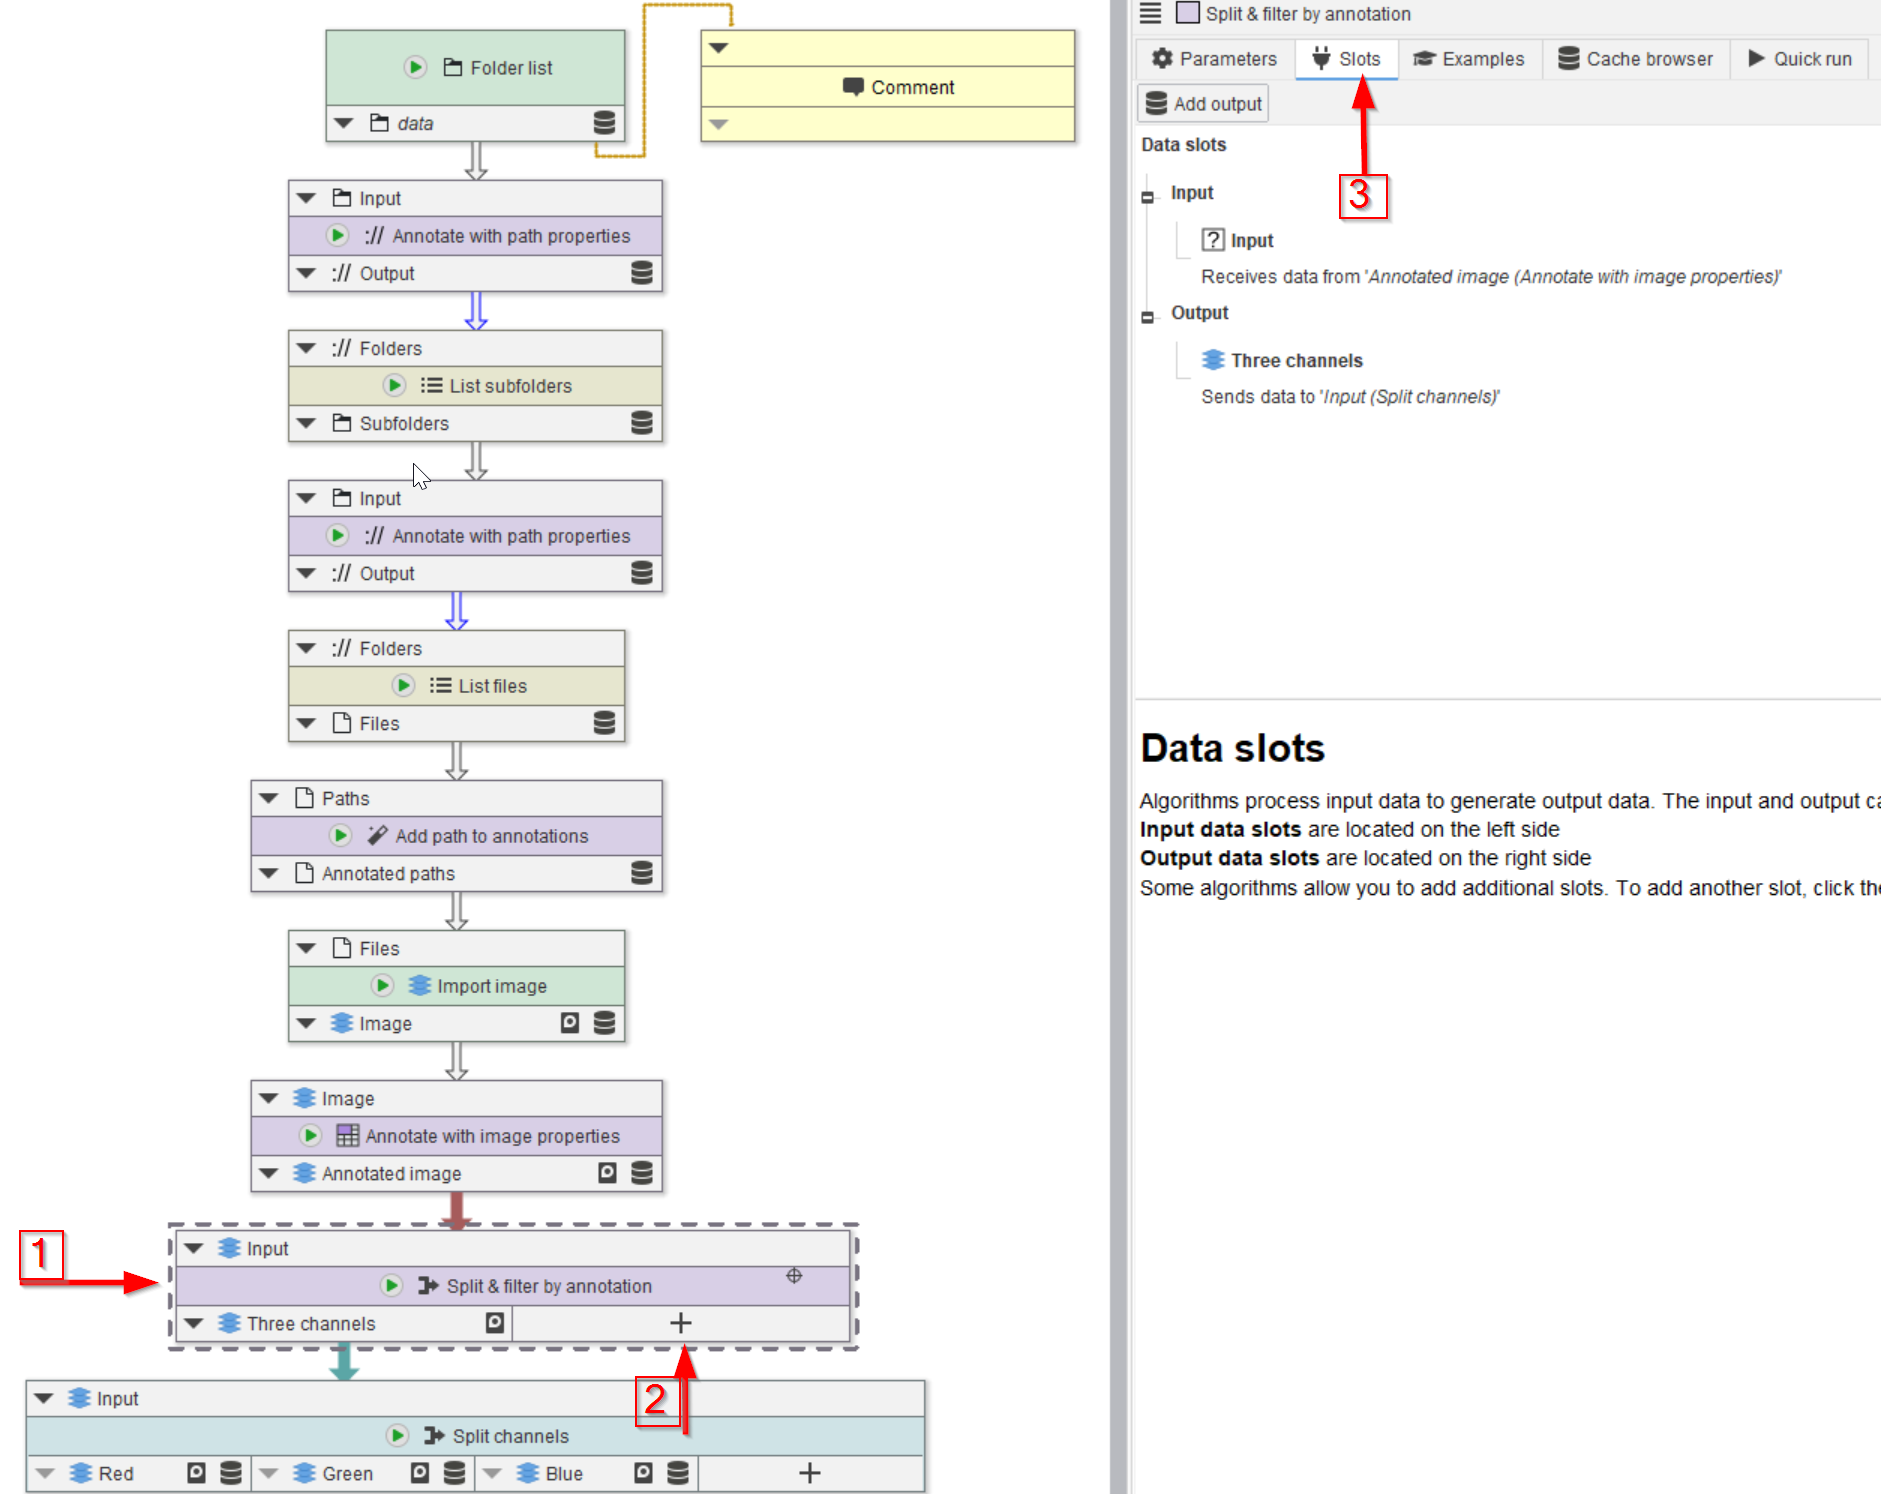
Step 1
Load the pipeline of the tutorial, select the Split & filter by annotations node (red arrow 1) and observe the ➕ (Add slot) button (red arrow 2) and the Slots tab in the right (red arrow 3).

Step 2
To add a new slot, click the ➕ button (red arrow 1) and use the Add slot window (red arrow 2) to add an Image slot (red arrow 3). Name the new slot accordingly (red arrow 4) and add it to the node (red arrow 5).
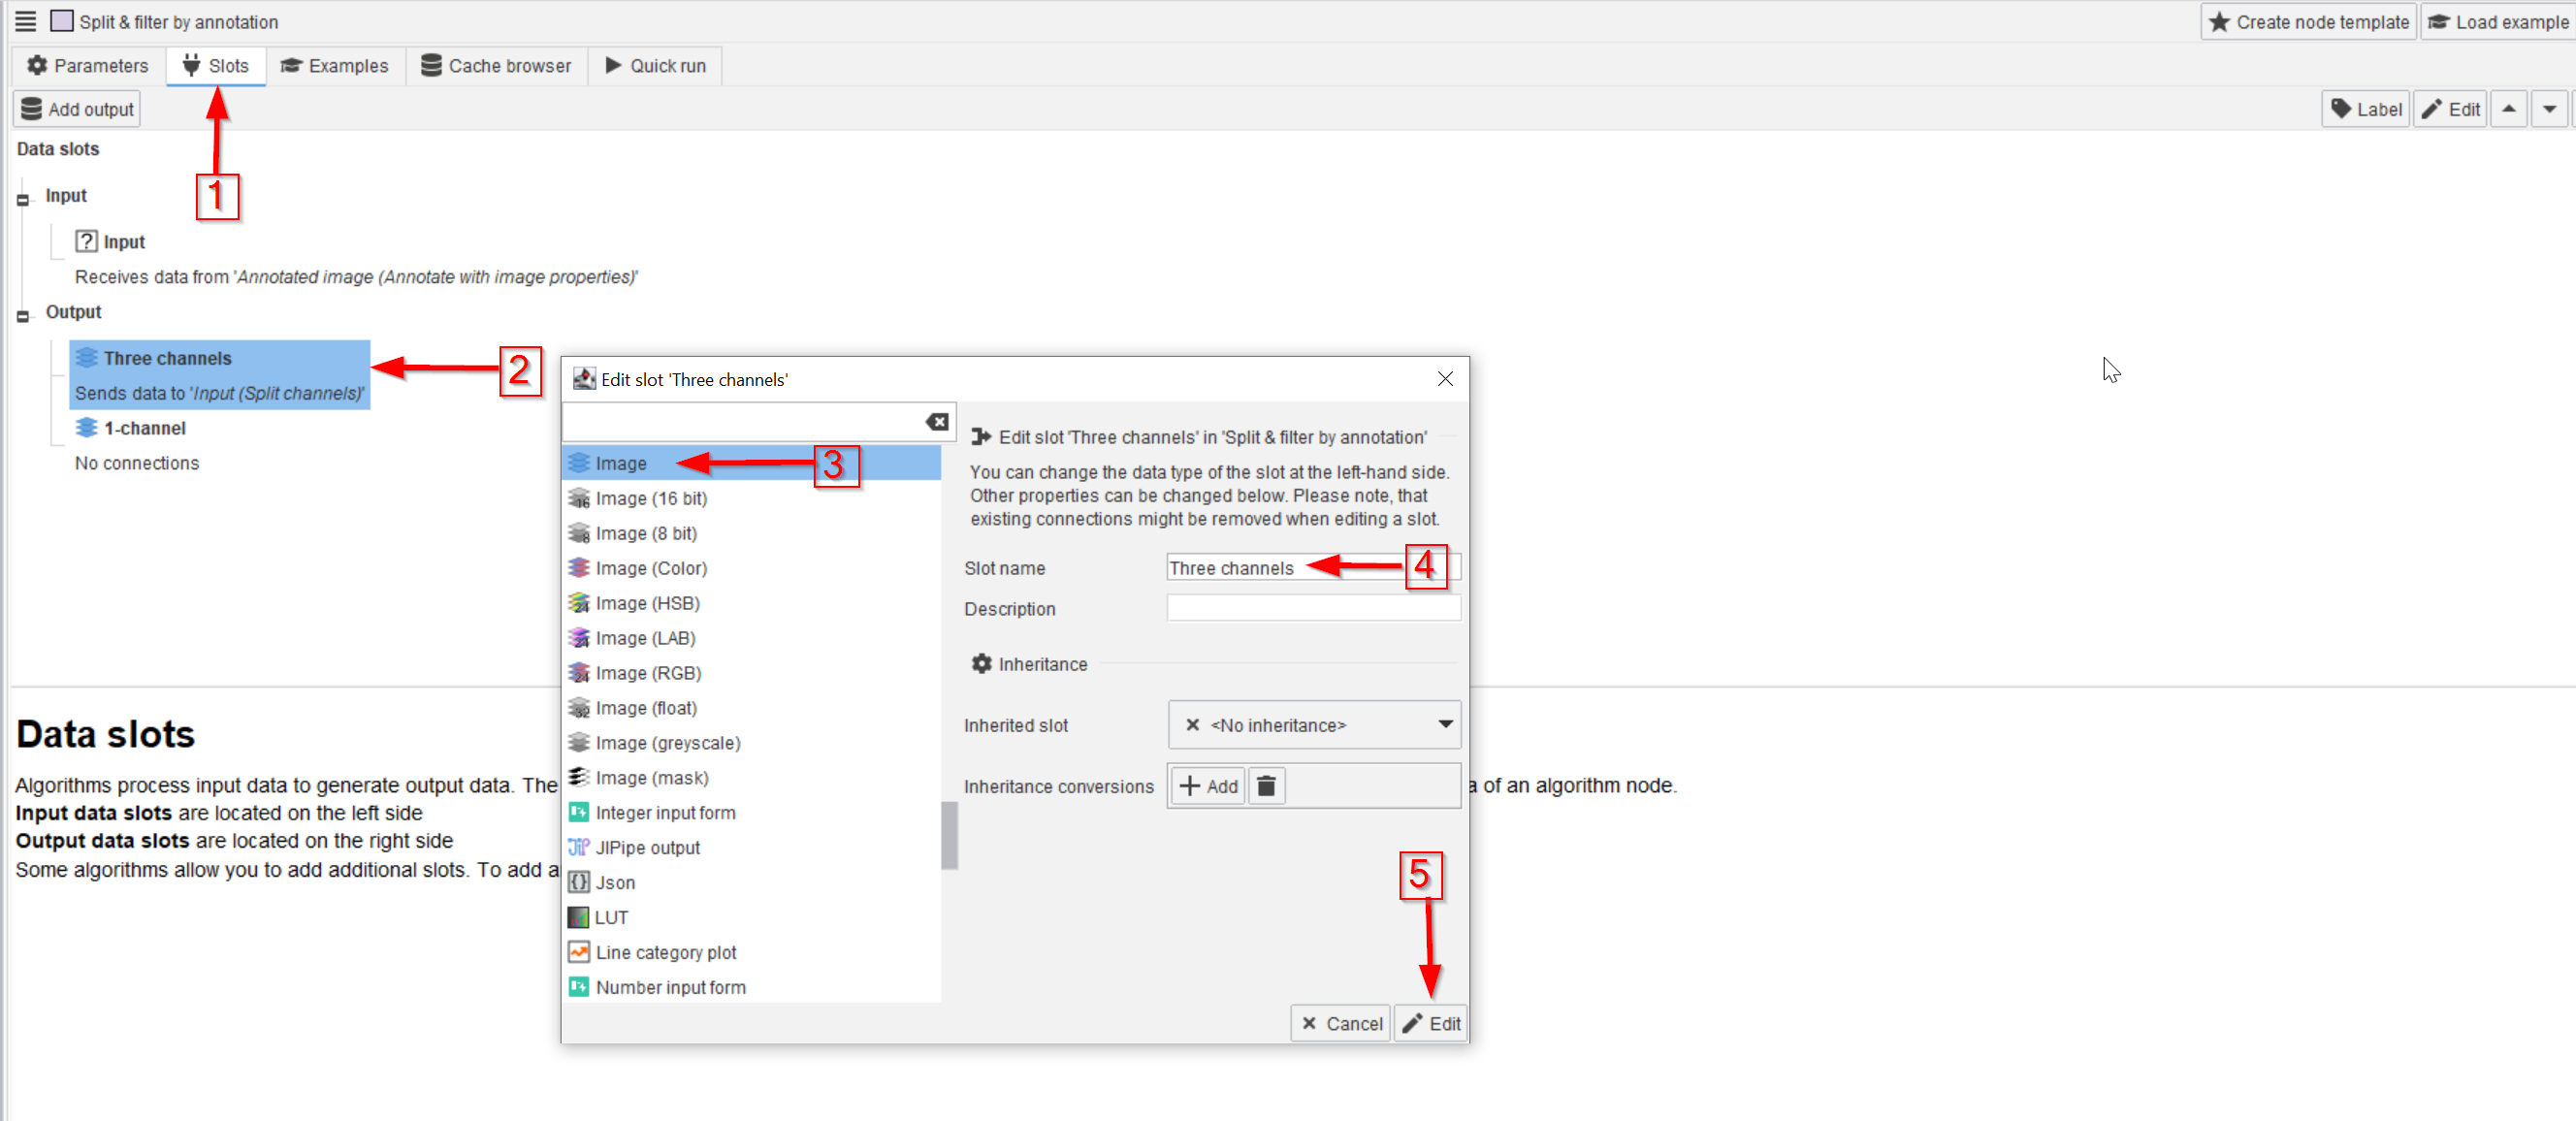
Step 3
In the Slots tab (red arrow 1) we can also change the properties of the already present first output slot.
To do this, select the slot to be edited (red arrow 2). Here the data type can be changed if necessary (red arrow 3) and a new name can be entered (red arrow 4). When done editing, accept the changes (red arrow 5).
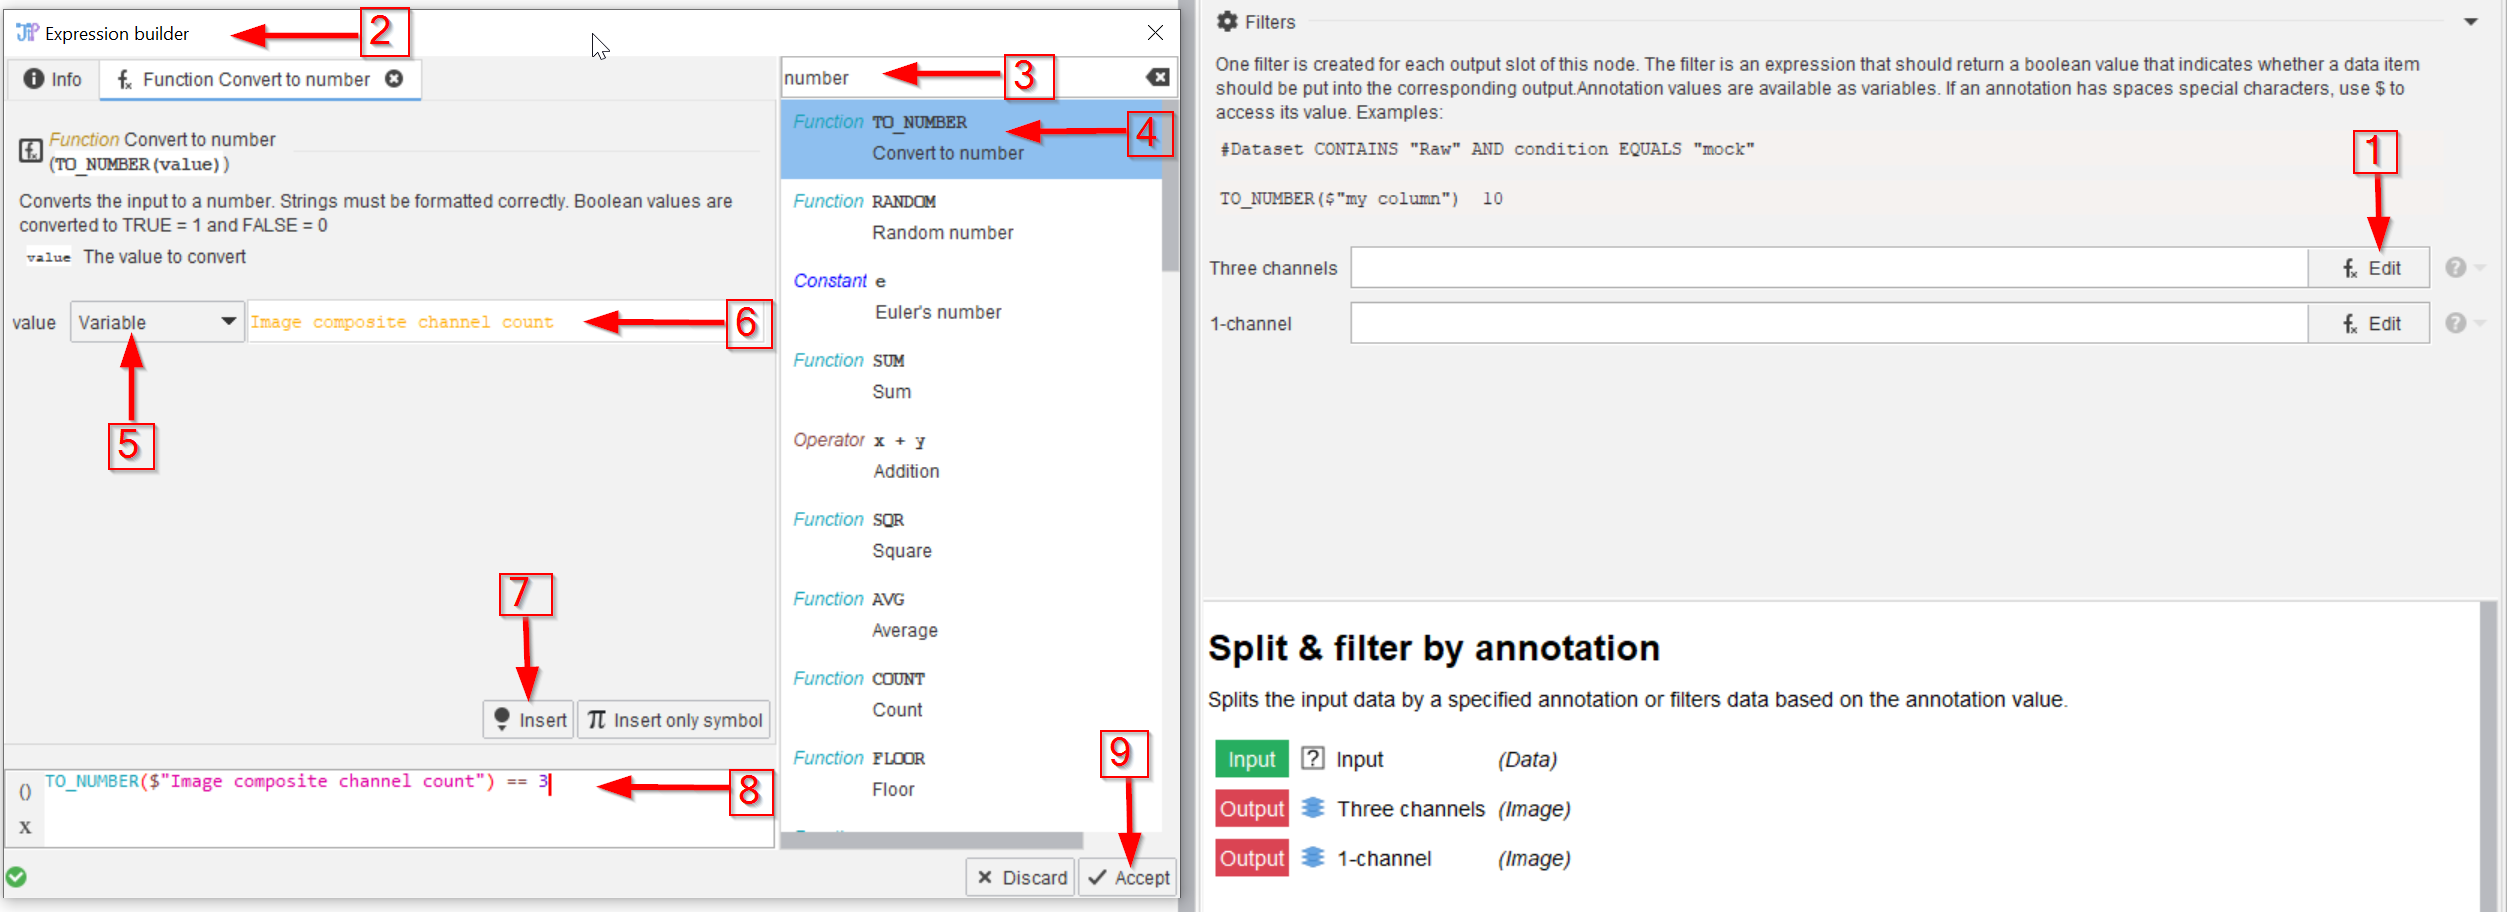
Step 4
To activate the filtering function, select the Edit option for expressions (red arrow 1).
In the expression editor window (red arrow 2) look for a number conversion function (red arrow 3) and select the TO_NUMBER function (red arrow 4). Choose the Variable value type (red arrow 5) and paste in the name of the variable based on which the filtering will be done (here: Image composite channel count as seen in the previous tutorial, red arrow 6).
Insert the new expression (red arrow 7) The editor field will now read:
TO_NUMBER($"Image composite channel count")Adapt the expression further to test for 3 channels via the comparison operator (red arrow 8):
TO_NUMBER($"Image composite channel count") == 3Accept the changes (red arrow 9).

Step 5
Enter the same filtering formula for the 1-channel slot (red arrow 1).
Easiest is to copy-paste the content of the Three-channel slot expression (red arrow 2) and change the channel number to 1 (red arrow 3).
The formulas now should be:
- Three channels:
TO_NUMBER($"Image composite channel count") == 3 - 1-channel:
TO_NUMBER($"Image composite channel count") == 1
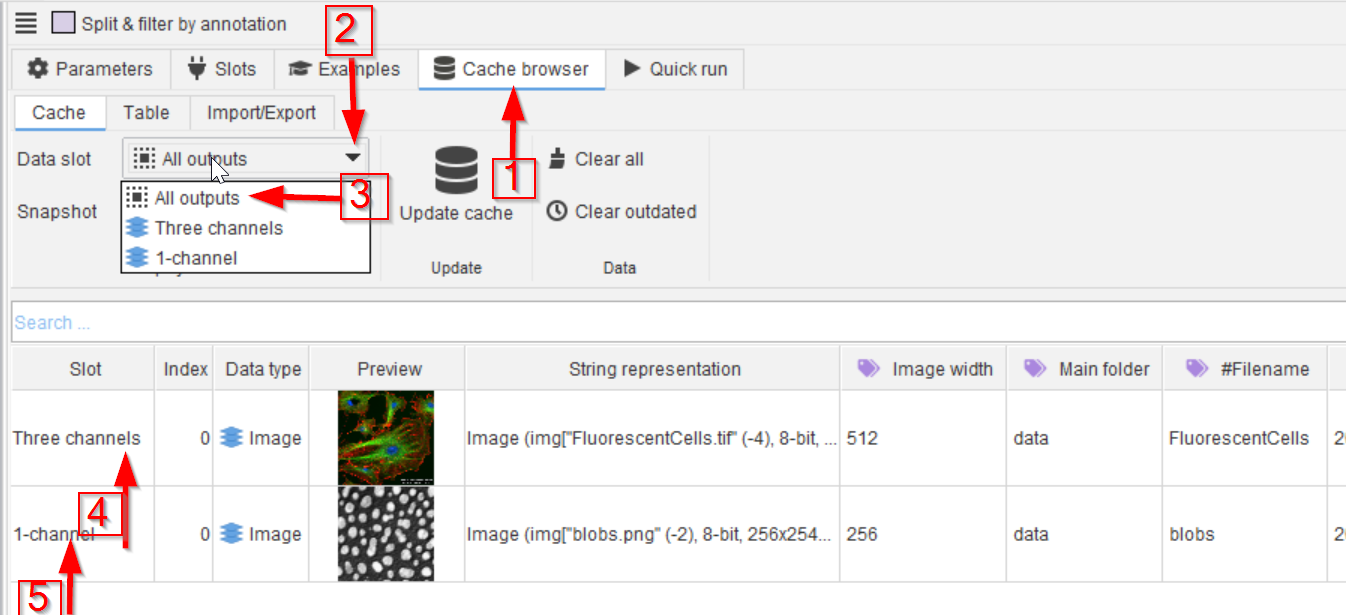
Step 6
Run the Split & filter by annotations node and observe the Cache browser (red arrow 1).
From the Data slot selector (red arrow 2) choose All outputs (red arrow 3) to see both the Three-channel (red arrow 4) and 1-channel (red arrow 5) outputs.
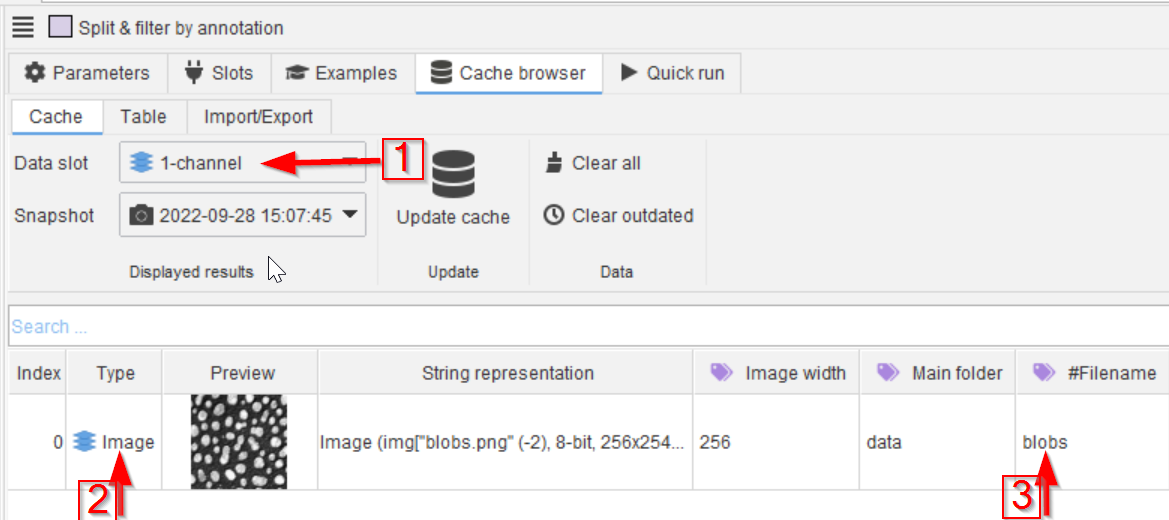
Step 7
If we choose the 1-channel output slot, e.g. (red arrow 1), we will only see the content of this output slot (red arrow 2), which comes from the blobs image (red arrow 3).
👉 Via such Split & filter by annotation nodes we can separate the analysis of various image types without having to write a full pipeline for each type of image. Moreover, we can add all the folders that need to be analyzed into the workflow, and do the separation of the various images later, based on annotations. Here not only the image channel number can be used for filtering, but any image property, file name structure, folder or subfolder name, or any other variable or parameter that is added to the annotations table.