Step 1
Nodes with a specific set of parameters, or nodes that are formed into a Group (see previous tutorial) can be saved as Templates, in order to make them available for easy reuse. The template nodes can be made accessible either globally (i.e., by other projects as well), or locally, where only the current project can have access to them.

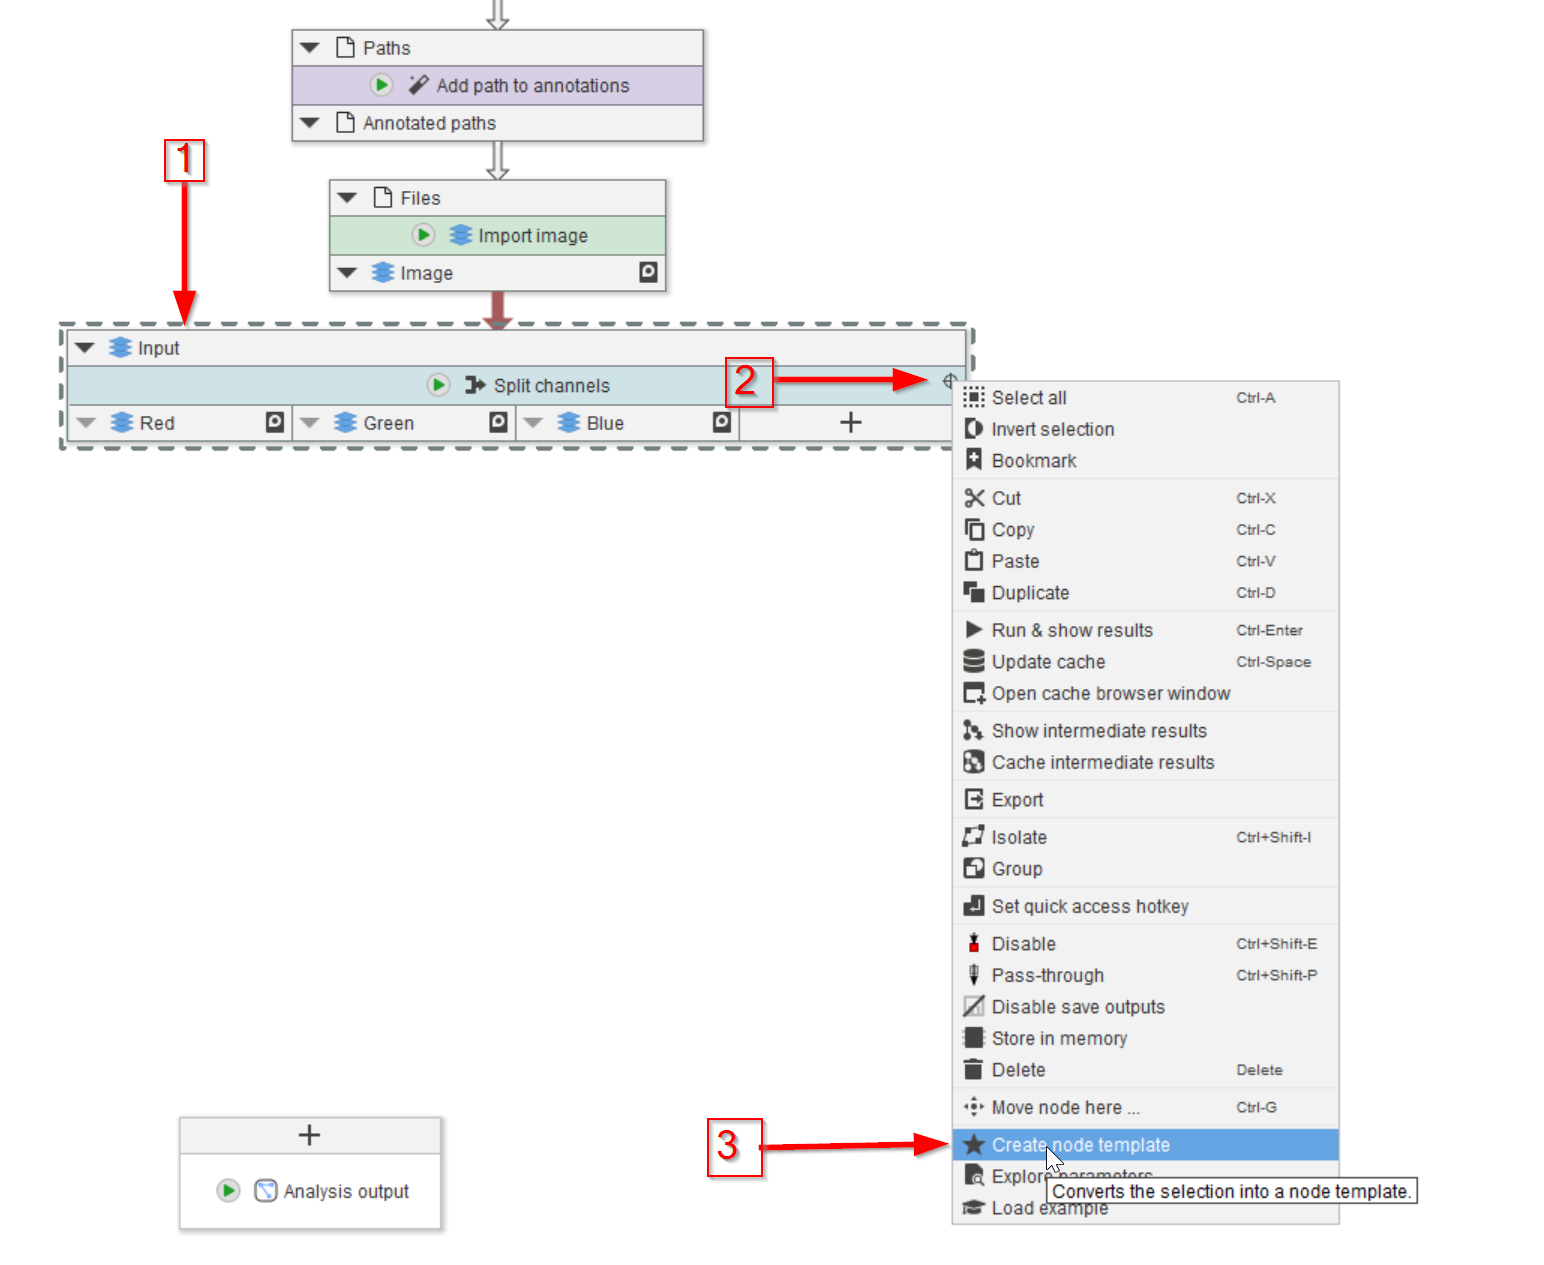
Step 2
Choose between having a global (red arrow 1) or local (red arrow 2) template. The former will make the new template available from any project, whereas the latter will restrict its availability to the current project.
Step 3
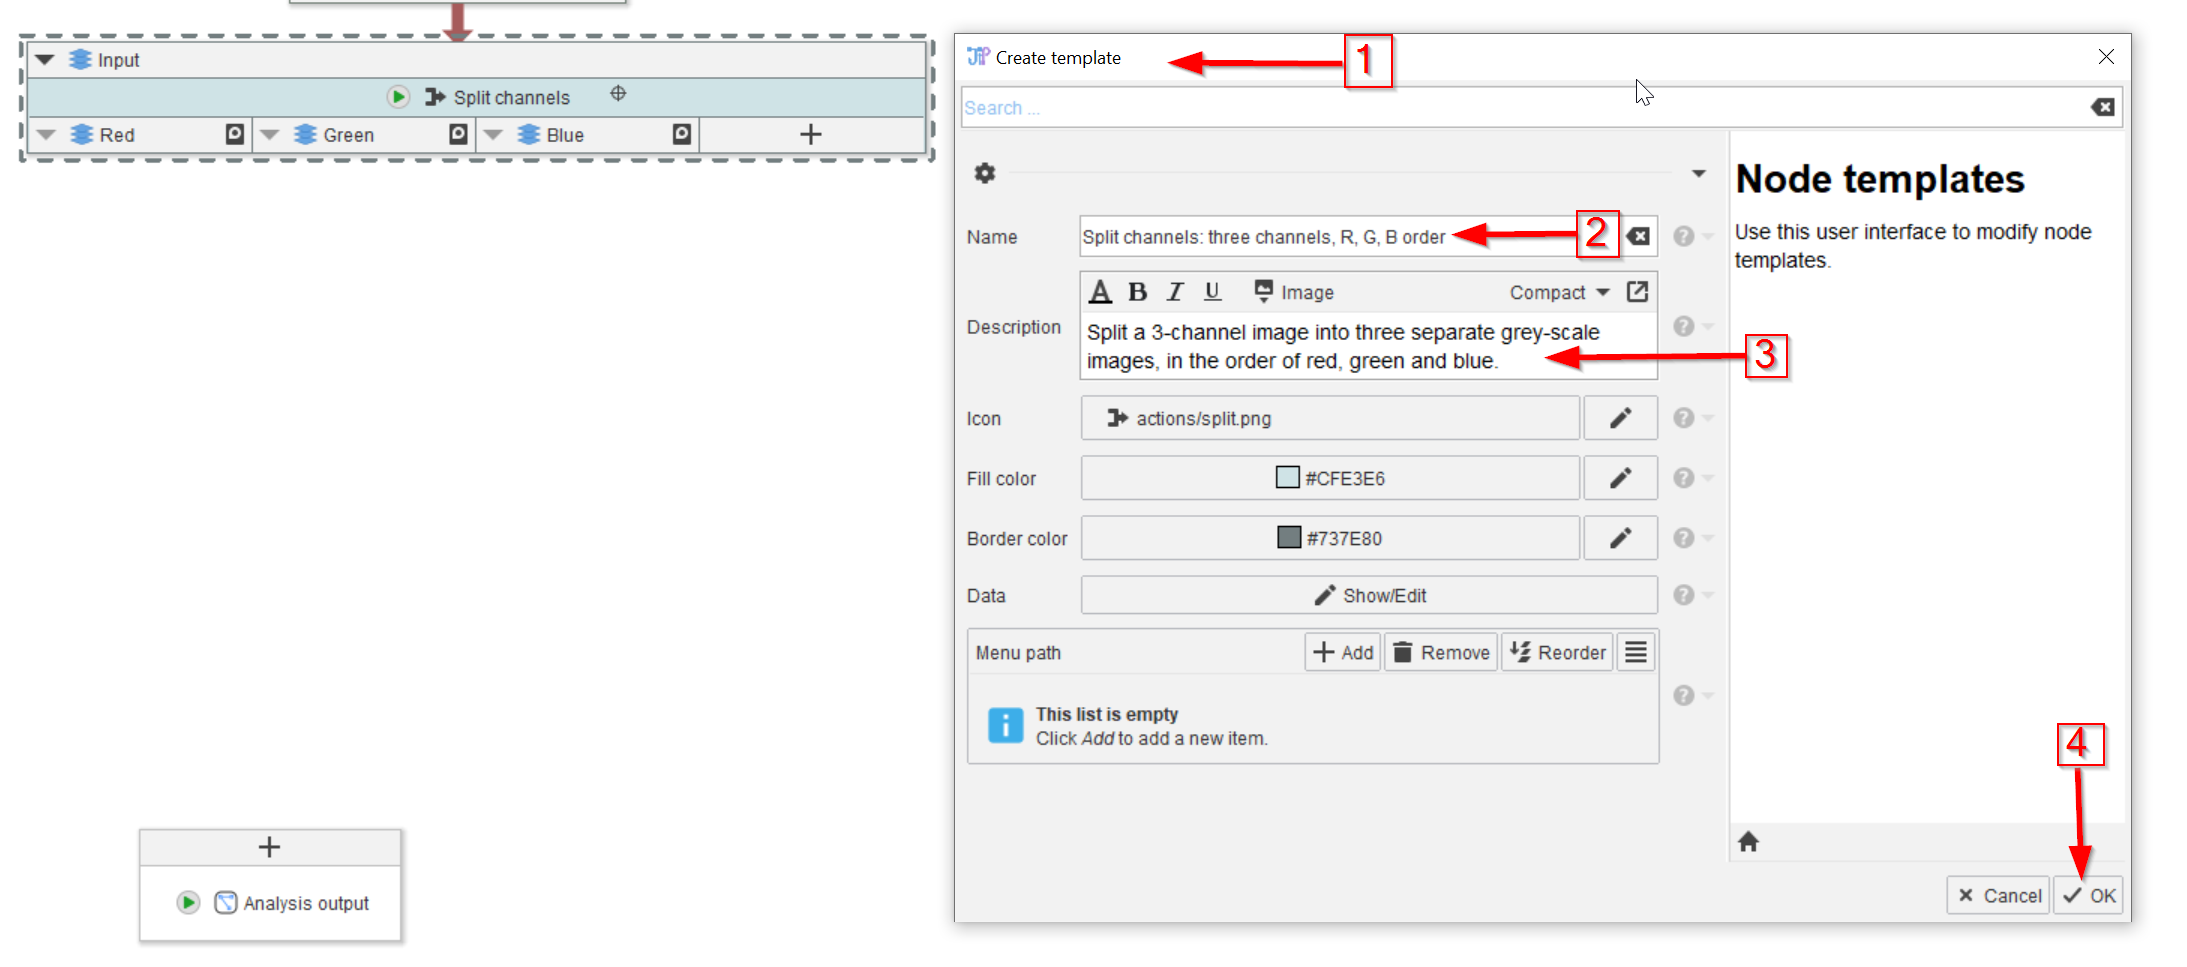
Use the newly opened Create template window (red arrow 1) to set the name of the template (red arrow 2), and to provide a description (red arrow 3). When done, click OK to save the new template (red arrow 4).

Step 4
To observe the newly created template node, click anywhere within the white area of the GUI (red arrow 1), select the Node templates tab on the right side (red arrow 2), and scroll down to find the newly added template (red arrow 3).
Note that the title of the node template (red arrow 4) and the detailed description (red arrow 5) also appear in the summary, together with the slots layout of the node (red line 6). This complete set of information helps to decide which template(s) to use in our projects.

Step 5
To add the template node into the pipeline, grab it with the mouse (red arrow 1) with the left button down, and drag it onto the GUI (red arrow 2).
It is also possible to select and add multiple nodes from the template list and drag them to the project area; use SHIFT+Left-click or Ctrl+Left-click to select multiple nodes from the template list.

Step 6
The newly added template (red arrow 1) will now appear in the pipeline area (red arrow 2).
Now it can be connected to other nodes, as any regular node.

Step 7
If the template node needs to be modified, the updated node must to be saved again as a template.
When using the same name for saving, it is best to delete the outdated node from the list first. This can be done by selecting the outdated node from the list (red arrow 1), right-click on the node and select the Delete option (red arrow 2).
Step 8
The template node(s) can be exported and imported between projects, or between various JIPipe instances; this way the nodes can be shared easy, e.g. during teaching sessions.
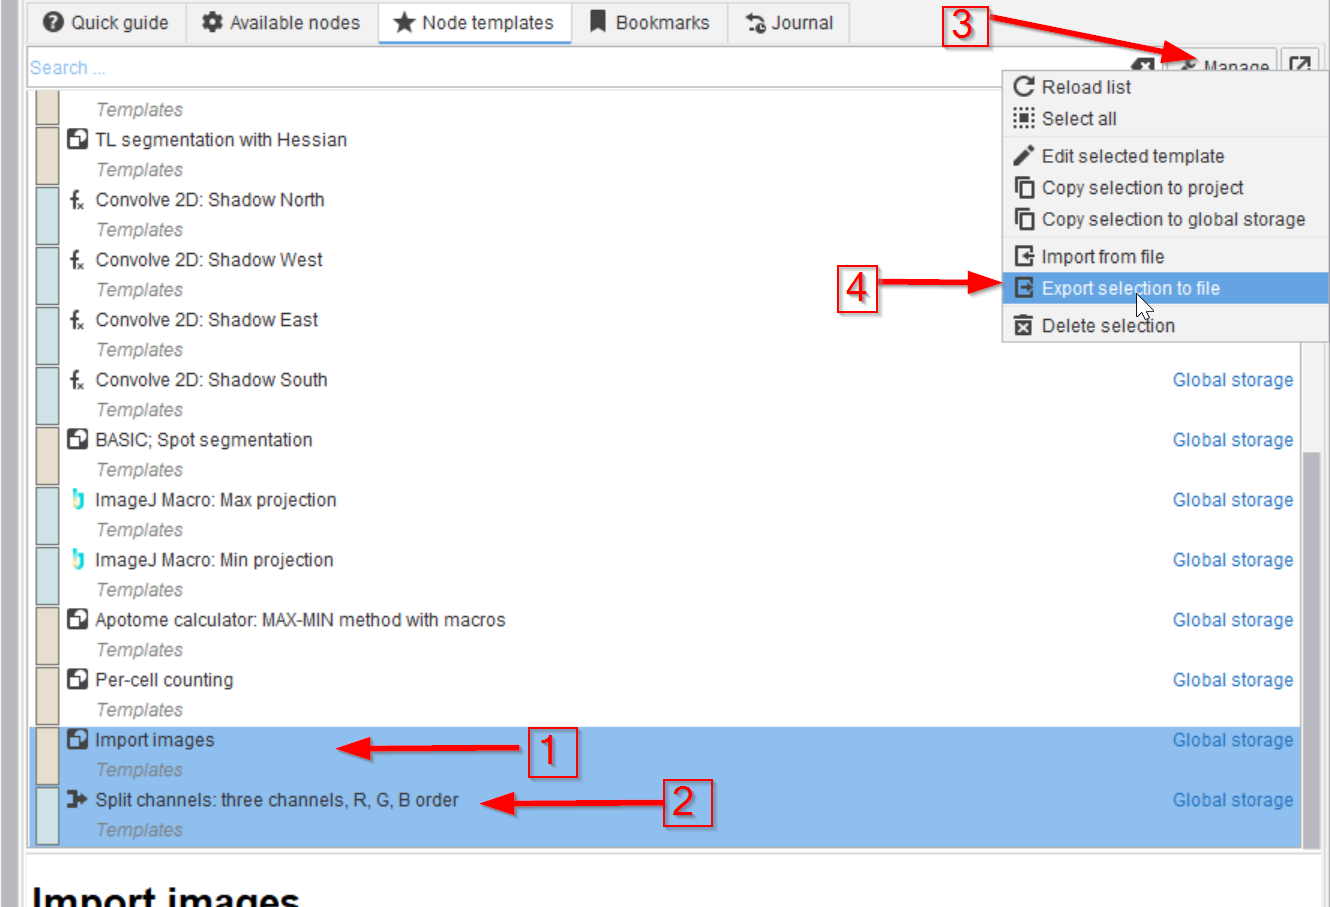
As an example, select two nodes from the list (red arrow 1 and 2), click on the Manage button (red arrow 3) and select Export selection to file (red arrow 4).
Step 9
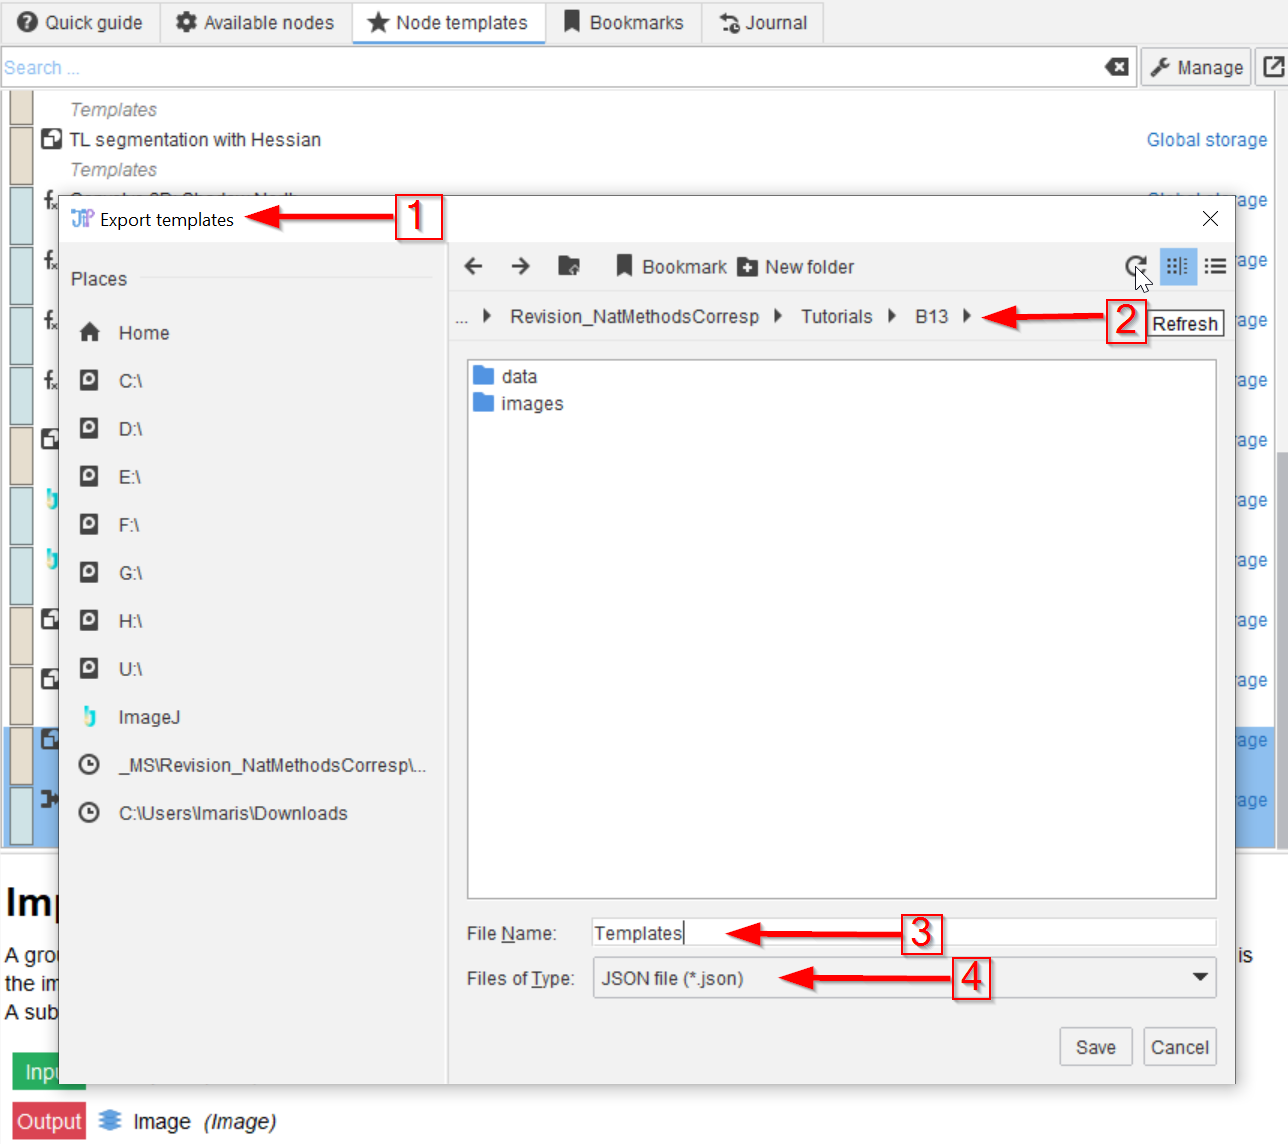
In the Export templates dialog (red arrow 1) navigate to the target folder (red arrow 2) and choose a name for the exported file (red arrow 3). The saved file is in JSON format (red arrow 4).
In this case, the saved templates will be found in the tutorial’s folder that can be explored after download.
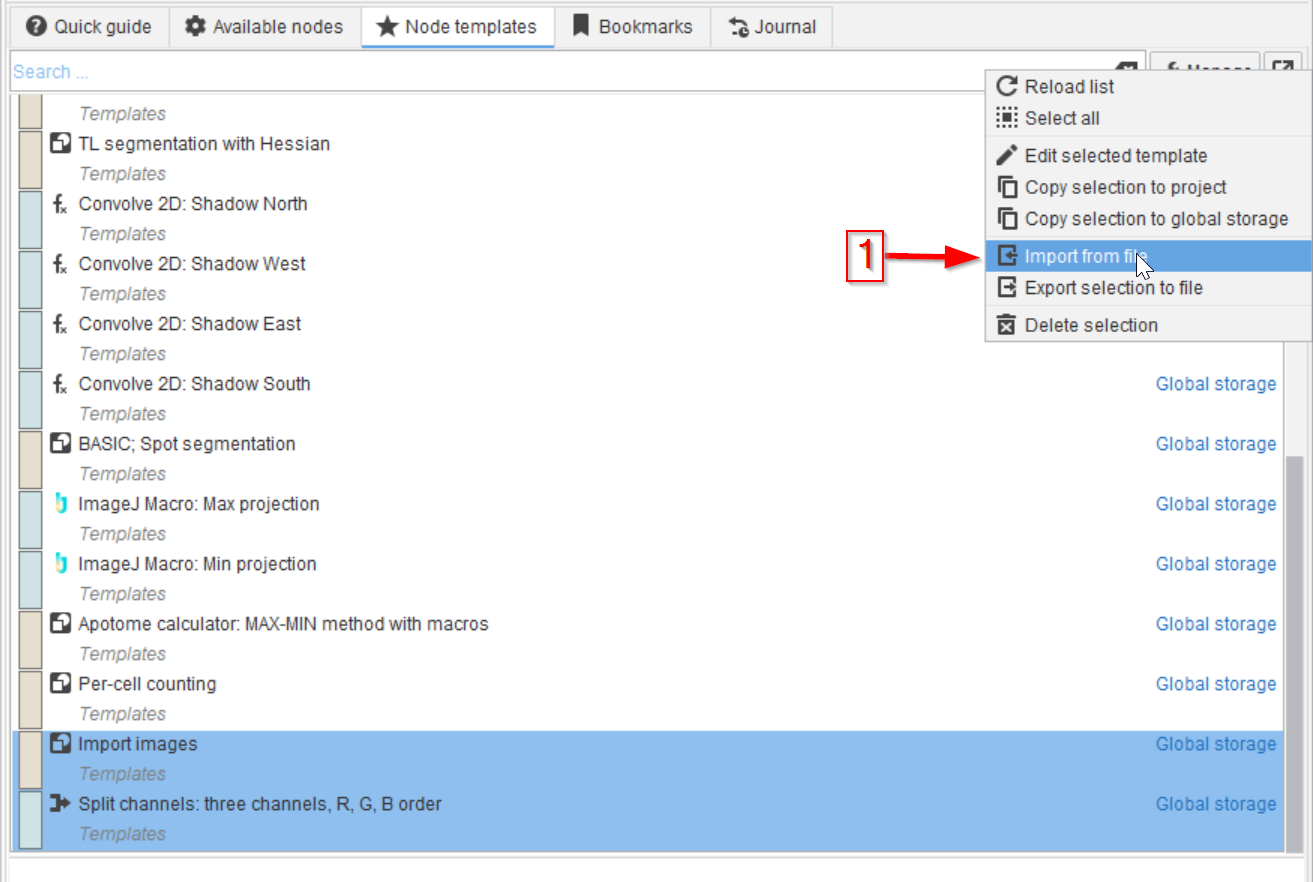
Step 10
Importing a template JSON file is done similarly: in the Manage menu, choose Import from file (red arrow 1).