Preliminary steps
Please import the image file as explained in the previous tutorial.
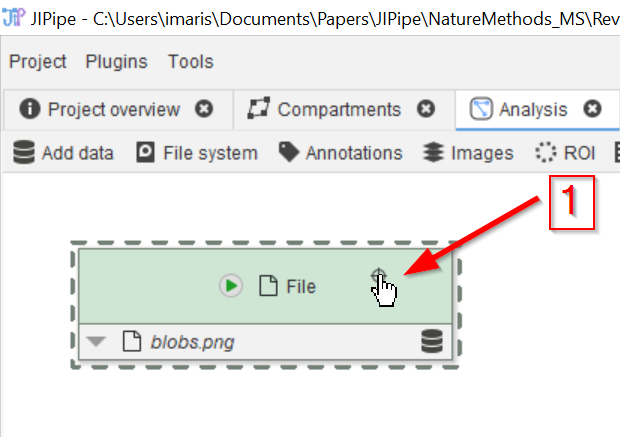
Step 1
Click on the node to activate it …
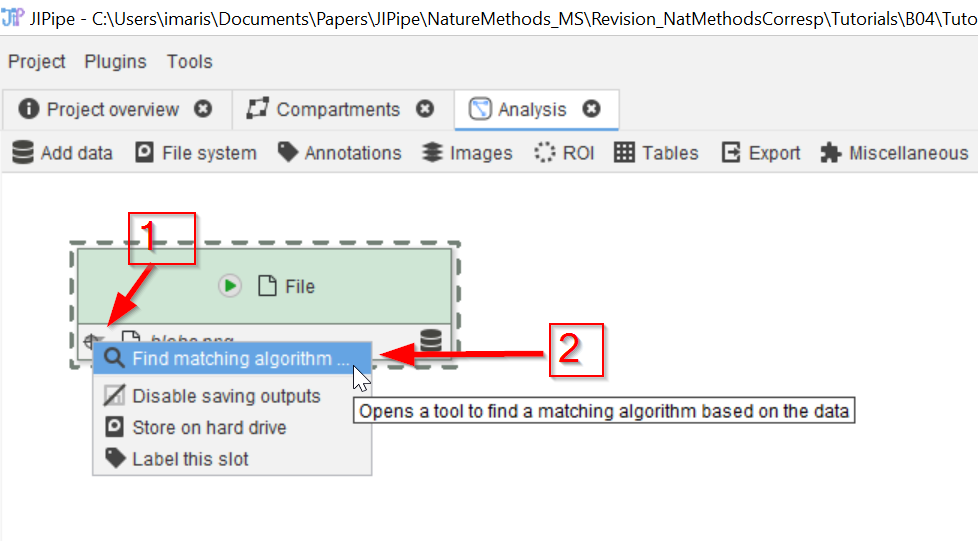
Step 2
… and click on the grey downwards arrowhead at the bottom right of the node (red arrow 1) to activate the node connection menu (red arrow 2)
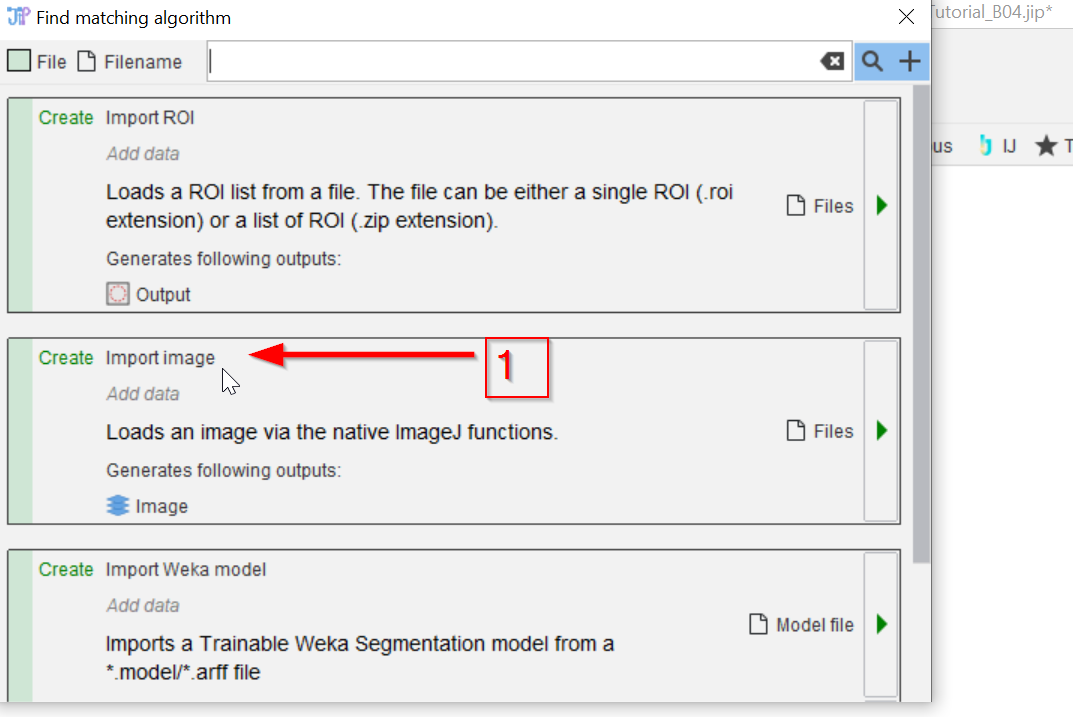
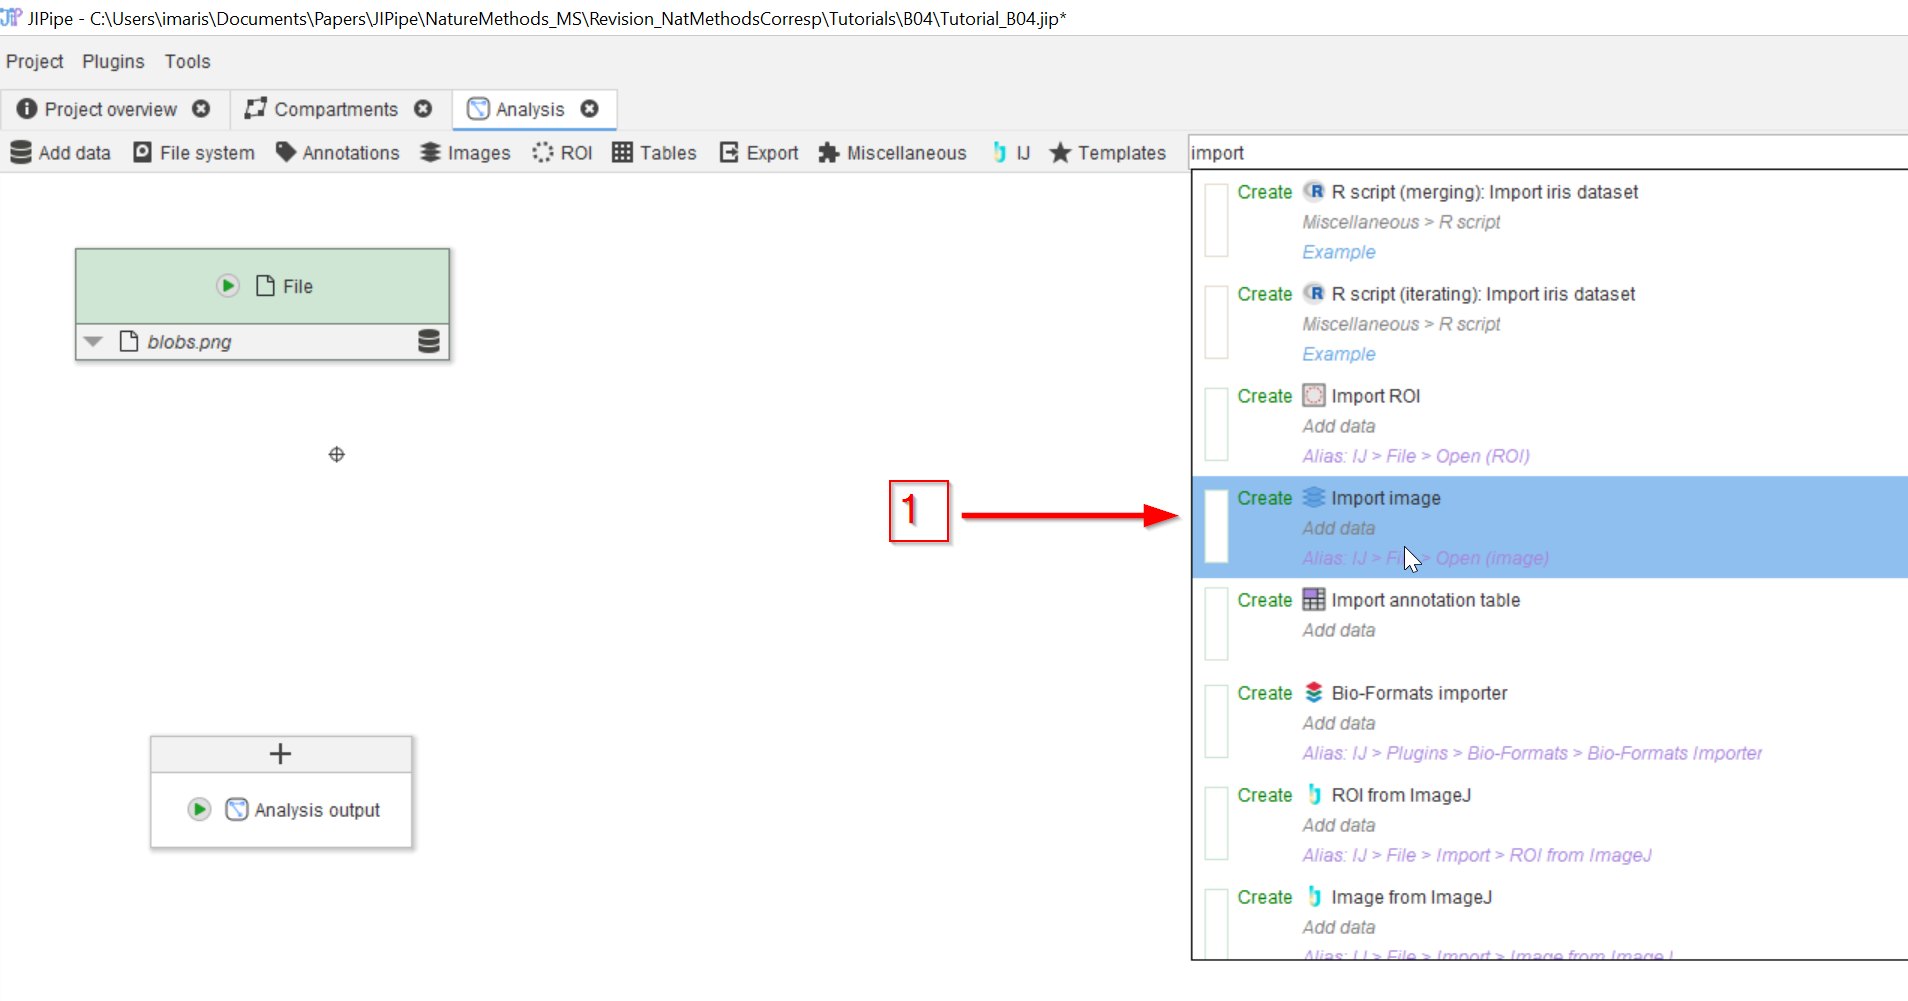
Step 3
This will show a list of compatible nodes, i.e., nodes that can accept the datatype from the active node. In this example node, which provides an image file location, the 2nd hit is the proper choice: Import image (red arrow 1)

Step 4
Clicking on the green arrowhead on the right (red arrow 1) …

Step 5
… will add the new node, already connected to the previous one
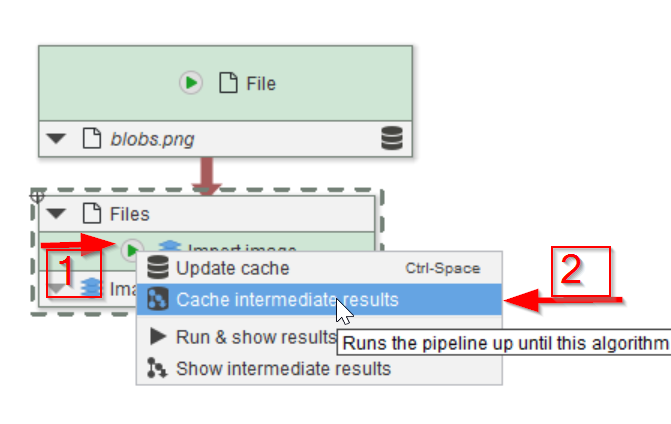
Step 6
Run the new node as described earlier: click on the green arrow of the bottom node (red arrow 1) and choose one of the running modes (red arrow 2)
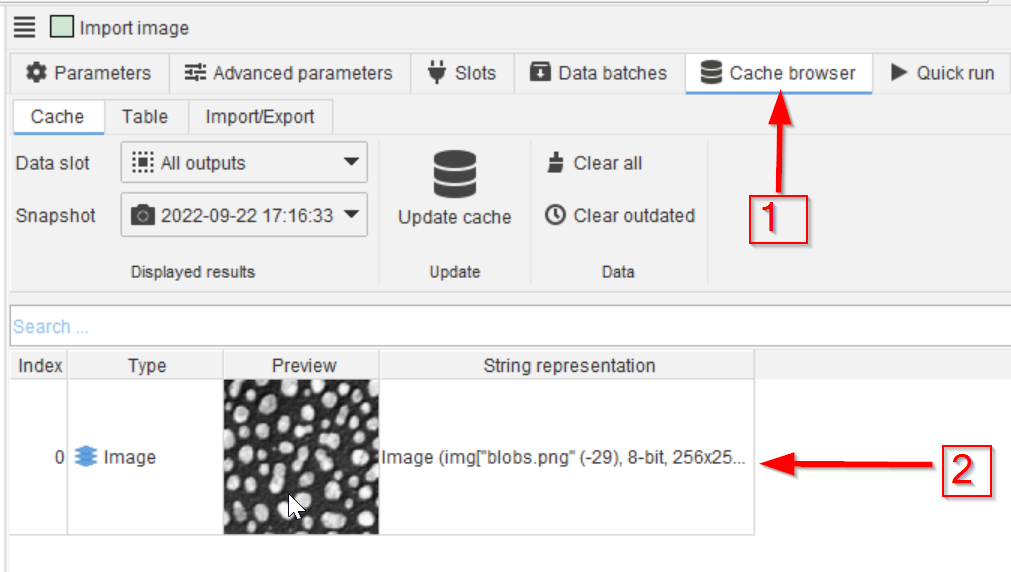
Step 7
The Cache browser on the right (red arrow 1) will now show the image after having been read into the project
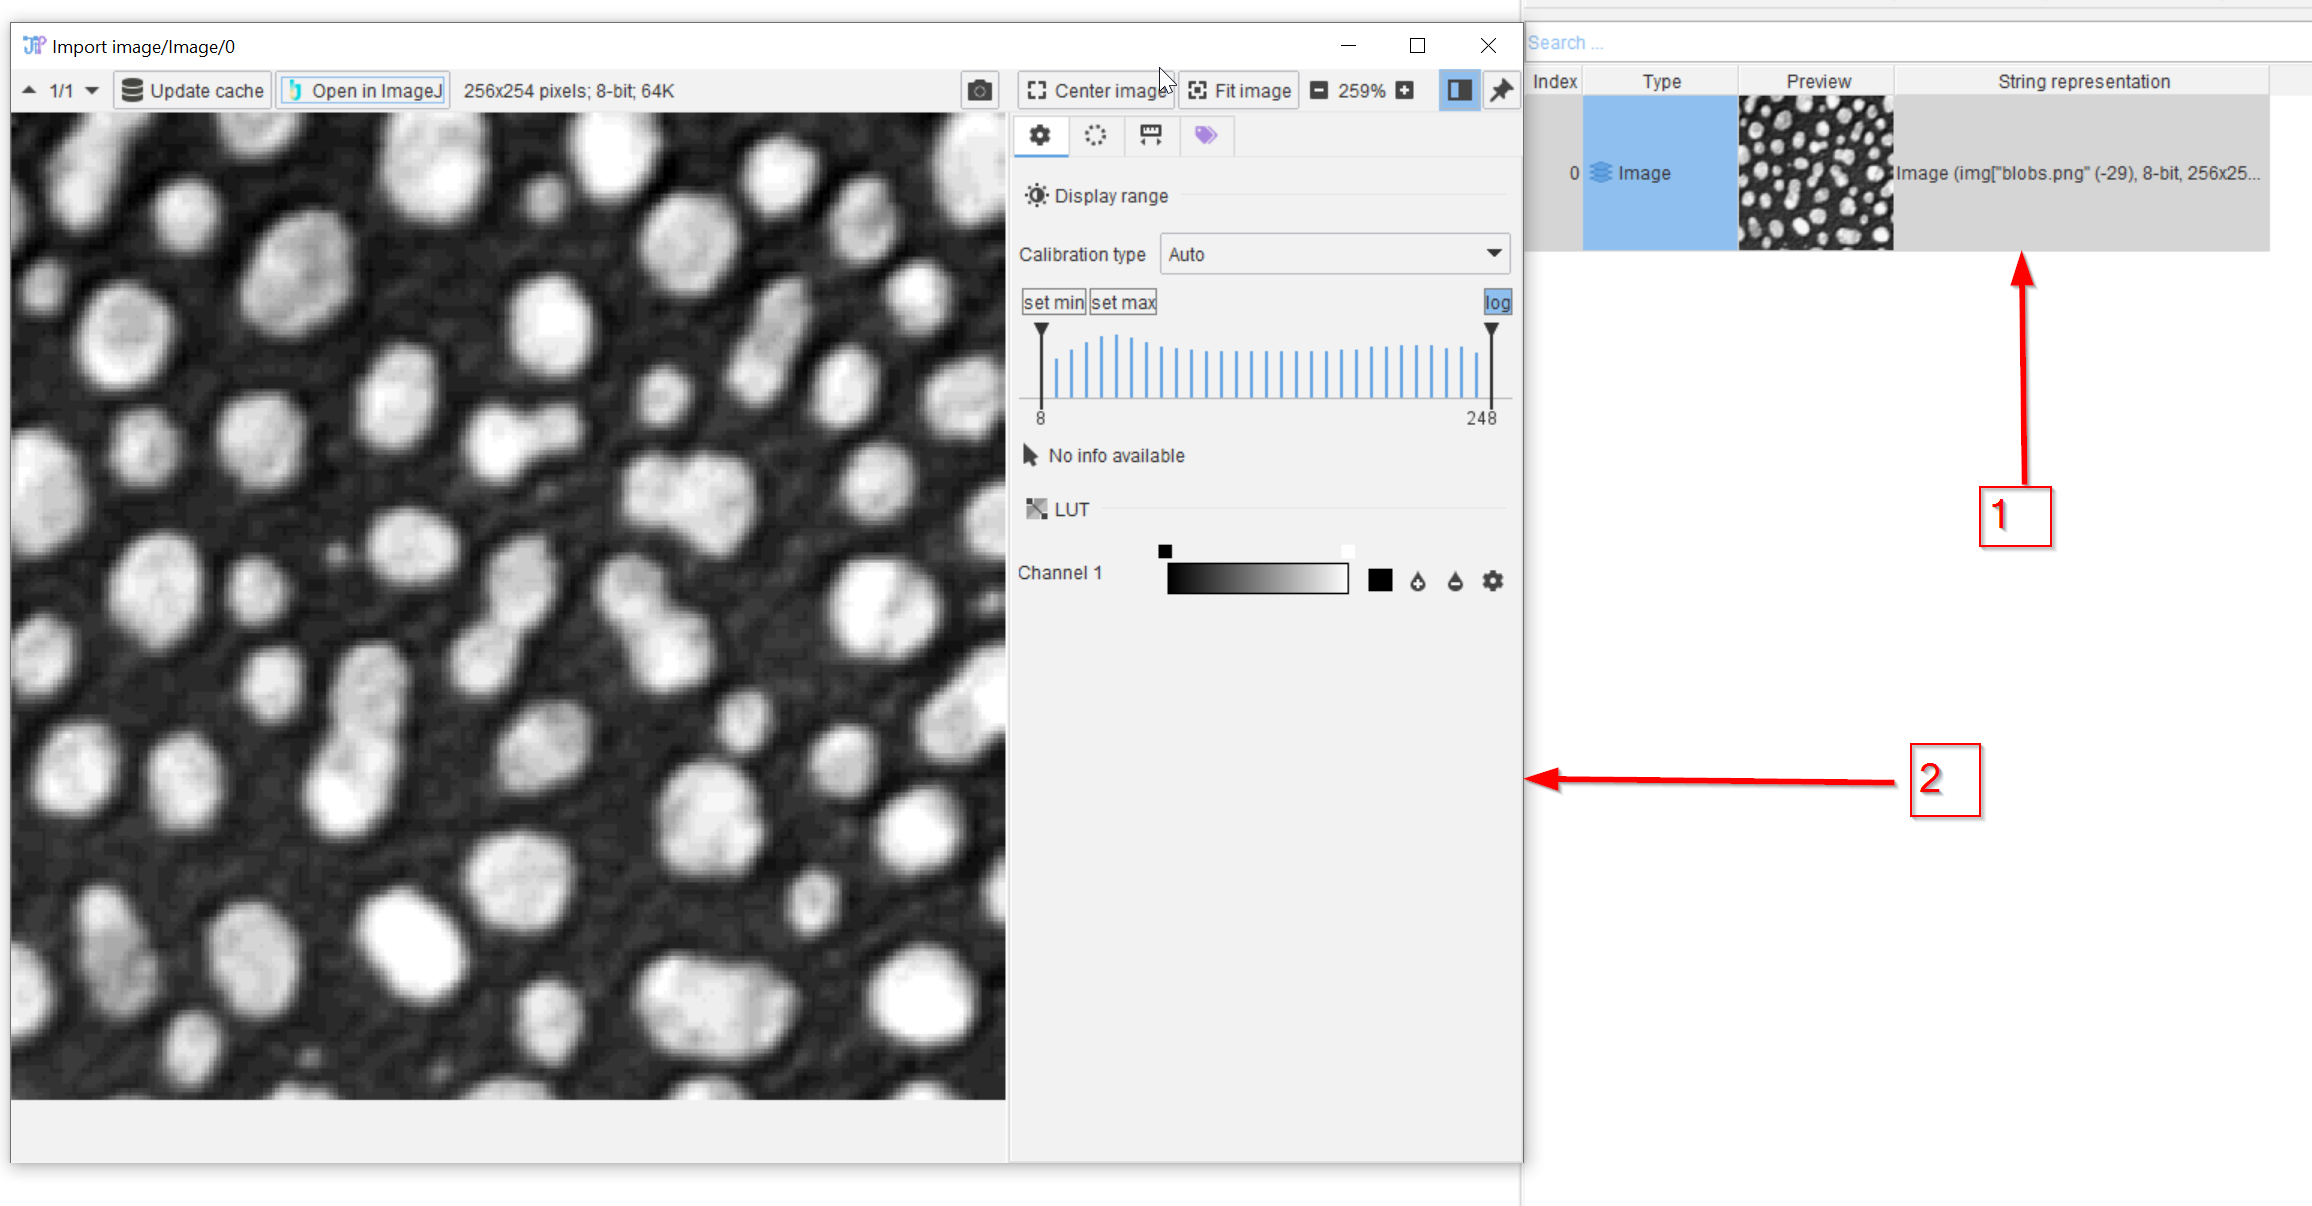
Step 8
As described before, double-clicking on the cache element (red arrow 1) will open it in a viewer (red arrow 2)
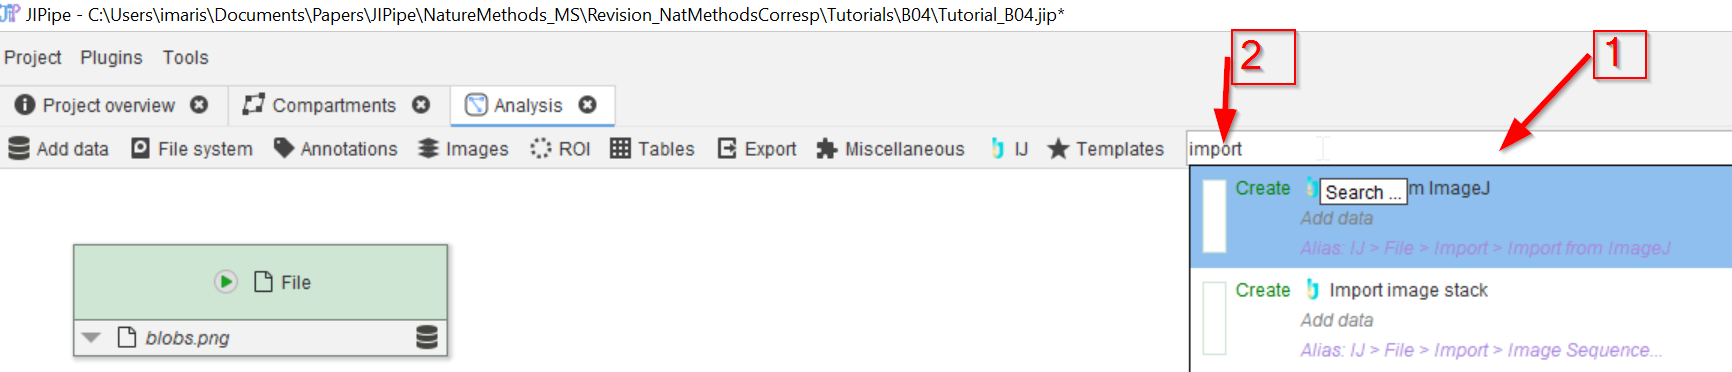
Step 1
Search for nodes by name. Use the search bar for this purpose. To import the image file as ImageJ image, search for a node called Import image.
Step 2
Scroll down the list of matching node names till the proper node is found.
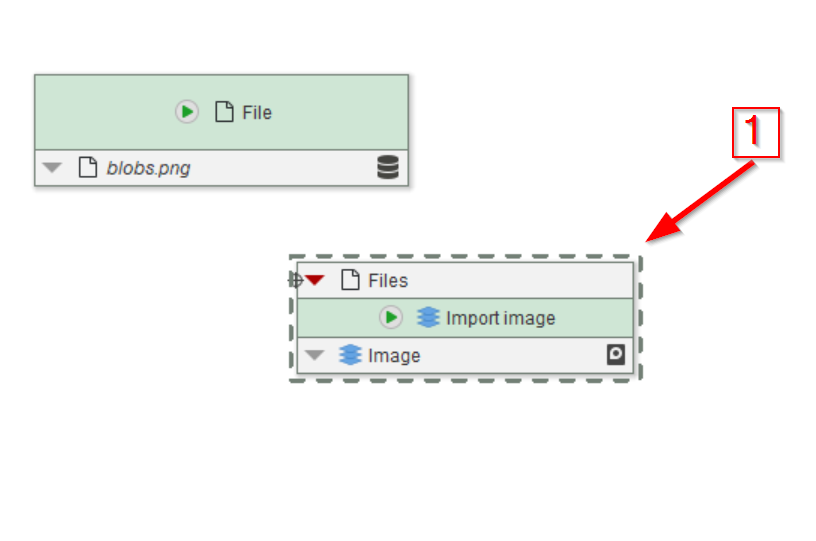
Step 3
This will add the new node to the GUI, but it will not be connected yet (red arrow 1).

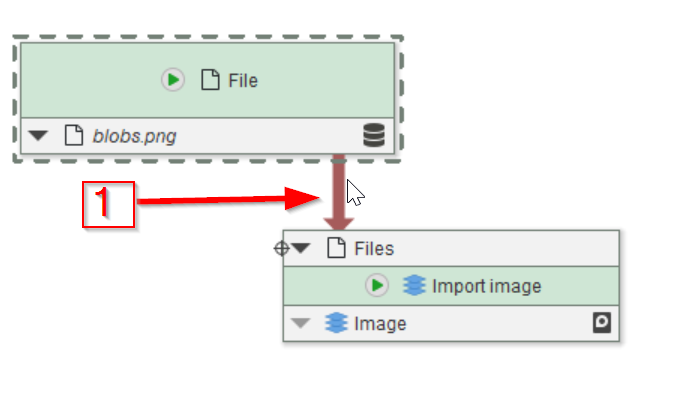
Step 4
To connect the Import image node to the File node, simply draw a line with the mouse, left button pushed, to connect the bottom white zone of the File node (red arrow 1) to the top white zone of the Import image node (red arrow 2).
Step 5
The resulting connection is symbolized by a color line connecting the two nodes (red arrow 1). This shows the dataflow between the nodes, the direction is indicated by the arrowhead at the bottom of the connecting line.
Step 6
Run the new node as described earlier: click on the green arrow of the bottom node (red arrow 1) and choose one of the running modes (red arrow 2)
Step 7
The Cache browser on the right (red arrow 1) will now show the image after having been read into the project
Step 8
As described before, double-clicking on the cache element (red arrow 1) will open it in a viewer (red arrow 2)
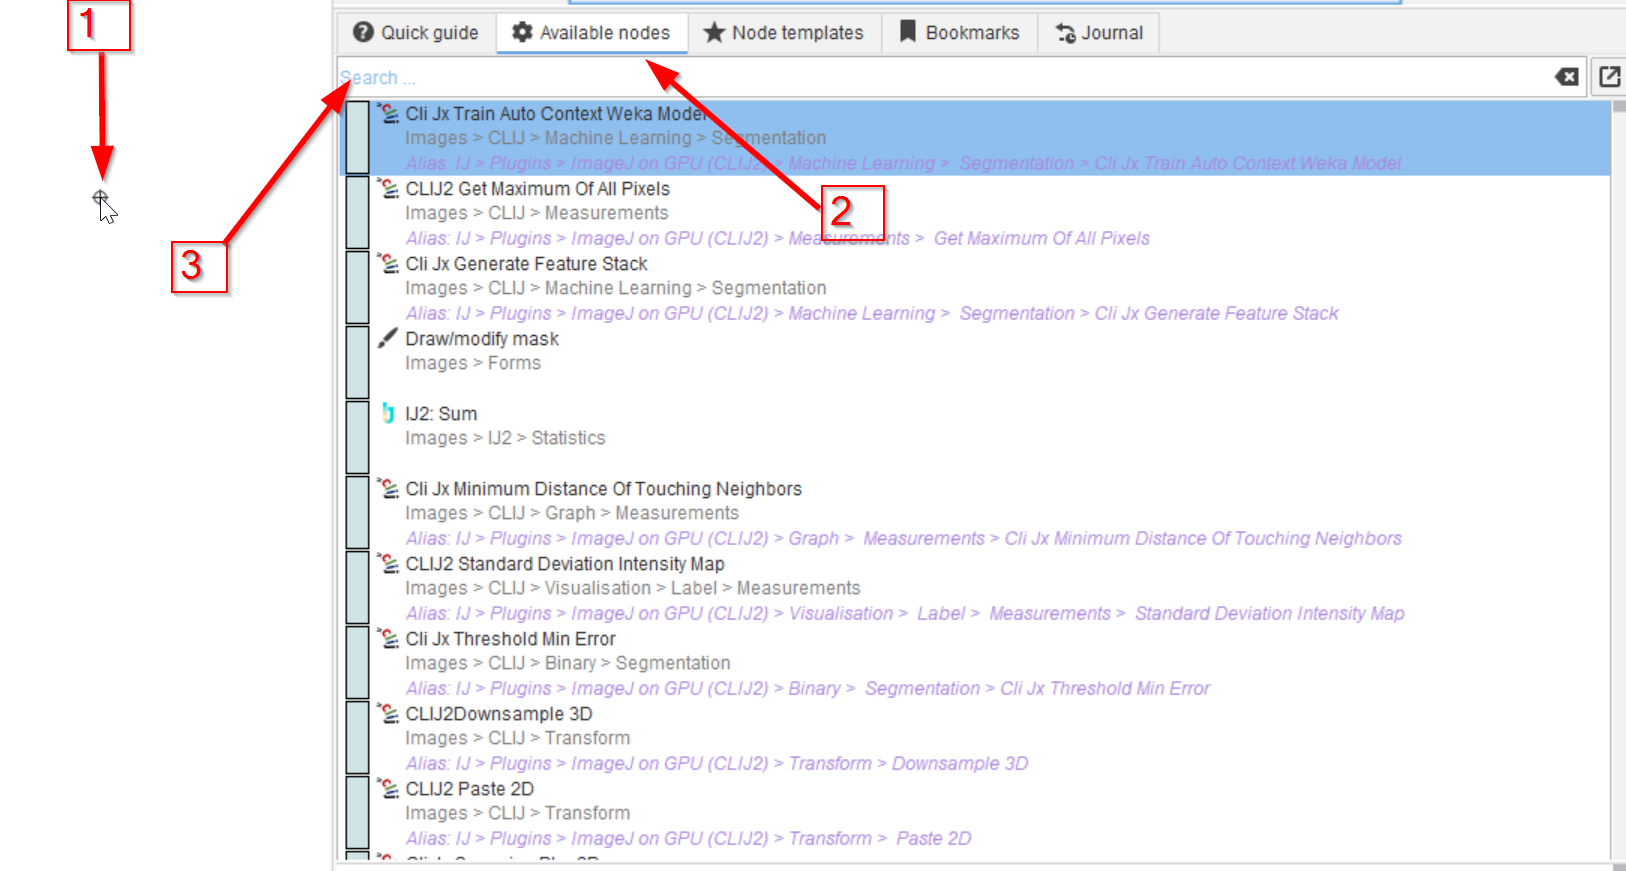
Step 1
To add a new node by drag and drop, none of the nodes must be selected; this can be achieved by clicking on the white are of the GUI (red arrow 1). The right side now shows the Available nodes tab (red arrow 2), where one can scroll down to find a node, or use the search bar (red arrow 3).

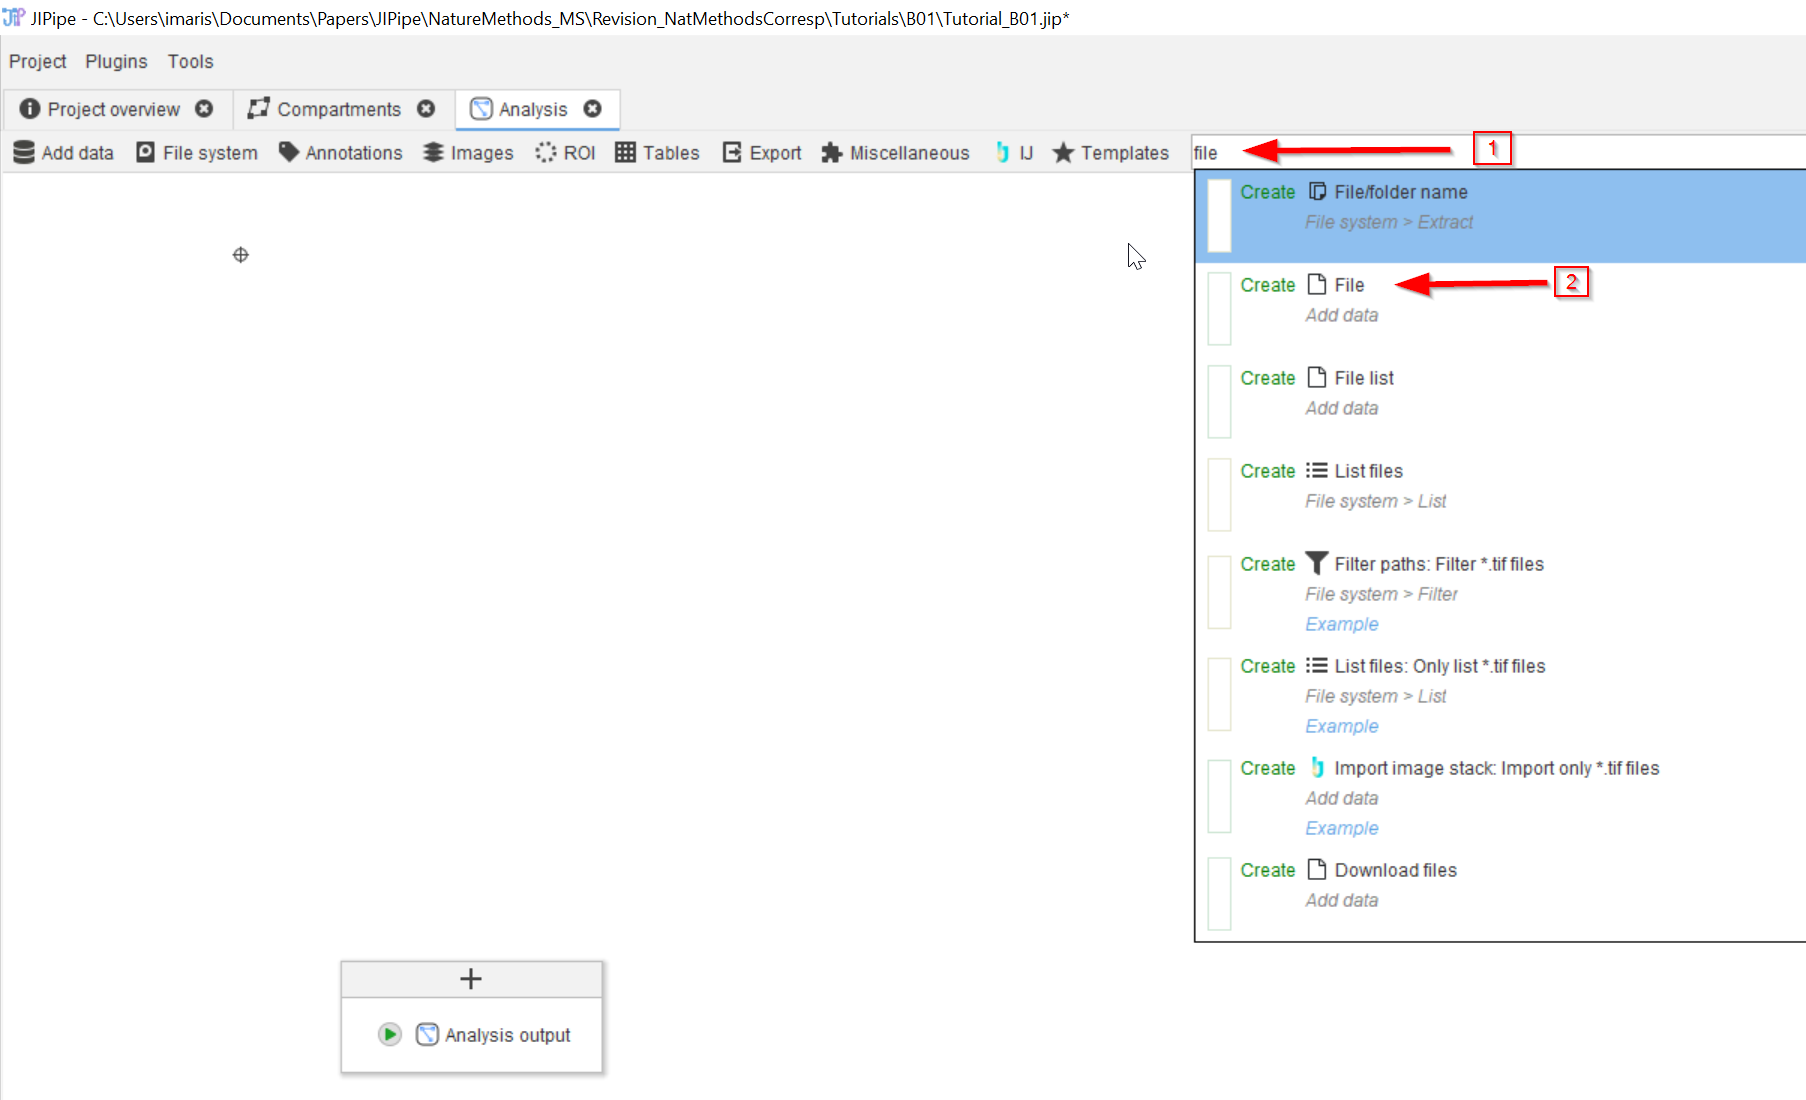
Step 2
The search option works based on keywords, providing the closest matches. Using Import image (red arrow 1) will produce the proper node close to the top results (red arrow 2), from where the node can simply be dragged to the GUI with the mouse, left button down (red arrow 3).

Step 3
The new node will appear on the GUI (red arrow 1)
Step 4
To connect the Import node to the File node, simply draw a line with the mouse, left button pushed, to connect the bottom white zone of the File node (red arrow 1) to the top white zone of the Import image node (red arrow 2).
Step 5
Run the new node as described earlier: click on the green arrow of the bottom node (red arrow 1) and choose one of the running modes (red arrow 2)
Step 6
The Cache browser on the right (red arrow 1) will now show the image after having been read into the project
Step 7
As described before, double-clicking on the cache element (red arrow 1) will open it in a viewer (red arrow 2)