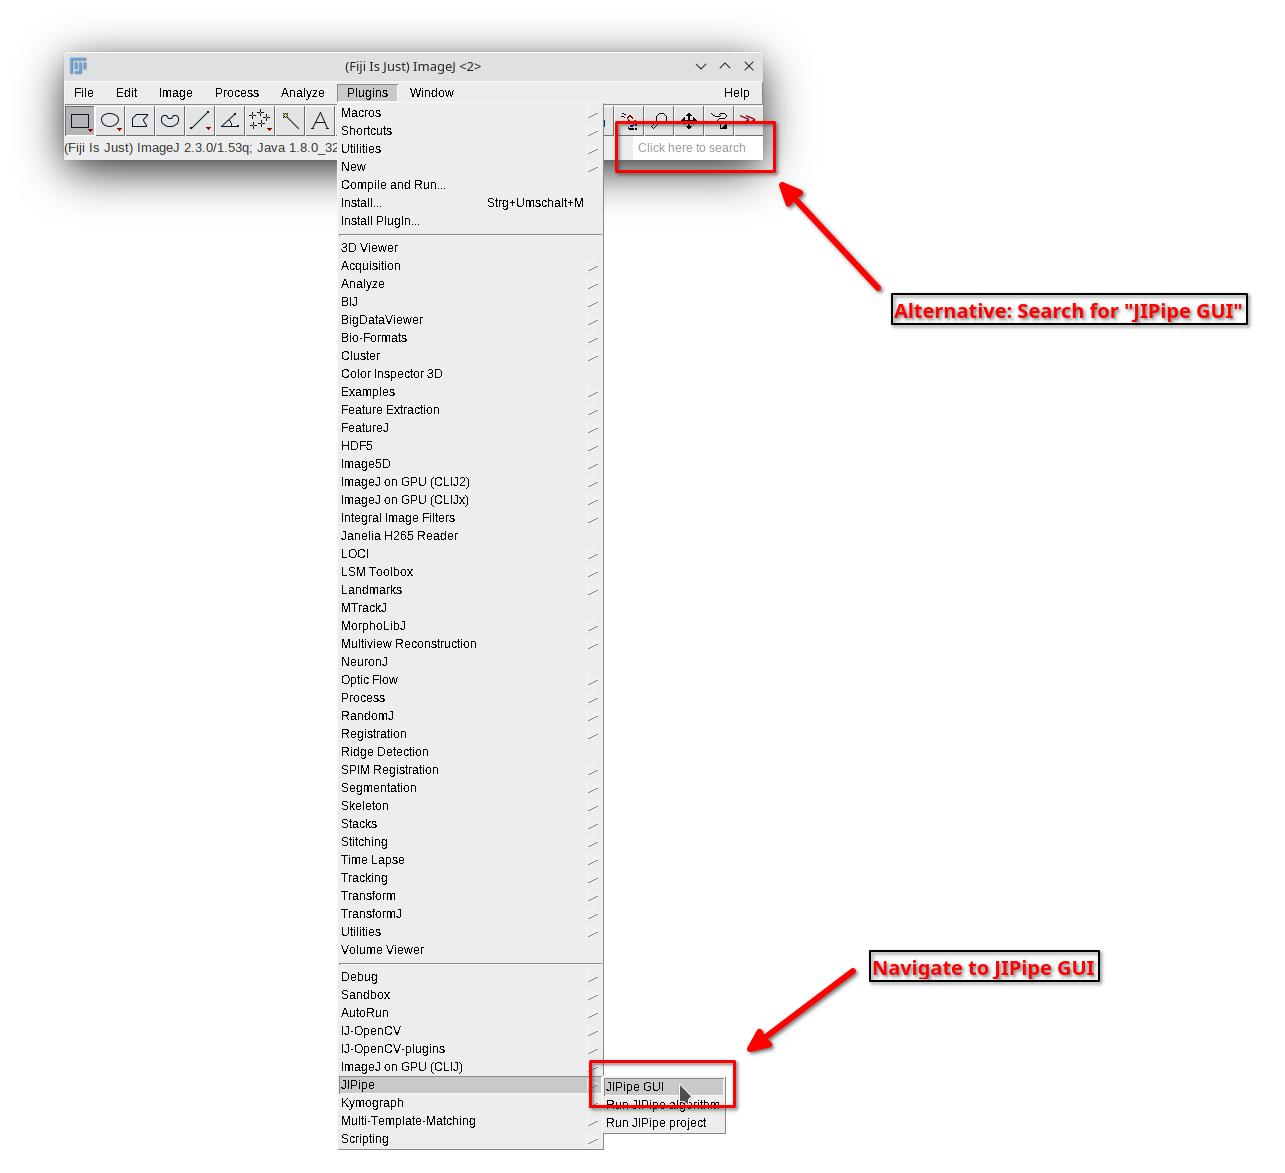
Step 1
Start JIPipe by navigating to Plugins > JIPipe > JIPipe GUI (or searching for the JIPipe GUI in the ImageJ search).
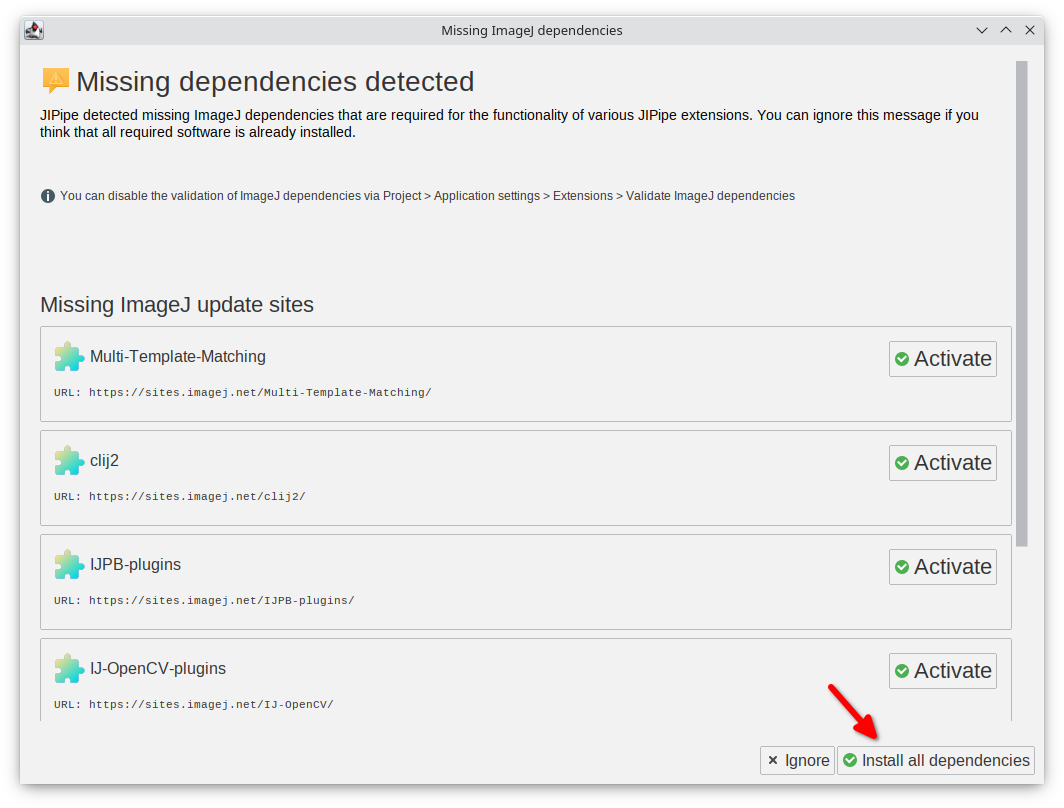
Step 2
JIPipe will go through its first setup process and depending on the Fiji installation might find missing ImageJ functions. This is normal and will be resolved in the next steps.
JIPipe will present you with a list of all missing ImageJ update sites that are displayed in a Missing ImageJ dependencies dialog.
Please click Install all dependencies to proceed.
If the dialog does not appear, you can skip the next step.
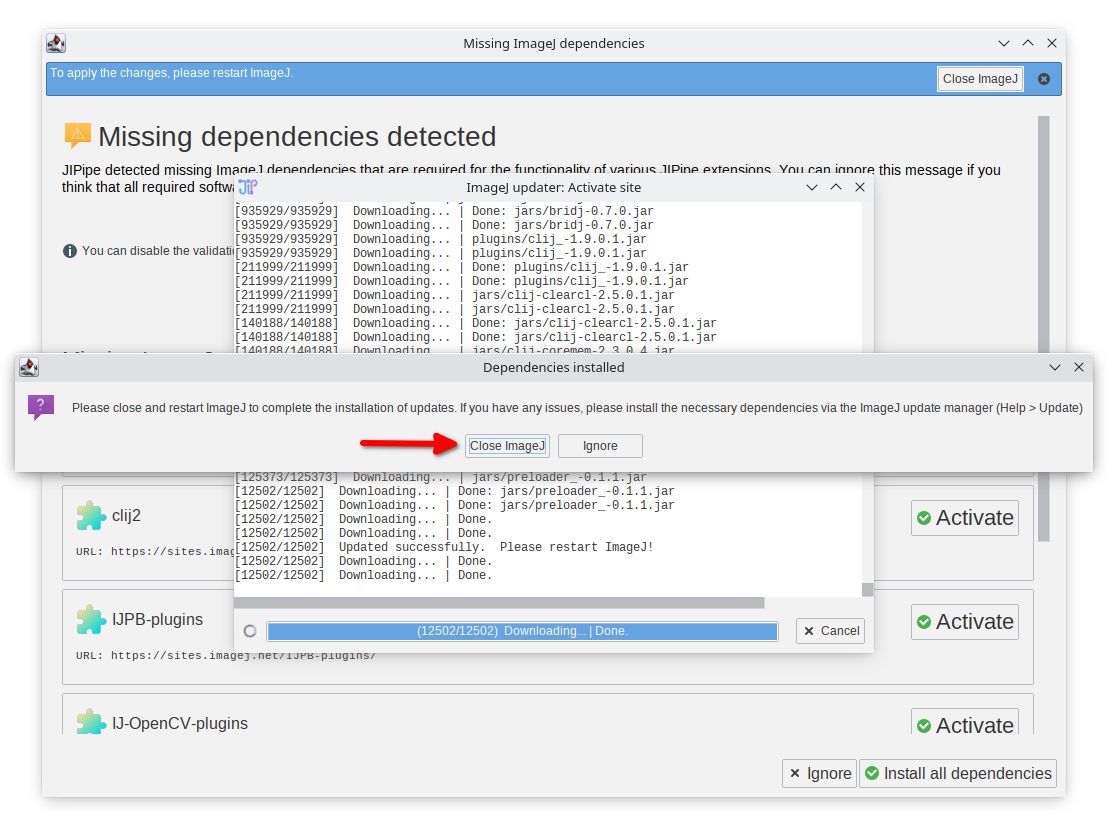
Step 3
If dependencies have been installed, you will be prompted to restart ImageJ.
Click Close ImageJ and start ImageJ again.
A restart of ImageJ is not required if no dependencies were installed.
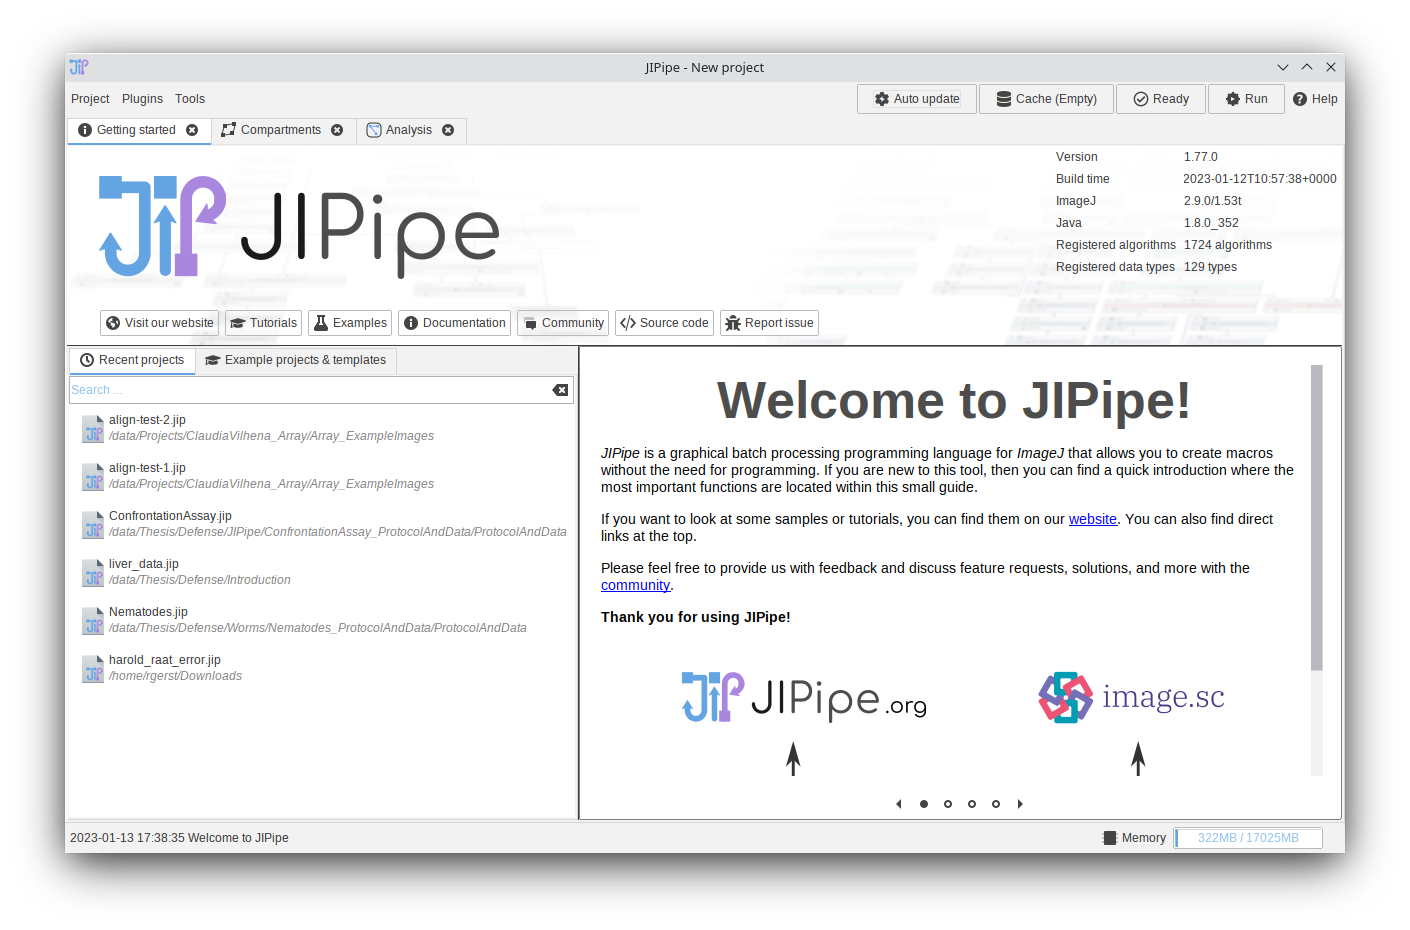
Step 4
After the initial setup (and restart of ImageJ if required), start JIPipe.
You should see JIPipe’s welcome screen.