Python integration
JIPipe provides nodes that allow to execute native Python (CPython) code and use it to process data. All nodes that are relevant to Python processing can be found in the category. The following nodes are available:
- Python script (iterating) ⭐
(Most commonly used node)
Executes the Python script for each iteration step. Each slot receives exactly one data item per step.
- Python script (merging)
Executes the Python script for each iteration step. Each slot receives multiple data items per step if they cannot be separated by annotations.
- Python script (multi-parameter capable, custom)
(Rarely used special case)
Executes the Python script exactly once that will receive all the data at once.
Background
The JIPipe Python integration basically works by applying the following steps:
Create temporary directories for inputs and outputs
Write all input data to its temporary directory in JIPipe's data table format.
Run the Python script, but also tell it where it can find the input and output folders
Let JIPipe read all data from the output directory. The data must be in JIPipe's data table format.
Most of the steps are already covered by the Python integration node and the JIPipe Python adapter library that is automatically injected into the Python script.
Writing Python scripts
Generally, you can use all Python libraries that are available to you in the currently configured Python environment. But to facilitate the data transfer between JIPipe and Python, you will need to use the functionality provided by JIPipe's adapter libraries and injected variables.
JIPipe-generated variables
On executing a Python script, JIPipe will automatically inject the following global variables into the Python script:
Name | Description |
|---|---|
| Dictionary where the keys are named according to the node's input slots and the values contain a representation of the data contained within the slot. |
| Dictionary where the keys are named according to the node's output slots and the values contain an object that will allow to write outputs. |
| Dictionary (string to string) that contains the text annotations associated to the current iteration step. |
| Dictionary that contains variables from the Script parameters parameter of the node. |
Importing data from JIPipe into Python
To copy data from the JIPipe into a Python variable you will need to get the correct input slot from the jipipe_inputs variable. For example, to obtain the input slot Input as variable ds, write:
Depending on which kind of data you want to use, you will have the following options:
The jipipe.imagej module provided by JIPipe's Python adapter offers a convenient functions to either obtain a file path to an image or directly load it using skimage.io.imread.
The jipipe.imagej module provided by JIPipe's Python adapter offers a convenient functions to either obtain a file path to the CSV exported table or directly load it as pandas.DataFrame.
If the data type is neither a table nor an image, you can obtain the row folder that contains the file(s) that represent the data.
Exporting data from Python into JIPipe
JIPipe expects that data is placed at very specific locations, following a highly standardized format. To do this conveniently, you will need to get the correct output slot from the jipipe_outputs variable. For example, to obtain the output slot Output as variable dso, write:
Depending on which kind of data and which libraries you want to export, you will have the following options:
The jipipe.imagej module provided by JIPipe's Python adapter offers a convenient functions to add a Numpy array as image into an output slot.
The jipipe.imagej module provided by JIPipe's Python adapter offers a convenient functions to add a Pandas DataFrame as Results Table into an output slot.
If you utilize a library that does not convert images into Numpy arrays, you will have to export the image manually into TIFF or PNG. To do this, you will have to add a new row into the output table and manually save data into the row folder.
If you are working with other data types, please read about how JIPipe stores this particular type by navigating to and going to the section.
Debugging Python scripts
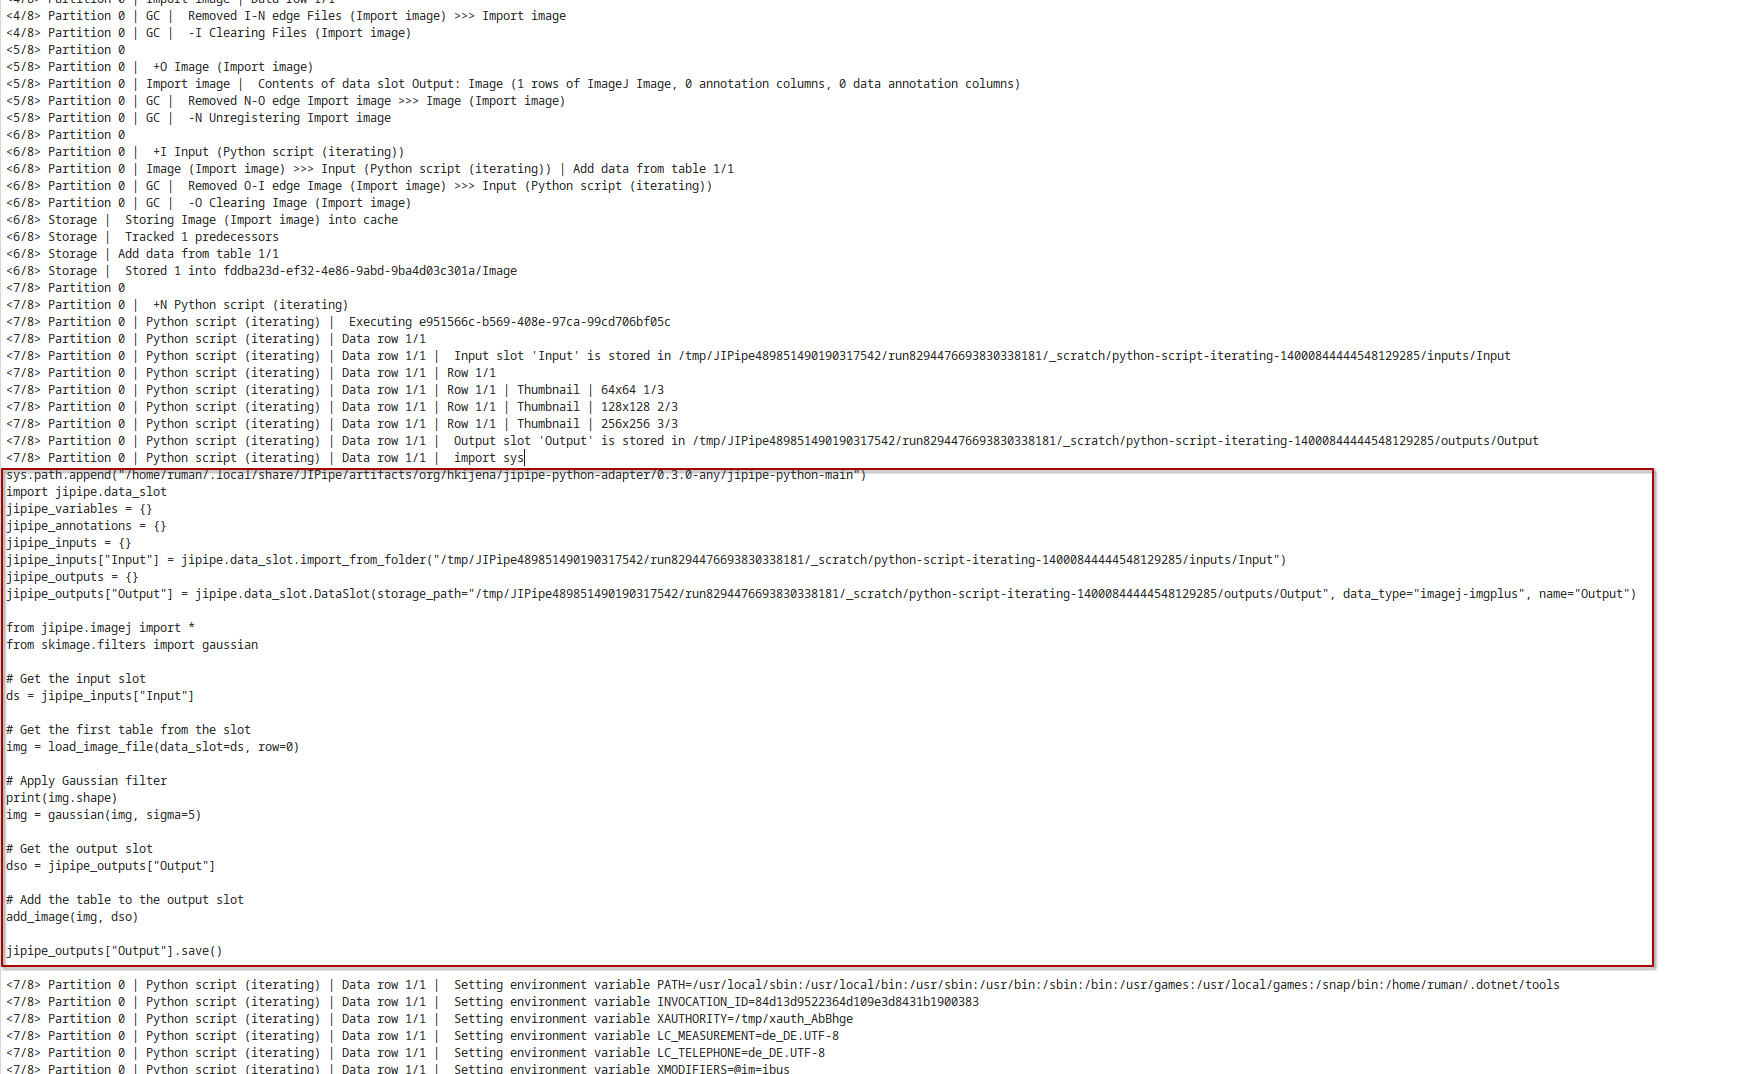
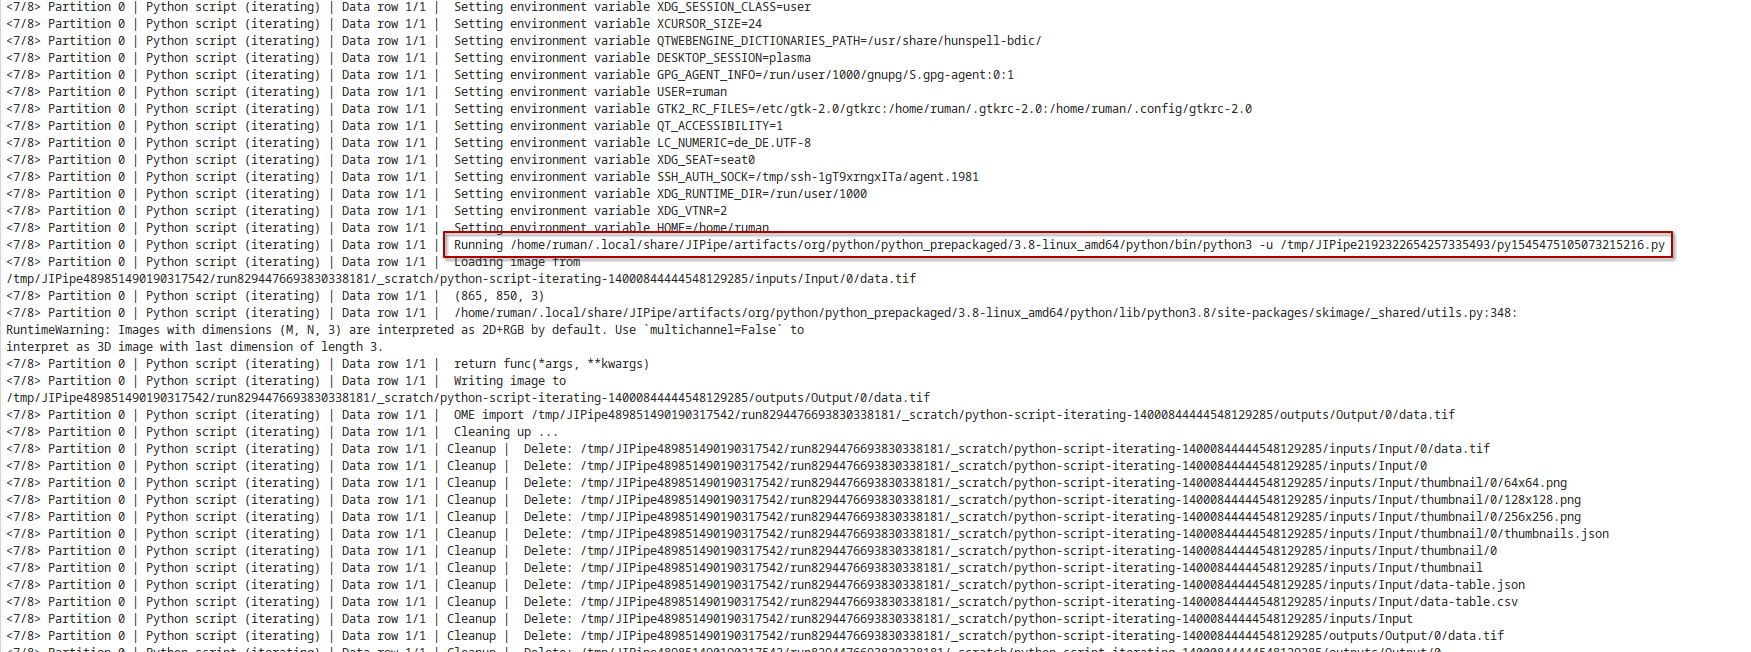
While JIPipe currently does not have any advanced debugging features, you can utilize the log entry generated by JIPipe to identify errors and even run your pipeline outside JIPipe.
- Full script printout
As JIPipe applies modifications to your script, it will print the final script into the log window:

- Commandline run command
JIPipe will also log all environment variables and the full run command:

- Python stdout/stderr output
JIPipe will also log all standard out and standard error messages directly after the run command.
JIPipe-provided Python
JIPipe will automatically take care of setting up Python for you and select the newest available artifact for you. The following Python versions with the specified libraries are available:
Overriding the Python version
You can always override the utilized Python version on a node, project, and application level.
Click the Infos & Settings button at the top right.
Go to the Settings tab on the right-hand side and select .
Ensure that Project default environment is enabled.
Click the Configure ... button and select one of the options.
Select the node you want to change
Go to the panel and activate the parameter .
Click the Configure ... button located next to the parameter and select one of the options.
Navigate to
Select
Click the Configure ... button located next to and select one of the options.